ZIGZAG CONTROL
SETTING STITCH WIDTH
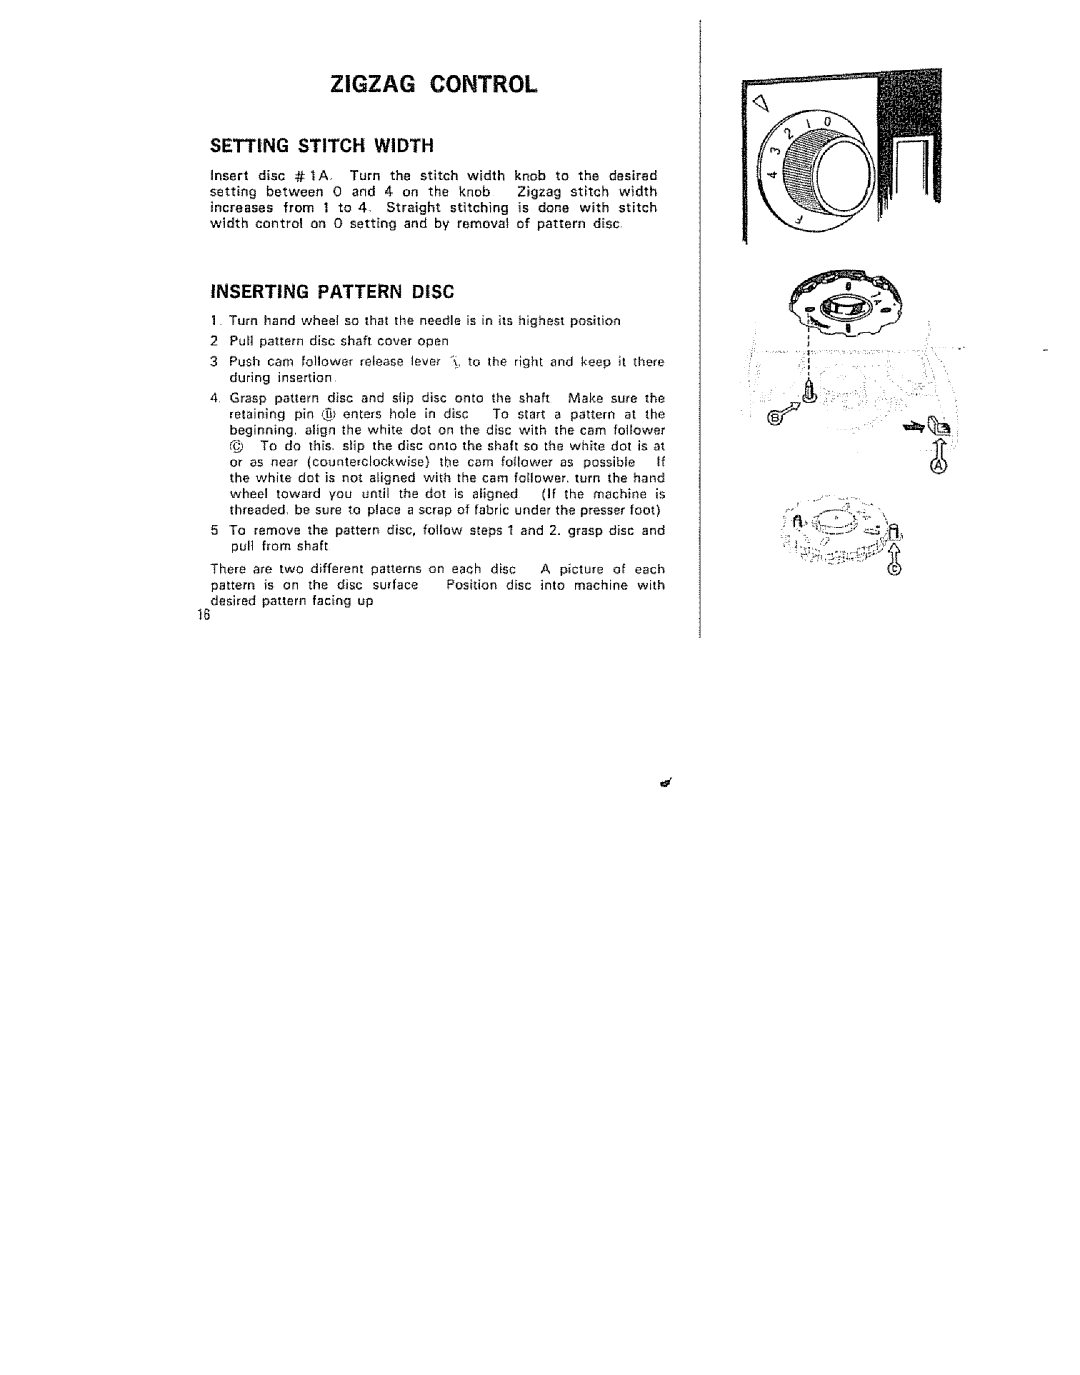
Insert disc # IA Turn the stitch width knob to the desired
setting between 0 and 4 on the knob Zigzag stitch width
increases from 1 to 4, Straight stitching is done with stitch width control on O setting and by remova of pattern disc
INSERTING |
| PATTERN | DISC |
|
|
|
|
|
|
|
|
|
|
|
|
| ||||||||
1 Turn hand wheel so that the needle is in its highest position |
|
|
|
| ||||||||||||||||||||
2 | Pull pattern disc shaft cover open |
|
|
|
|
|
|
|
|
|
|
|
|
|
| |||||||||
3 | Push cam follower release lever _, to the right and keep it there |
|
| |||||||||||||||||||||
| during |
| insertion |
|
|
|
|
|
|
|
|
|
|
|
|
|
|
|
|
|
| |||
4 | Grasp | pattern | disc | and | s_ip | disc | onto |
| the | shaft |
| Make | sure | the | i¸ | i¸ | ||||||||
| retaining | pin | _ | enters hole | in disc |
| To | start | a | pattern | at | the | ||||||||||||
|
|
|
| |||||||||||||||||||||
| beginning, align the white dot on the disc with the cam follower |
|
| |||||||||||||||||||||
| _ | To | do | this, | slip | the | disc | onto | the | shaft | so | the | white | dot | is | at |
|
| ||||||
| or as | near | (counterclockwise) | tbe | cam | foIlower | as | possible |
| If |
|
| ||||||||||||
| the white dot is not aligned with the cam follower, turn the hand |
|
| |||||||||||||||||||||
| wheel toward you until the | dot | is | aligned |
| (if |
| the | machine | is |
|
| ||||||||||||
| threaded, be sure to place a scrap of fabric under the presser foot) |
|
|
| ||||||||||||||||||||
5 | To remove the pattern disc, follow steps 1 and 2, grasp disc and |
|
| |||||||||||||||||||||
| pult | from shaft |
|
|
|
|
|
|
|
|
|
|
|
|
|
|
|
|
|
| ||||
There | are | two | different | patterns | on | each | disc |
| A | picture | of | each |
|
| ||||||||||
pattern |
| is | on | the | disc | surface |
| Position | disc | into | machine | with |
|
| ||||||||||
desired | pattern |
| facing up |
|
|
|
|
|
|
|
|
|
|
|
|
|
|
|
| |||||
t6