
153.32116, 153.32118 specifications
The Kenmore 153.32118 and 153.32116 are leading models in the realm of water heaters, designed to enhance efficiency and performance while maintaining user-friendliness. Both models cater to the modern consumer's needs for reliable hot water access in residential settings.One of the standout features of the Kenmore 153.32118 and 153.32116 is their energy-efficient design. Equipped with advanced insulation technology, these heaters maximize heat retention, which minimizes energy loss and contributes to lower utility bills. The units operate on an efficient heating element that quickly raises water temperature, ensuring that users have hot water available whenever they need it.
Both models come with a user-friendly digital display that allows homeowners to easily adjust settings, monitor water temperature, and receive alerts about system performance. This intuitive interface enhances the overall user experience, making it simple for anyone to operate the heater without requiring extensive technical knowledge.
Safety is a top priority in the design of these water heaters. They are equipped with multiple safety features, such as a temperature control mechanism that prevents overheating and a pressure relief valve that mitigates risks associated with excessive pressure build-up. These safety measures ensure peace of mind for the user, knowing that the appliance is designed to operate safely within a home environment.
The Kenmore 153.32118 and 153.32116 models also boast a compact design, allowing them to fit seamlessly into various spaces, whether in a utility room, basement, or closet. The sleek appearance ensures that they can be incorporated into the home without disrupting the aesthetic flow of the environment.
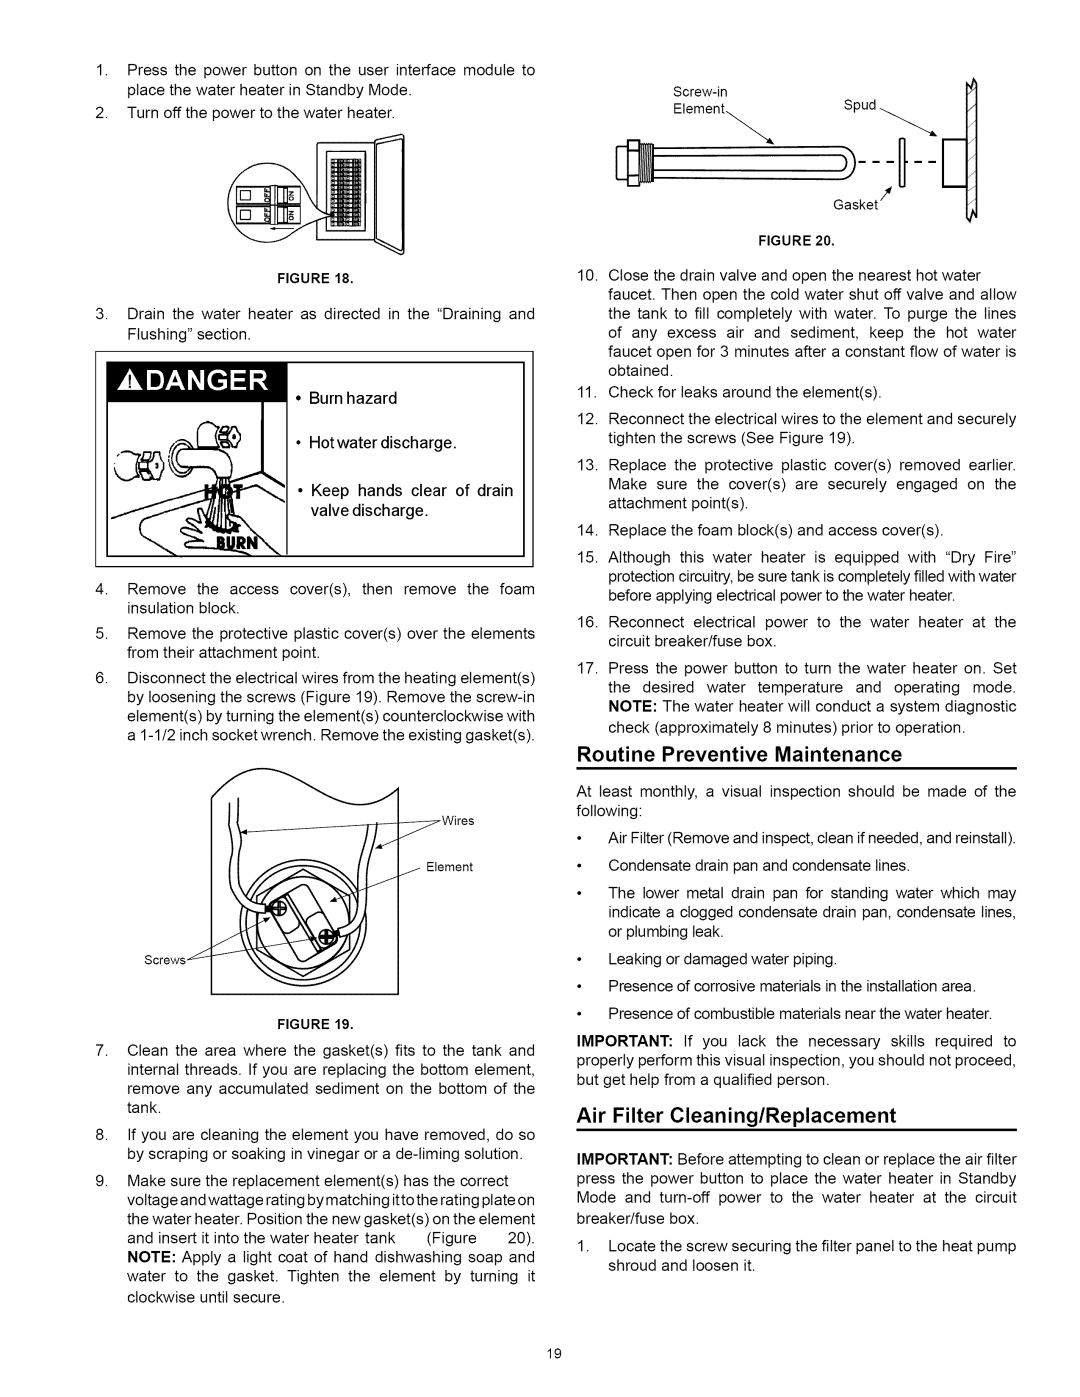
Maintenance is made simple with these units, as they are designed to require minimal attention over time. The self-cleaning feature helps inhibit sediment buildup, which can affect efficiency and longevity. This technology not only extends the lifespan of the heaters but also ensures consistent performance over time.
In conclusion, the Kenmore 153.32118 and 153.32116 represent a blend of efficiency, safety, and modern technology. With their advanced features and user-friendly design, they meet the demands of today’s households for reliable hot water solutions while keeping energy consumption to a minimum. Whether for daily household needs or specialized tasks, these water heaters stand out as robust options in the market.