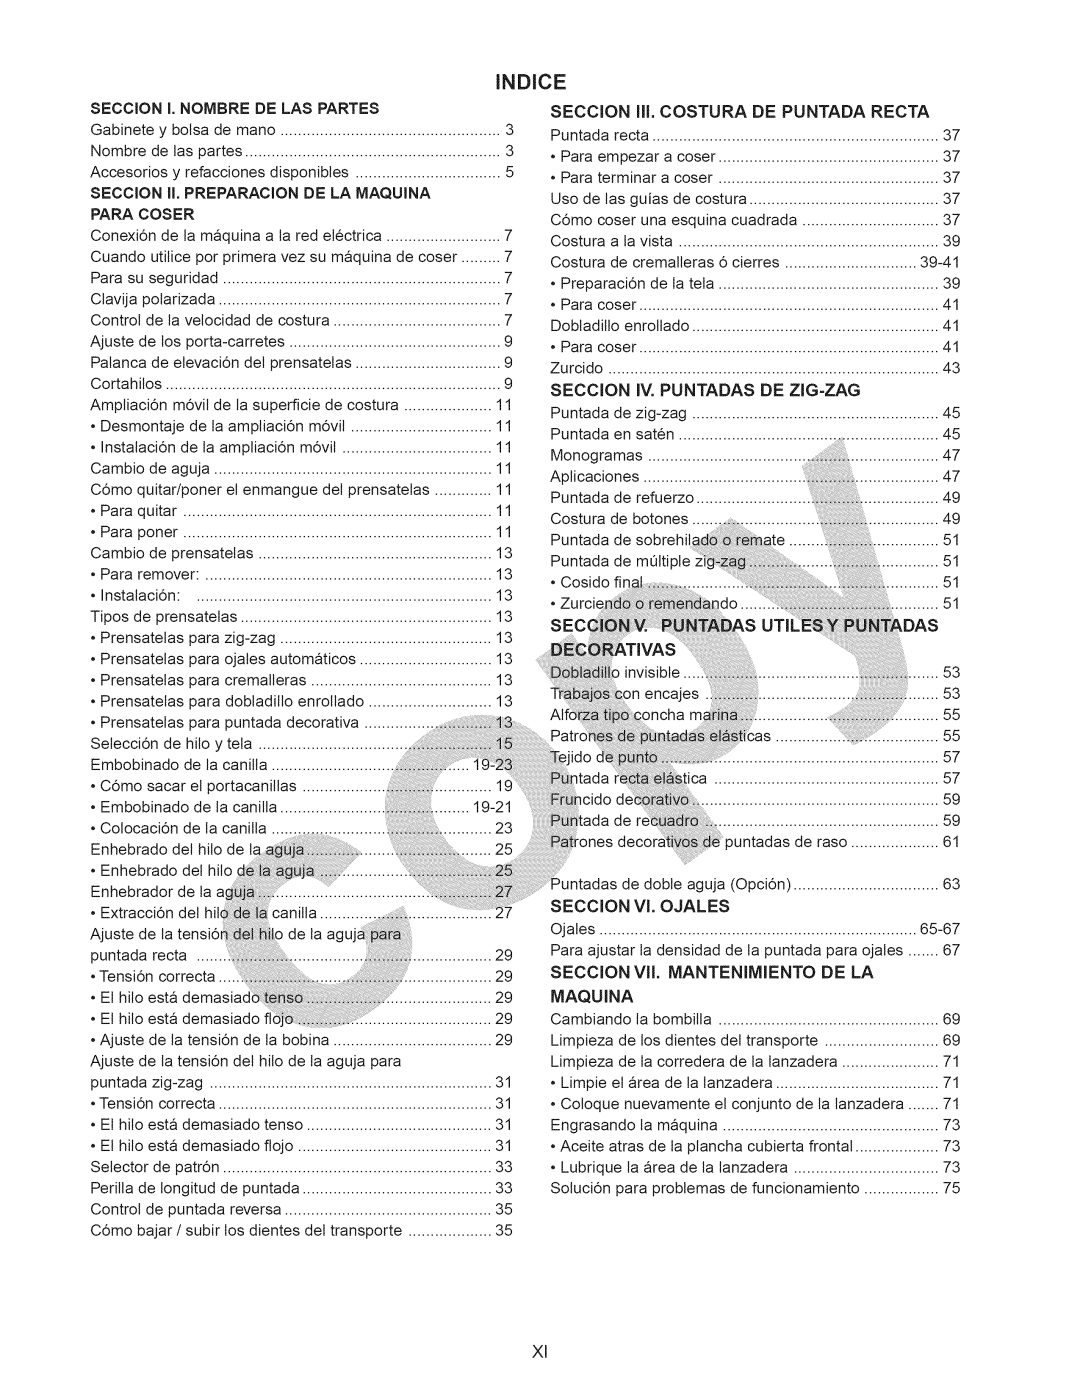
INDICE

SECCION

I. NOMBRE DE LAS PARTES


SECCION

ill. COSTURA

DE PUNTADA

RECTA

Gabinete y bolsa

de mano


3

Puntada

recta


37

Nombre

de las partes


3

Para empezar

a coser

37

Accesorios

y refacciones

disponibles

5

Para terminar

a coser

37

SECClON II. PREPARAClON DE LA MAQUINA


Uso de las guias de costura

37

PARA COSER


C6mo coser

una esquina

cuadrada

37

Conexi6n

de la maquina

a la red

electrica

7

Costura

a ta vista

39

Cuando

utitice pot primera vez su maquina de coser

7

Costura

de cremalleras 6 cierres

39-41

Para su seguridad

...............................................................


7

Preparaci6n de ta teta

39

Clavija

polarizada


7

................................................................


Para coser

....................................................................


41

Control

de la vetocidad de costura

7

Dobladitlo enrollado

41


Ajuste de los porta-carretes


9

Para coser

....................................................................


41

Palanca

de etevaci6n det prensatetas

9

Zurcido

...........................................................................


43

Cortahitos

............................................................................


9

SECClON IV. PUNTADAS DE ZIG=ZAG


Ampliaci6n

m6vit de la superficie

de costura

11

Puntada

de zig-zag

45

Desmontaje

de ta amptiaci6n

m6vit

11

Puntada

en saten

45

Instalaci6n

de ta ampliaci6n

m6vit

11

Monogramas


.. 47

Cambio

de aguja


11

...............................


...............................................................


Aplicaciones


.. 47

C6mo quitar/poner

et enmangue

det prensatetas

11

....................................


Puntada

de refi


49

Para quitar


11


......................................................................


Costura

de botones


49

Para poner


11


......................................................................


Puntada

de sobrehih


..51

Cambio

de prensatetas


13


Puntada

de mQltiple


51

Para remover:


13


• Cosido

fi


.............

:

..51

Instalaci6n:

...................................................................


13

o


51

Tipos de prensatetas


13


Prensatetas

para zig-zag


13


Prensatetas

para ojales

automaticos

13


invisible


.. 53

Prensatetas

para cremalleras


13


)n encajes


.. 53

Prensatetas

para dobladitlo

enrollado

13


55

Prensatetas para puntada decorativa


...........................

55

Setecci6n de hito y teta


...................................

57

Embobinado

de la canitla


ica

57

C6mo

sacar et portacanitlas


1


.............................................

59

Embobinado

de la canitla


........

19-21


59

Colocaci6n

de ta canitla


23


)untadas de raso

61

Enhebrado

det hito de


25


Enhebrado det hito

Enhebrador

de ta


de doble aguja (Opci6n)

63


SECCION


Vl. OJALES


Extracci6n

det


Ajuste

de la


de la


Ojales


65-67


Para ajustar

la densidad

de ta puntada

para ojales

....... 67

puntada

recta ..


29


SECClON


VII.

MANTENIMIENTO

DE LA


Tensi6n correcta ....


29


Et hito

esta

demasia,


............ 29

MAQUINA


Et hito

esta demasiado

fl

............ 29

Cambiando

ta bombitla

..................................................

69

Ajuste

de ta tensi6n de ta bobina

29

Limpieza

de los dientes

det transporte

..........................

69

Ajuste

de la tensi6n

det hito de ta aguja para


Limpieza

de ta corredera

de la lanzadera

71

puntada

zig-zag


31

Limpie et area de la tanzadera

71

Tensi6n correcta


31

Coloque

nuevamente et conjunto de la lanzadera

....... 71

Et hito esta demasiado

tenso

31

Engrasando

ta maquina

.................................................

73

El hito

esta demasiado

flojo

31

Aceite atras de

la plancha cubierta frontal

73

Selector

de patr6n


33

Lubrique la area de la tanzadera

73

Peritla

de longitud de puntada

33

Soluci6n

para problemas

de funcionamiento

75

Control


de puntada

reversa

35


C6mo

bajar

/ subir

los dientes det transporte

35


XI

Page 12
Image 12
Kenmore 15358 owner manual Indice

15358 specifications

The Kenmore 15358 is a standout among the various models in Kenmore’s lineup of high-efficiency washing machines. Designed to offer superior cleaning performance while being user-friendly, this washer is particularly noted for its capacity, efficiency, and innovative technology.

One of the primary features of the Kenmore 15358 is its large capacity drum, which can hold up to 5.3 cubic feet of laundry. This spacious design allows users to wash more items in a single load, effectively saving time and energy, especially for families or individuals with busy lifestyles. Whether it’s bulky comforters or large piles of clothing, the Kenmore 15358 can accommodate diverse laundry needs without compromising on cleanliness.

The washer is equipped with an advanced Direct Drive Motor, which not only provides powerful cleaning action but also operates quietly, reducing noise levels during the washing cycle. This motor is designed to last and requires less maintenance, enhancing the machine's longevity.

Another notable technology present in the Kenmore 15358 is the SmartWash HE (high-efficiency) system, which intelligently adjusts the water levels, temperatures, and washing times based on the load's size and fabric type. This technology ensures optimal cleaning while also conserving water and energy, aligning with eco-friendly practices.

The machine features multiple wash cycles and options, including the popular Steam Clean cycle, which uses steam to penetrate fabrics, aiding in the removal of tough stains while reducing wrinkles. Its Sanitize cycle is another highlight, designed to eliminate bacteria and allergens, providing a higher level of cleanliness, especially beneficial for those with sensitive skin or allergies.

User convenience is another hallmark of the Kenmore 15358. A modern control panel, featuring an easy-to-read display and intuitive controls, makes selecting wash settings simple. The addition of a Delay Wash feature allows users to schedule their loads to start later, offering flexibility for those with dynamic routines.

Moreover, the Kenmore 15358 is built with a gentle yet effective wash action that helps protect clothes from wear and tear, ensuring they look great for longer. Combined with its sleek design, this washing machine stands out aesthetically in any laundry room.

In summary, the Kenmore 15358 is a high-capacity, efficient washing machine packed with advanced technologies that enhance cleaning performance while ensuring user convenience. Its focus on delivering effective results while being eco-friendly makes it an ideal choice for a modern household.