Cooktop Features
READ THESE INSTRUCTIONS CAREFULLY BEFORE USING THE COOKTOP
The Cooking Zones may appear to be cool while turned ON and after they have been turned OFF. The glass surface may be HOT from residual heat transferred from the cookware and burns may occur.
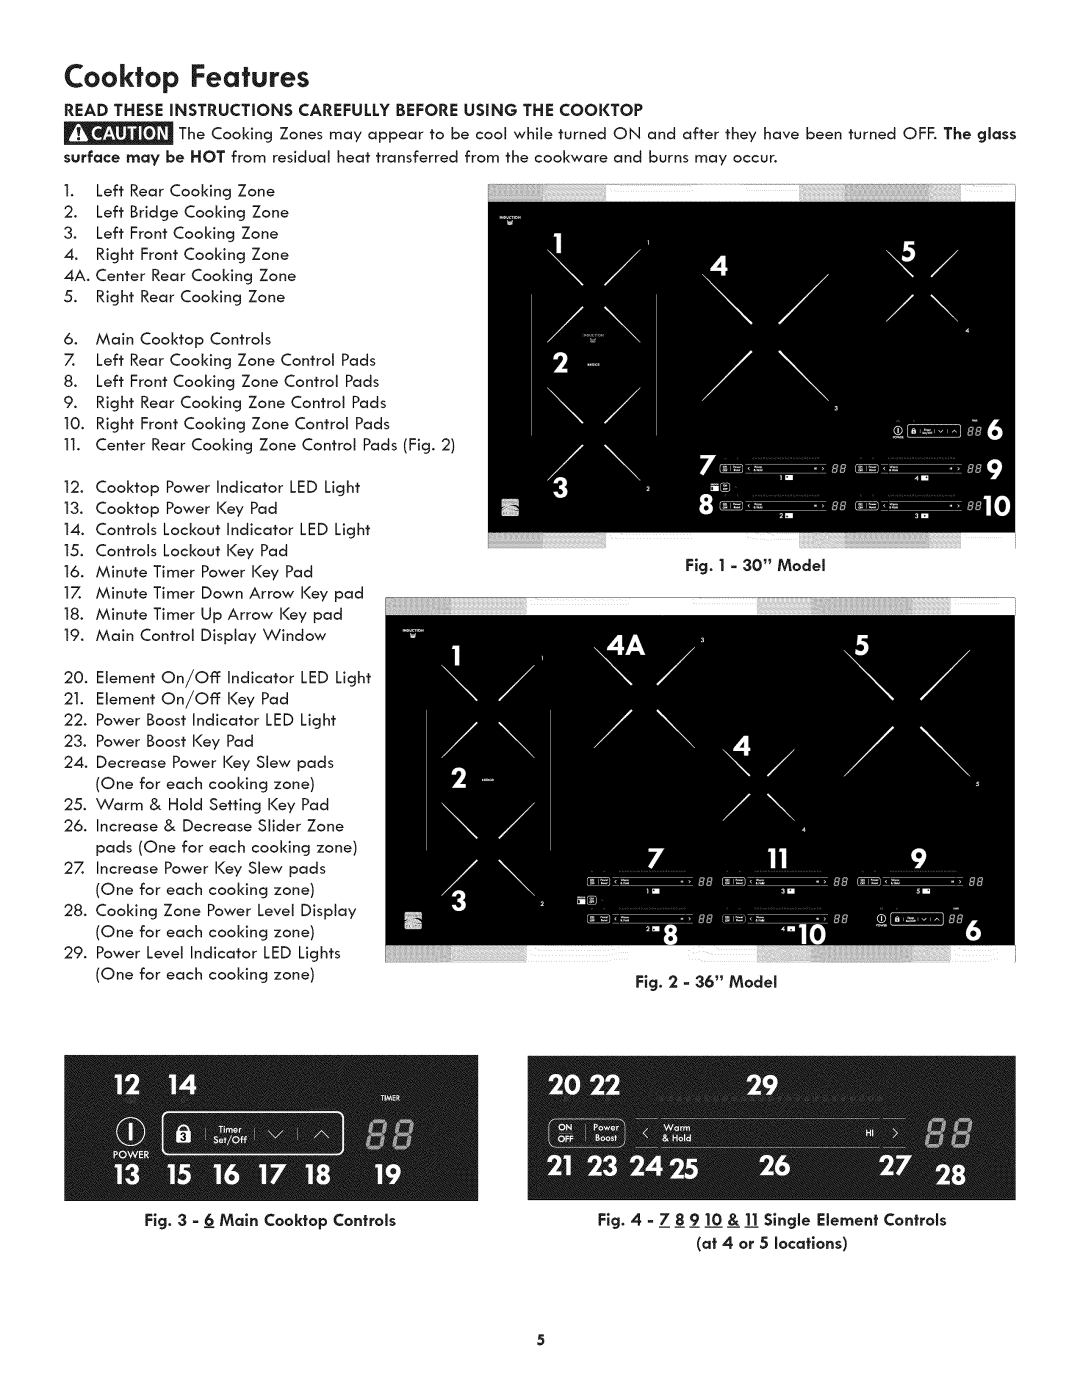
1.Left Rear Cooldng Zone
2.Left Bridge Cooldng Zone
3.Left Front Cooking Zone
4.Right Front Cooking Zone
4A. Center Rear Cooking Zone
5.Right Rear Cooking Zone
6.Main Cooktop Controls
7.Left Rear Cooking Zone Control Pads
8.Left Front Cooking Zone Control Pads
9.Right Rear Cooking Zone Control Pads
10.Right Front Cooking Zone Control Pads
11.Center Rear Cooking Zone Control Pads (Fig. 2)
12.Cooktop Power Indicator LED Light
13.Cooktop Power Key Pad
14.Controls Lockout Indicator LED Light
15.Controls Lockout Key Pad
16. Minute Timer Power Key Pad | Fig. ] = 30" Model |
|
17.Minute Timer Down Arrow Key pad
18.Minute Timer Up Arrow Key pad
19.Main Control Display Window
20.Element On/Off Indicator LED Light
21.Element On/Off Key Pad
22.Power Boost Indicator LED Light
23.Power Boost Key Pad
24.Decrease Power Key Slew pads (One for each cooking zone)
25.Warm & Hold Setting Key Pad
26.Increase & Decrease Slider Zone pads (One for each cooking zone)
27.Increase Power Key Slew pads (One for each cooking zone)
28.Cooking Zone Power Level Display (One for each cooking zone)
29. Power Level Indicator LED Lights |
| J |
(One for each cooking zone) | Fig. 2 = 36" | Model |
|
Fig. 3 = 6 Main Cooktop Controls | Fig. 4 = 7 8 9 ]0 & ]1 Single Element Controls |
(at 4 or 5 locations)
