PARTS & FEATURES
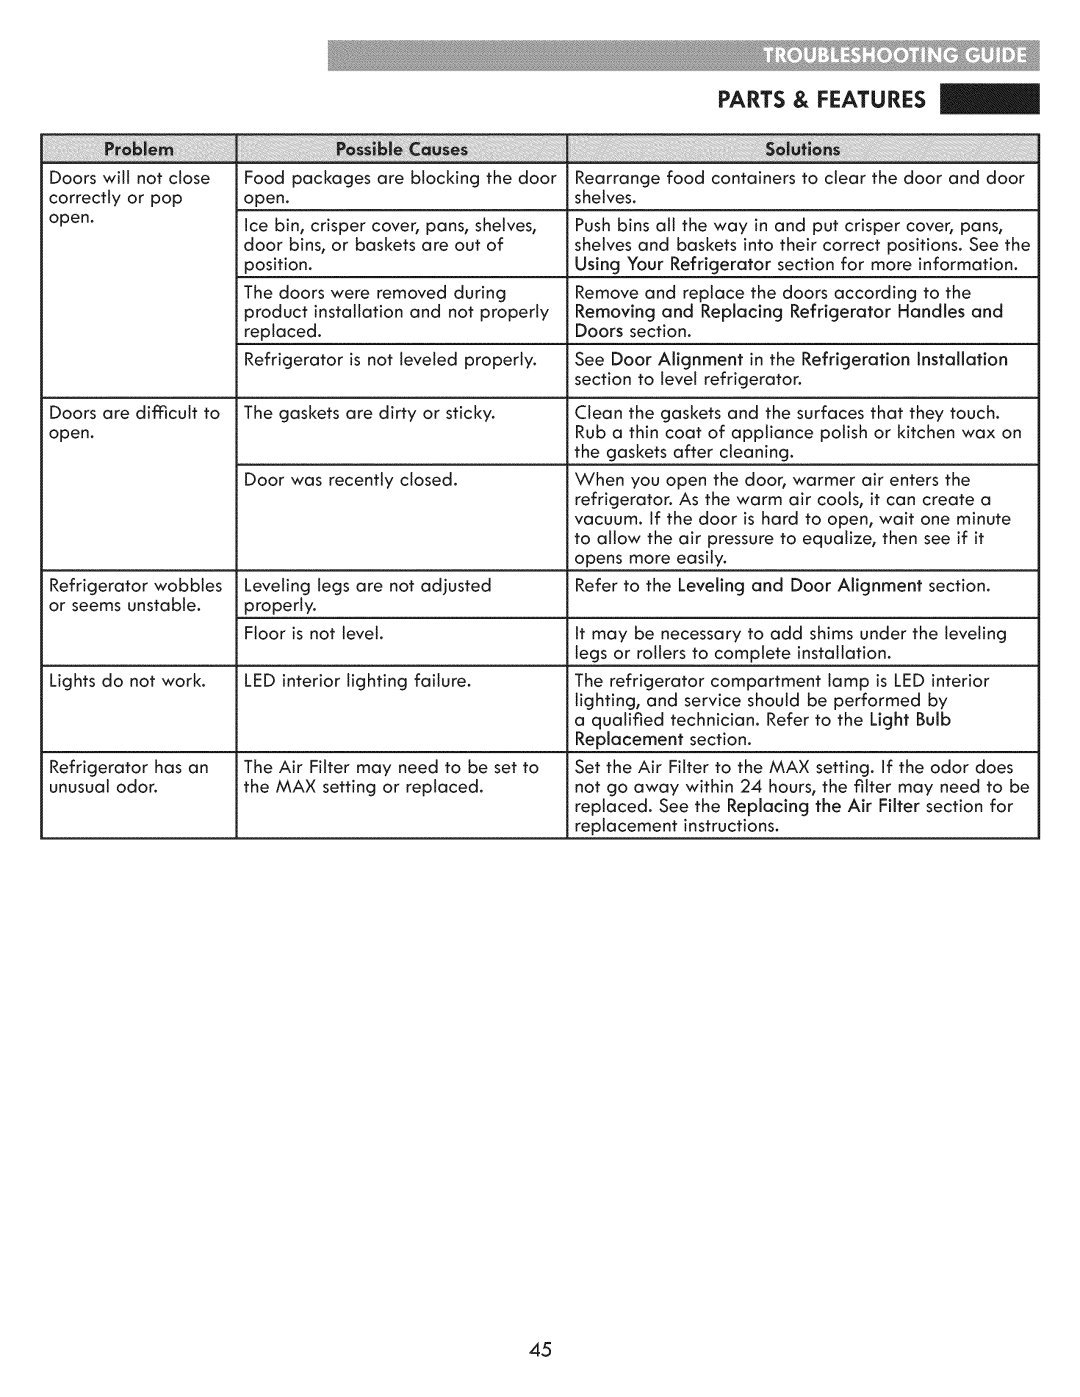
Doors | will | not close | Food packages | are | blocking the door |
correctly | or pop | open. |
|
| |
open. |
|
| Ice bin, crisper cover, pans, shelves, | ||
|
|
| door bins, or baskets are out of | ||
|
|
| position. |
|
|
|
|
| The doors were removed during | ||
|
|
| product installation and not properly | ||
|
|
| replaced. |
|
|
|
|
| Refrigerator is not leveled properly. | ||
Doors | are | difficult to | The gaskets are | dirty | or sticky. |
open. |
|
|
|
|
|
Door was recently closed.
Refrigerator | wobbles | Leveling legs are | not adjusted | ||
or seems unstable. | properly. |
|
| ||
|
| Floor | is not | level. |
|
Lights do not | work. | LED | interior | lighting failure. | |
Refrigerator has an | The Air Filter may | need to be set to |
unusual odor. | the MAX setting or | replaced. |
Rearrange food containers to clear the door and door shelves.
Push bins all the way in and put crisper cover, pans, shelves and baskets into their correct positions. See the Using Your Refrigerator section for more information.
Remove and replace the doors according to the Removing and Replacing Refrigerator Handles and Doors section.
See Door Alignment in the Refrigeration Installation section to level refrigerator.
Clean the gaskets and the surfaces that they touch. Rub a thin coat of appliance polish or kitchen wax on the gaskets after cleaning.
When you open the door, warmer air enters the refrigerator. As the warm air cools, it can create a vacuum. If the door is hard to open, wait one minute to allow the air pressure to equalize, then see if it opens more easily.
Refer to the Leveling and Door Alignment section.
it may be necessary to add shims under the leveling legs or rollers to complete installation.
The refrigerator compartment lamp is LED interior lighting, and service should be performed by
a qualified technician. Refer to the Light Bulb Replacement section.
Set the Air Filter to the MAX setting, if the odor does not go away within 24 hours, the filter may need to be replaced. See the Replacing the Air Filter section for replacement instructions.
45
