INSTALLATION INSTRUCTIONS
 LEVELING THE DRYER
![]() WARNING:
WARNING:
•Wear gloves during installation.
•Failure to follow these instructions can result in injury.
To ensure that the dryer provides optimal drying performance, it must be level. To minimize vibration, noise, and unwanted movement, the floor must be a level, solid surface.
NOTE: Adjust the leveling feet only as far as necessary to level the dryer. Extending the leveling feet more than necessary can cause the dryer to vibrate.
![]() Levell
Levell
![]() Leveling Feett
Leveling Feett
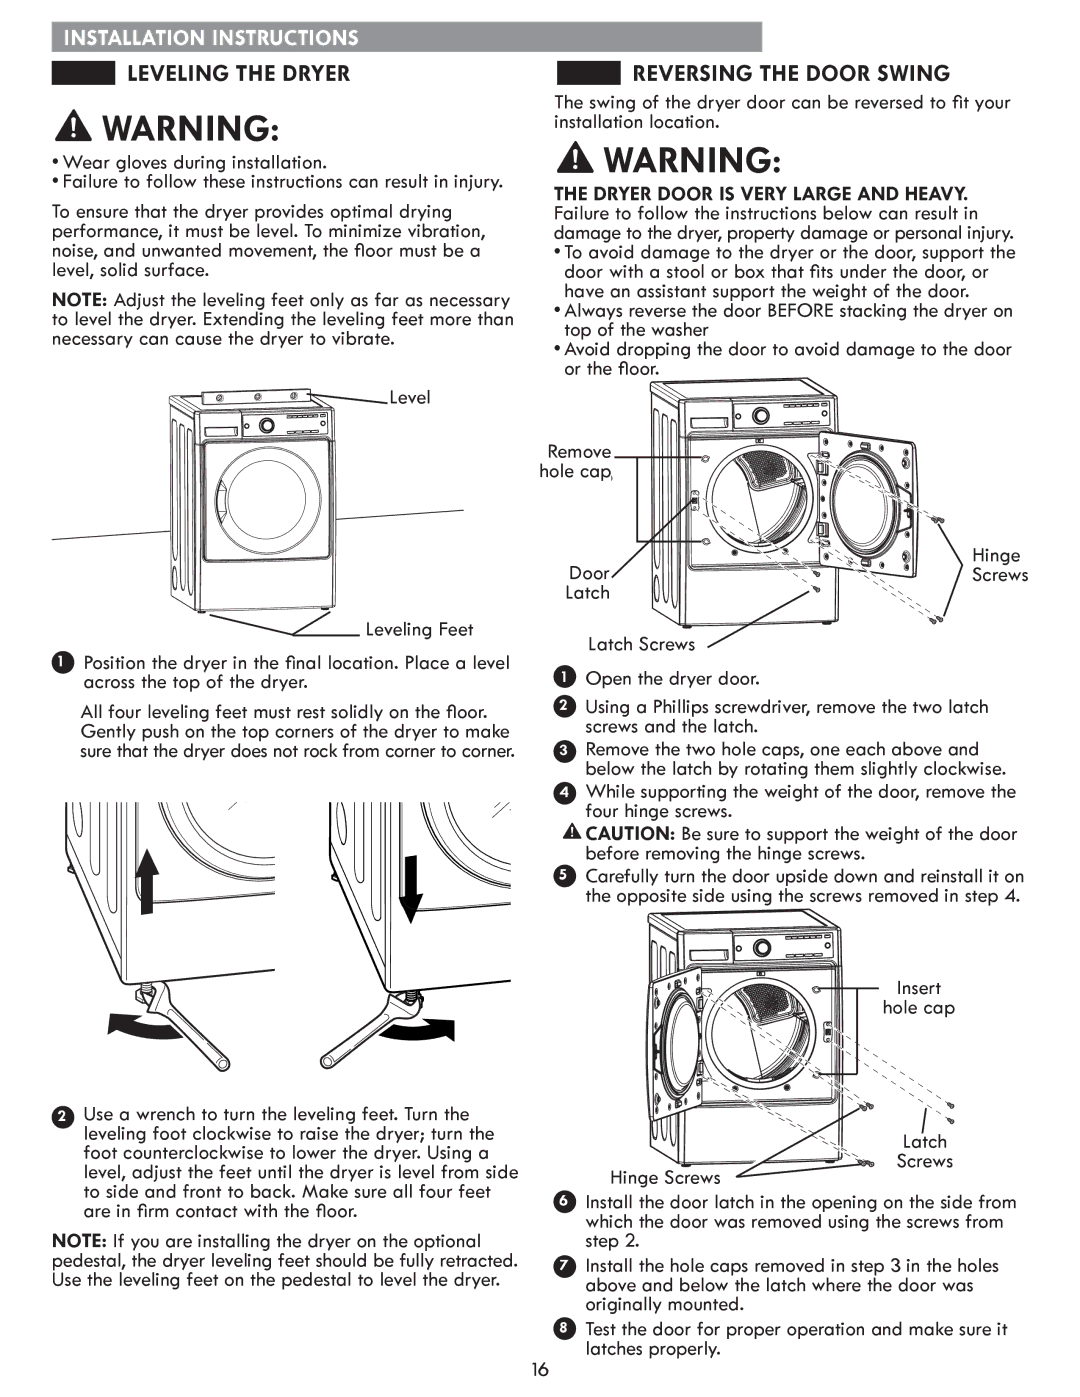
1Position the dryer in the final location. Place a level across the top of the dryer.
All four leveling feet must rest solidly on the floor. Gently push on the top corners of the dryer to make sure that the dryer does not rock from corner to corner.
2Use a wrench to turn the leveling feet. Turn the leveling foot clockwise to raise the dryer; turn the foot counterclockwise to lower the dryer. Using a level, adjust the feet until the dryer is level from side to side and front to back. Make sure all four feet are in firm contact with the floor.
NOTE: If you are installing the dryer on the optional pedestal, the dryer leveling feet should be fully retracted. Use the leveling feet on the pedestal to level the dryer.
 REVERSING THE DOOR SWING
The swing of the dryer door can be reversed to fit your installation location.
![]() WARNING:
WARNING:
THE DRYER DOOR IS VERY LARGE AND HEAVY. Failure to follow the instructions below can result in damage to the dryer, property damage or personal injury.
•To avoid damage to the dryer or the door, support the door with a stool or box that fits under the door, or have an assistant support the weight of the door.
•Always reverse the door BEFORE stacking the dryer on top of the washer
•Avoid dropping the door to avoid damage to the door or the floor.
Remove
Remove
hole cap
hole cap
Door | Hinge |
Screws | |
Latch |
|
1Open the dryer door.
2Using a Phillips screwdriver, remove the two latch screws and the latch.
3Remove the two hole caps, one each above and below the latch by rotating them slightly clockwise.
4While supporting the weight of the door, remove the four hinge screws.
5Carefully turn the door upside down and reinstall it on the opposite side using the screws removed in step 4.
Hinge Screws
6Install the door latch in the opening on the side from which the door was removed using the screws from step 2.
7Install the hole caps removed in step 3 in the holes above and below the latch where the door was originally mounted.
8Test the door for proper operation and make sure it latches properly.
16