- STEP 3: INSTALL
..* SEM.LEF*UCET
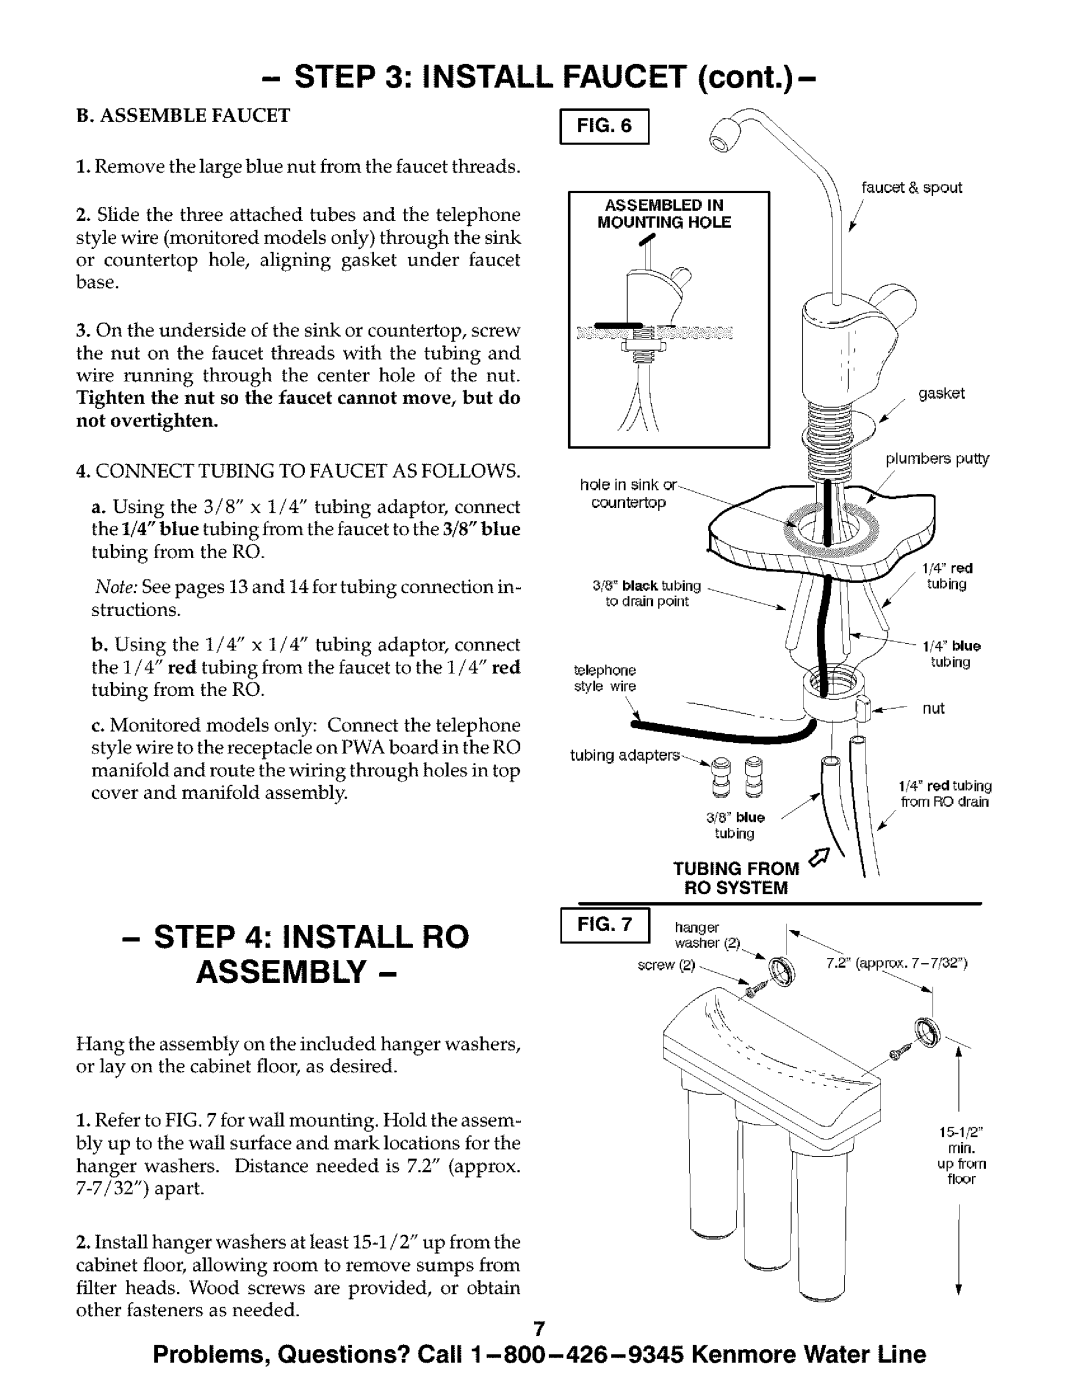
1.Remove the large blue nut from the faucet threads.
2.Slide the three attached tubes and the telephone
style wire (monitored models only) through the sink
or countertop hole, aligning gasket under faucet base.
3.On the underside of the sink or countertop, screw
the nut on the faucet threads with the tubing and
wire running through the center hole of the nut. Tighten the nut so the faucet cannot move, but do not overtighten.
4.CONNECT TUBING TO FAUCET AS FOLLOWS.
a. Using the 3/8" x 1/4" tubing adaptor, connect the 1/4" blue tubing from the faucet to the 3/8" blue tubing from the RO.
FAUCET (cont.)-
[FIG6].
ASSEMBLED IN
MOUNTING HOLE
hole in sink or_ countertop
faucet & spout
/gasket
plumbers putty
/
1/4" red
Note: See pages 13 and 14 for tubing connection in- structions.
b. Using the 1/4" x 1/4" tubing adaptor, connect the 1/4" red tubing from the faucet to the 1/4" red tubing from the RO.
c. Monitored models only: Connect the telephone
style wire to the receptacle on PWA board in the RO manifold and route the wiring through holes in top
cover and manifold assembly.
318" black tubing
to drain point
telephone
style wire
\
tubing
3/_" blue
tubing
tubing
tubing
nut
114" red tubing from RO drain
-STEP 4: INSTALL RO ASSEMBLY -
Hang the assembly on the included hanger washers, or lay on the cabinet floor, as desired.
1.Refer to FIG. 7 for wall mounting. Hold the assem- bly up to the wall surface and mark locations for the
hanger washers. Distance needed is 7.2" (approx.
2.Install hanger washers at least
filter heads. Wood screws are provided, or obtain
other fasteners as needed.
7
TUBING FROM
RO SYSTEM
FIG. 7 ] hoager
washer (2).
screw (2) __ | 7.2" (appr_ 7- 7/32") |
|
rrlirl.
up from floor
Problems, Questions? Call