Using a USB Mouse

Using the USB HUB Function

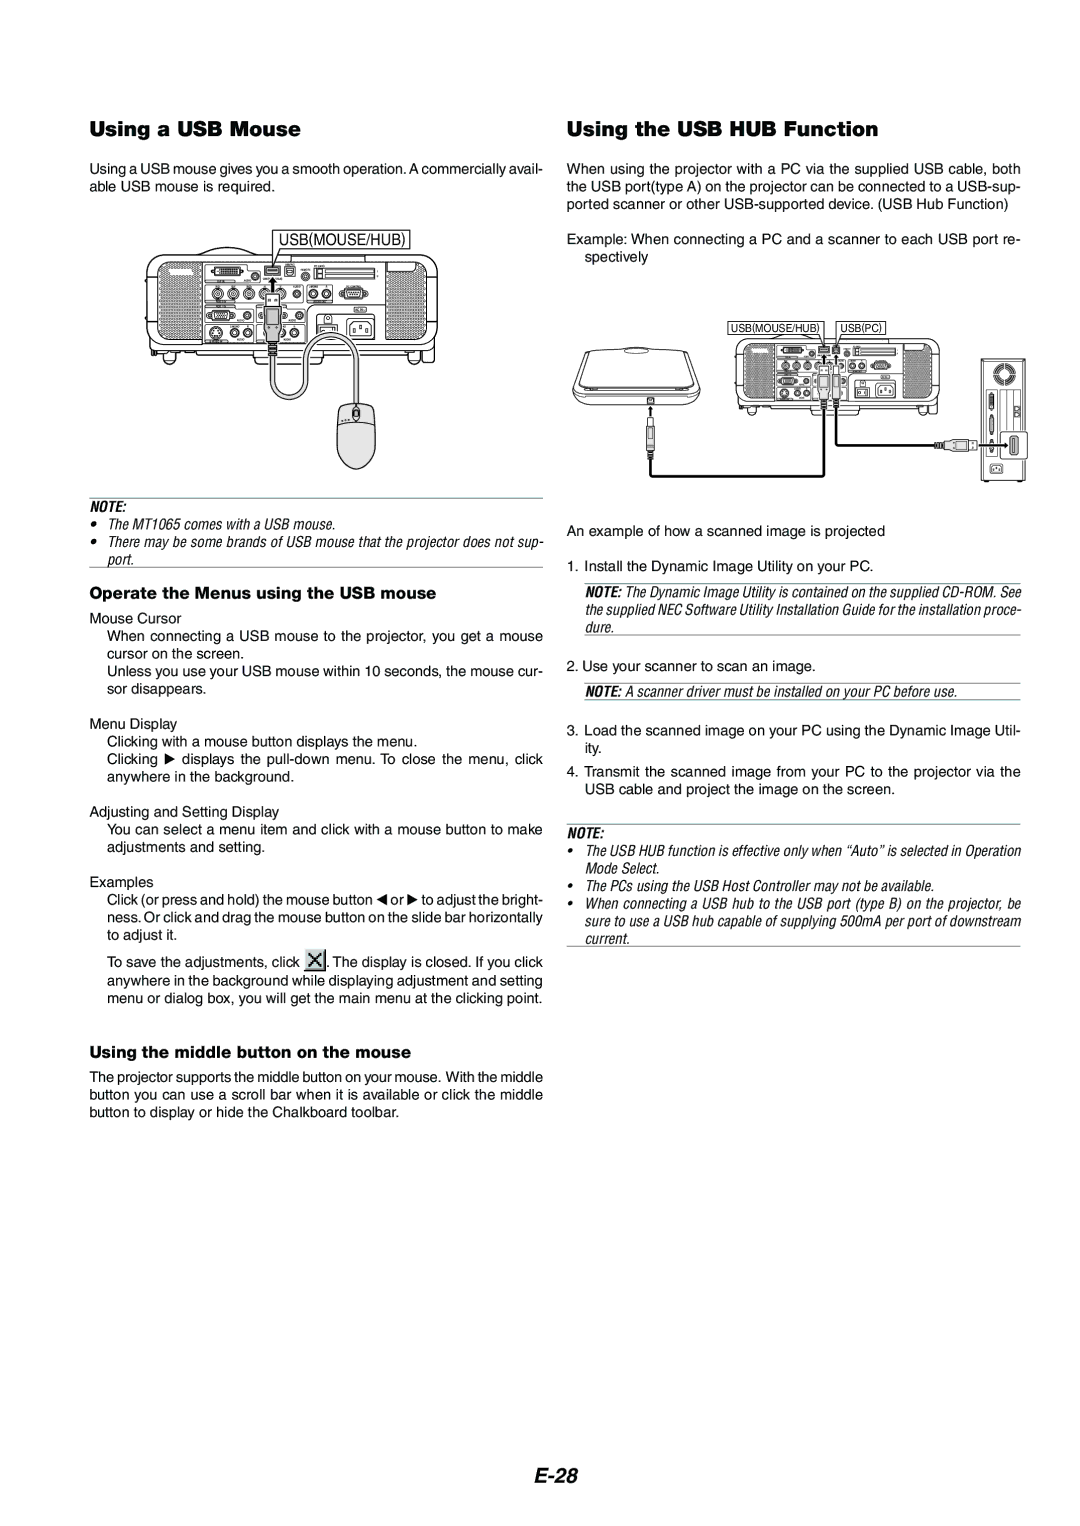
Using a USB mouse gives you a smooth operation. A commercially avail- able USB mouse is required.

USB(MOUSE/HUB)

When using the projector with a PC via the supplied USB cable, both the USB port(type A) on the projector can be connected to a USB-sup- ported scanner or other USB-supported device. (USB Hub Function)

Example: When connecting a PC and a scanner to each USB port re- spectively

USB(MOUSE/HUB) USB(PC)

NOTE:

The MT1065 comes with a USB mouse.

There may be some brands of USB mouse that the projector does not sup- port.

Operate the Menus using the USB mouse

Mouse Cursor

When connecting a USB mouse to the projector, you get a mouse cursor on the screen.

Unless you use your USB mouse within 10 seconds, the mouse cur- sor disappears.

Menu Display

Clicking with a mouse button displays the menu.

Clicking displays the pull-down menu. To close the menu, click anywhere in the background.

Adjusting and Setting Display

You can select a menu item and click with a mouse button to make adjustments and setting.

Examples

Click (or press and hold) the mouse button or to adjust the bright- ness. Or click and drag the mouse button on the slide bar horizontally to adjust it.

To save the adjustments, click . The display is closed. If you click anywhere in the background while displaying adjustment and setting menu or dialog box, you will get the main menu at the clicking point.

Using the middle button on the mouse

The projector supports the middle button on your mouse. With the middle button you can use a scroll bar when it is available or click the middle button to display or hide the Chalkboard toolbar.

An example of how a scanned image is projected

1.Install the Dynamic Image Utility on your PC.

NOTE: The Dynamic Image Utility is contained on the supplied CD-ROM. See the supplied NEC Software Utility Installation Guide for the installation proce- dure.

2.Use your scanner to scan an image.

NOTE: A scanner driver must be installed on your PC before use.

3.Load the scanned image on your PC using the Dynamic Image Util- ity.

4.Transmit the scanned image from your PC to the projector via the USB cable and project the image on the screen.

NOTE:

The USB HUB function is effective only when “Auto” is selected in Operation Mode Select.

The PCs using the USB Host Controller may not be available.

When connecting a USB hub to the USB port (type B) on the projector, be sure to use a USB hub capable of supplying 500mA per port of downstream current.

E-28

Page 28
Image 28
Kensington MT1075, MT1065 user manual Using a USB Mouse Using the USB HUB Function, Operate the Menus using the USB mouse

MT1065, MT1075 specifications

Kensington, a leader in innovative accessories for the digital workspace, has introduced two remarkable models: the MT1065 and MT1075. These devices are designed to enhance productivity and provide seamless connectivity in the modern office environment.

The Kensington MT1065 is specially engineered for professionals seeking a reliable and feature-rich solution for their connectivity needs. One of its main highlights is its versatility, as it supports multiple connections, including HDMI, USB-C, and VGA. This flexibility allows users to easily connect various devices, from laptops to projectors, and seamlessly transition between presentations or collaborative sessions.

With its compact and lightweight design, the MT1065 is ideal for on-the-go professionals. It fits easily into a backpack or laptop case, making it convenient for travel. Additionally, this model employs advanced video technology, supporting resolutions up to 4K, ensuring that presentations are crisp, clear, and visually engaging. The MT1065 also features Plug and Play capability, which means that users can set it up quickly without the need for additional software or drivers.

On the other hand, the Kensington MT1075 takes connectivity a step further by incorporating additional ports, including multiple USB-A and USB-C connections. This makes it a perfect choice for those who require extended connectivity options. It facilitates connection to numerous peripherals, such as external hard drives, keyboards, and mice, all while keeping the workspace organized and efficient.

The MT1075 also boasts advanced power delivery capabilities, enabling the user to charge their devices while maintaining high-performance data transfer simultaneously. This dual functionality helps in minimizing cable clutter, resulting in a cleaner and more organized workstation. Furthermore, it supports high-definition video output, making it suitable for video conferencing, online streaming, and graphic-intensive applications.

Both models feature a robust build quality, ensuring durability and longevity, vital in a bustling office environment. Kensington’s commitment to user-friendly design is evident in the easy-to-use interface and ergonomic layout, prompting users to maximize their productivity effectively.

In conclusion, whether opting for the Kensington MT1065 or the MT1075, users benefit from advanced connectivity options, enhanced power delivery, and a commitment to quality and performance. Both models encapsulate the essence of modern workspace needs, allowing professionals to work smarter and more efficiently in today’s digital age.