Timer operations
Playback or recording can also be activated at the desired time by using a commercially available timer.
50
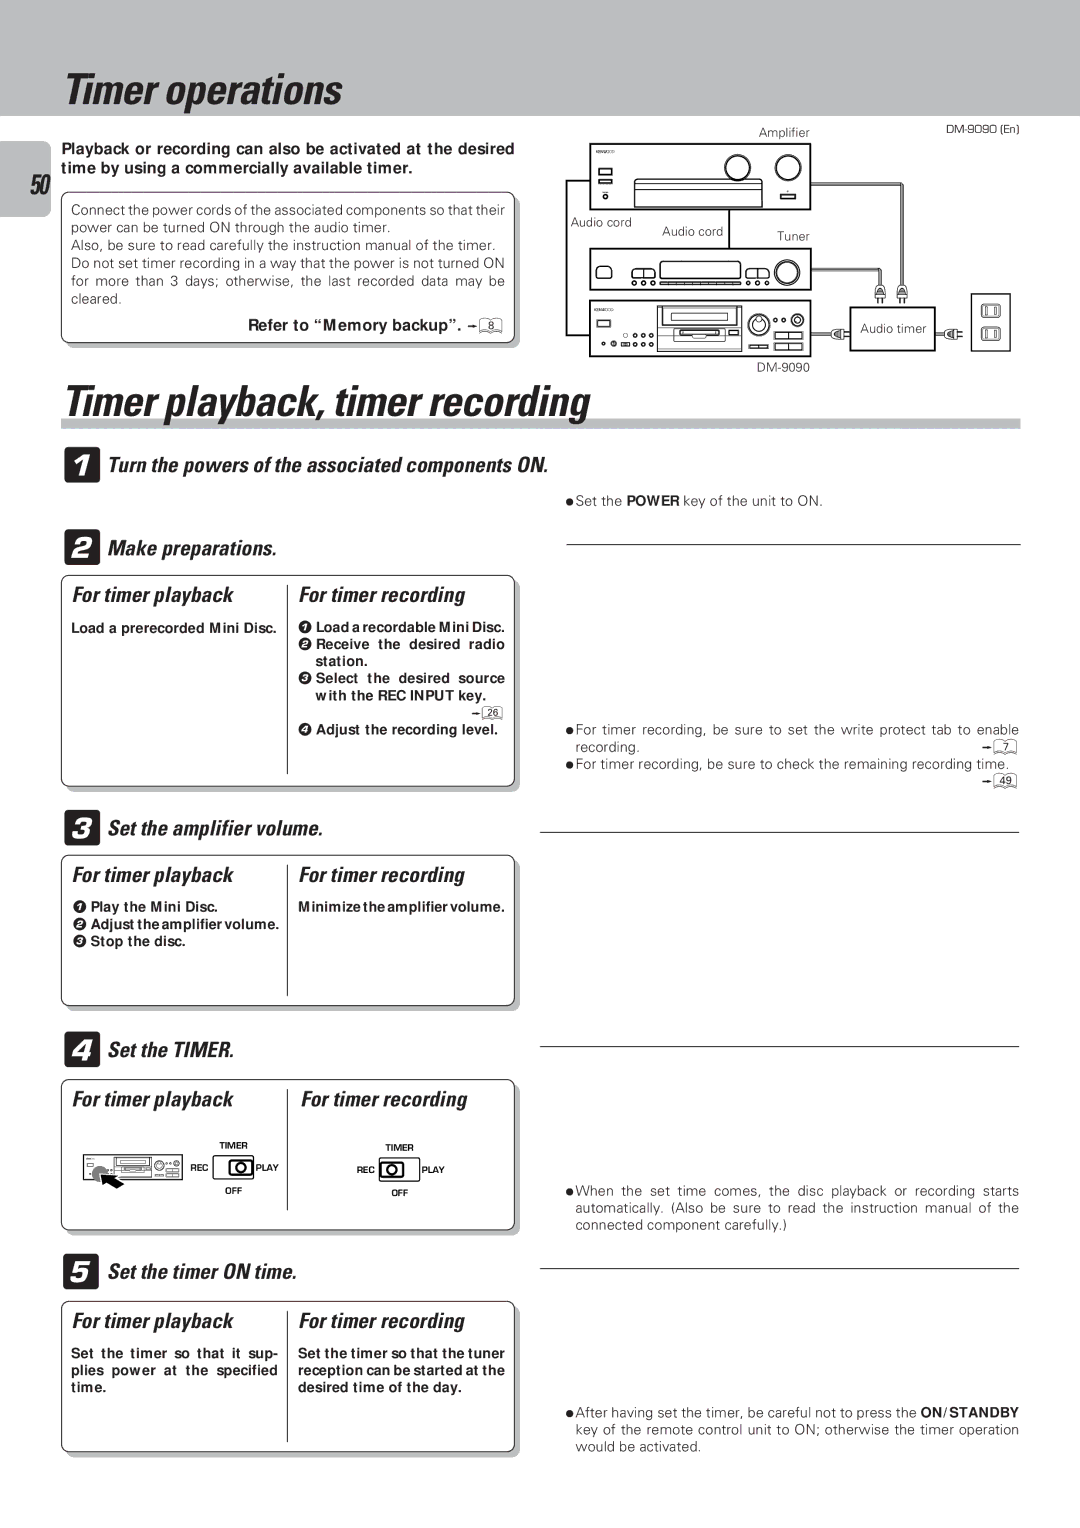
Connect the power cords of the associated components so that their power can be turned ON through the audio timer.
Also, be sure to read carefully the instruction manual of the timer. Do not set timer recording in a way that the power is not turned ON for more than 3 days; otherwise, the last recorded data may be cleared.
Refer to “Memory backup”. 8
Amplifier |
Audio cord
Audio cord | Tuner |
|
Audio timer
Timer playback, timer recording
1Turn the powers of the associated components ON.
ÖSet the POWER key of the unit to ON.
2Make preparations.
For timer playback
Load a prerecorded Mini Disc.
For timer recording
1Load a recordable Mini Disc.
2 Receive the desired radio station.
3 Select the desired source with the REC INPUT key.
¤
4Adjust the recording level. ÖFor timer recording, be sure to set the write protect tab to enable
recording.7
ÖFor timer recording, be sure to check the remaining recording time. o
3Set the amplifier volume.
For timer playback | For timer recording |
1 Play the Mini Disc. | Minimize the amplifier volume. |
2Adjust the amplifier volume.
3 Stop the disc.
4Set the TIMER.
For timer playback |
| For timer recording | |
TIMER |
|
| TIMER |
REC | PLAY | REC | PLAY |
OFF | OFF | ÖWhen the set time comes, the disc playback or recording starts |
automatically. (Also be sure to read the instruction manual of the connected component carefully.)
5Set the timer ON time.
For timer playback
Set the timer so that it sup- plies power at the specified time.
For timer recording
Set the timer so that the tuner reception can be started at the desired time of the day.
ÖAfter having set the timer, be careful not to press the ON/STANDBY key of the remote control unit to ON; otherwise the timer operation would be activated.