Filler |
| panel |
|
| If panels | are | |||
re | uired | if - |
|
| more |
| than | ||
pane 7 s are | less |
| l/4” | (6 | mm) | ||||
than | l/4” |
|
|
| thick, | route | |||
(6 mm) | thick. |
|
| panel | edges | ||||
|
|
|
|
|
| on | all | sides. | |
|
| nylon | / |
|
|
|
|
| |
|
|
|
|
|
|
|
| ||
|
| washers |
|
|
|
|
|
| |
| (discard) |
|
|
|
|
|
| ||
|
| door |
|
| IGcorative |
|
| ||
|
| handle- |
|
|
|
| |||
|
|
|
| panel |
|
| |||
|
|
|
|
|
|
|
| ||
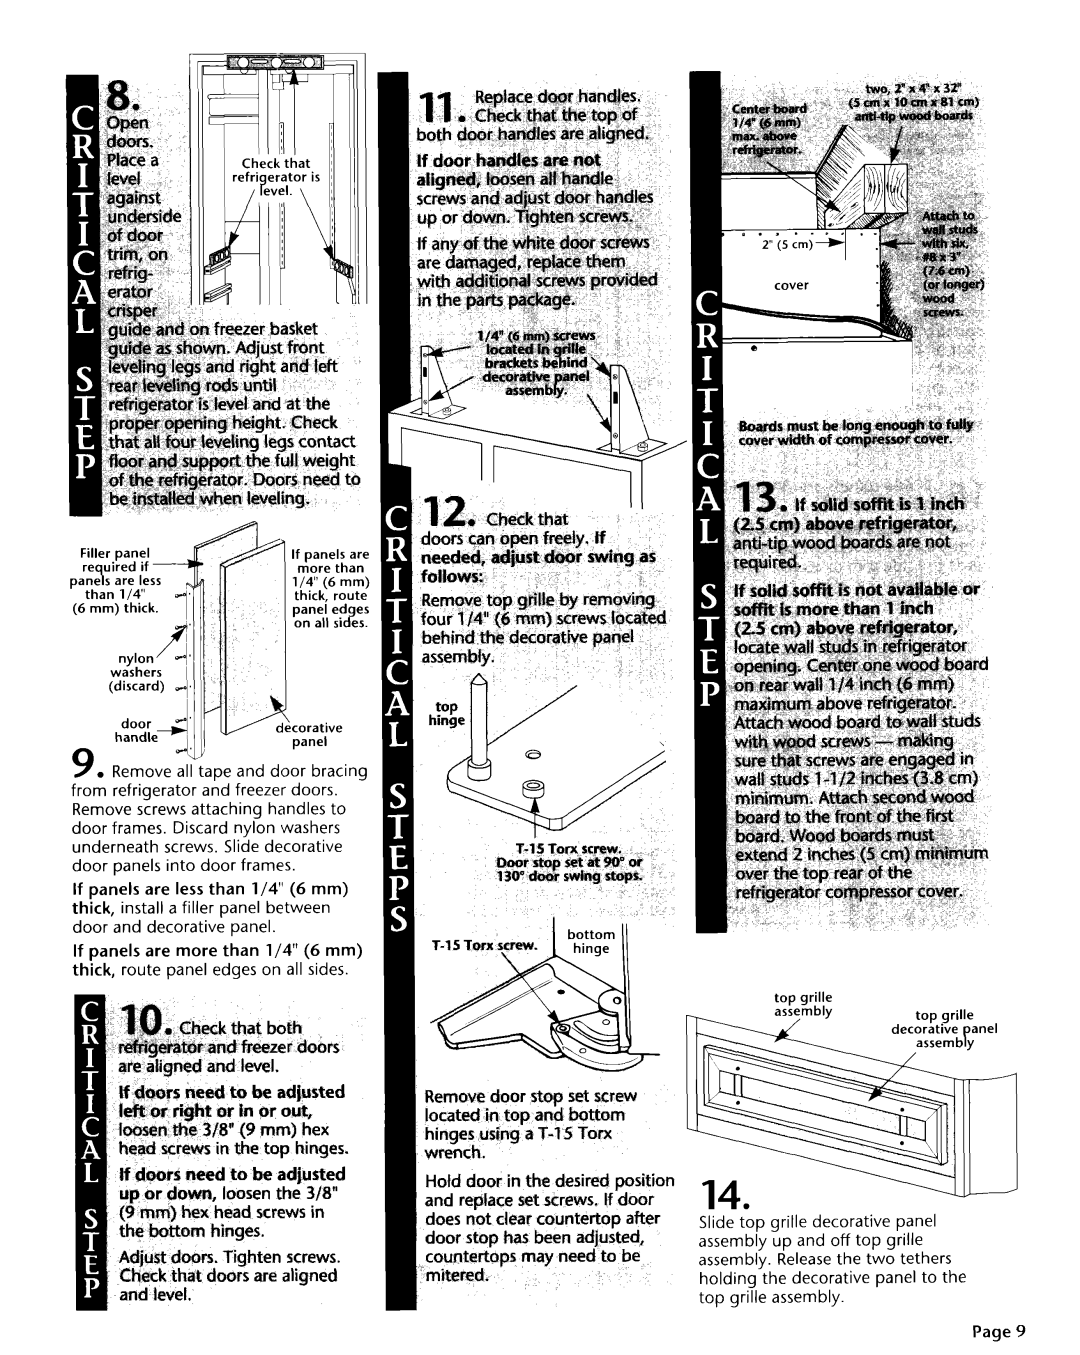
9. Remove all taDe and door bracinq | |||||||||
from | refrigerator | and freezer doors. |
|
| |||||
Remove screws | attaching | handles |
| to | |||||
door frames. Discard nylon washers |
|
| |||||||
underneath |
| screws. Slide | decorative |
|
| ||||
door panels into door frames. |
|
|
| ||||||
If panels are less than l/4” (6 mm) thick, install a filler panel between
door and decorative panel.
If panels are more than l/4” (6 mm) thick, route panel edges on all sides.
are atigned and teveJ,
assembiy
top grille
lf4~~~s iwsd ta be adjusted kbr fight or bl or out,
bmen’&e 3/S” (9 mm) hex hwfid screws in the tap hinge5
#dptws md to be adjusted up or down, loosen the 3/8 (9 rnmi~ hex head screws in the b&torn hinges.
Adju$t doors. Tighten screws. ftimk that doors are aligned and levei.
Remove door stop set screw
located in top and bottcvn hinges using a
Hotd door in the desired position and replrace ~?t crews. I#door does not clear countertop after door stop has been adjusted, countertops may need to be ““mitered.
14.
Slide top grille decorative panel assembly up and off top grille assembly. Release the two tethers holding the decorative panel to the top grille assembly.
Page 9
