Install custom panel
Option 1: For models KUDP02FSPA, KUDS02FSPA, KUDU02FSPA
NOTE: The handle for the custom panel is not included.
IMPORTANT: If the handle is attached from the back of the custom panel, the screw holes should be countersunk for the screws heads to be flush with the panel. If the handle is attached to the front of the custom panel, the screw lengths cannot exceed the panel thickness. For more information on KitchenAid custom handle selection, refer to the KitchenAid Catalog, visit www.kitchenaid.com, or call
NOTE: A
NOTE: All mounting hardware supplied is for a 3/4"
(19.1 mm) thick wood panel. If a thinner wood panel, or materials other than wood are used, it is the consumer’s responsibility to obtain the proper length screws and adjust the pilot holes accordingly.
IMPORTANT: Use a moisture resistant sealer on both sides and all edges of the panel to protect it from humidity.
|
custom panel dimensions
3/4" (19.1 mm)
*This dimension is for 4" (10.2 cm) toe kick. If the installation needs a higher toe kick, adjust the height of the wood panel accordingly. Not recommended for toe kicks greater than 6" (15.2 cm).
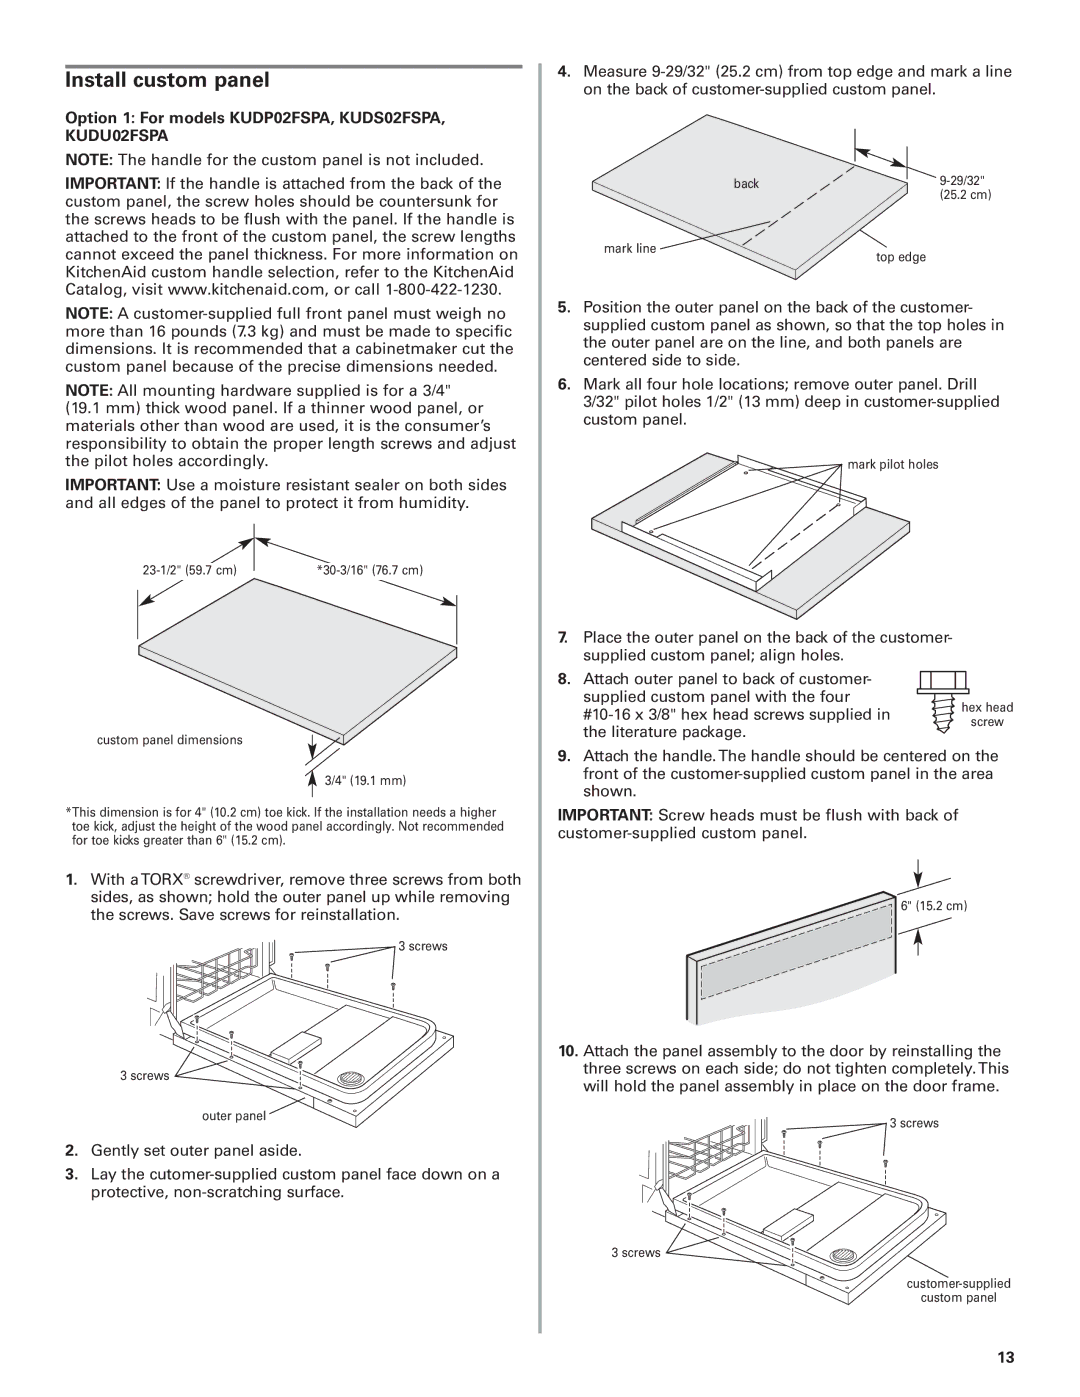
1.With a TORX® screwdriver, remove three screws from both sides, as shown; hold the outer panel up while removing the screws. Save screws for reinstallation.
![]() 3 screws
3 screws
3 screws ![]()
outer panel
2.Gently set outer panel aside.
3.Lay the
4.Measure
back | |
| (25.2 cm) |
mark line | top edge |
|
5.Position the outer panel on the back of the customer- supplied custom panel as shown, so that the top holes in the outer panel are on the line, and both panels are centered side to side.
6.Mark all four hole locations; remove outer panel. Drill 3/32" pilot holes 1/2" (13 mm) deep in
![]() mark pilot holes
mark pilot holes
7.Place the outer panel on the back of the customer- supplied custom panel; align holes.
8. Attach outer panel to back of customer- supplied custom panel with the four
hex head | ||
screw | ||
the literature package. | ||
|
9.Attach the handle. The handle should be centered on the front of the
IMPORTANT: Screw heads must be flush with back of
6" (15.2 cm)
10.Attach the panel assembly to the door by reinstalling the three screws on each side; do not tighten completely. This will hold the panel assembly in place on the door frame.
![]() 3 screws
3 screws
3 screws ![]()
custom panel
13