3.Close and latch the door, and place level against the front panel. Check that dishwasher is plumb. If needed, adjust leveling leg or add shims under rear wheel until dishwasher is plumb.
4.Repeat for other side of dishwasher.
NOTE: Shims must be securely attached to floor to prevent their movement when the dishwasher is operated.
5.Place level against top front
opening of tub. Check that dishwasher is level from side to side. If dishwasher is not level, adjust front legs up or down until dishwasher is level.
Make Electrical Connection
Check “Electrical requirements” section.
You need to:
•have the correct electrical supply and recommended grounding method.
If you are:
•direct wiring, use Option 1
•using a power supply cord, use Option 2
Option 1: Direct wire method
1.Route direct wire so that it does not touch dishwasher motor or lower part of dishwasher tub.
2.Pull direct wire through hole in terminal box.
Helpful Tip:
• Select the proper size
• Insert wire ends into
• Twist connector.
•Gently tug on wires to be sure both are secured.
3.Connect the wires as follows using
Power supply wire: |
| Terminal box wire: |
white |
| white |
|
black ![]()
![]() black
black
ground wire ![]()
![]() ground connector
ground connector
![]() WARNING
WARNING
Electrical Shock Hazard
Electrically ground dishwasher.
Connect ground wire to green ground connector in terminal box.
Do not use an extension cord.
Failure to follow these instructions can result in death, fire, or electrical shock.
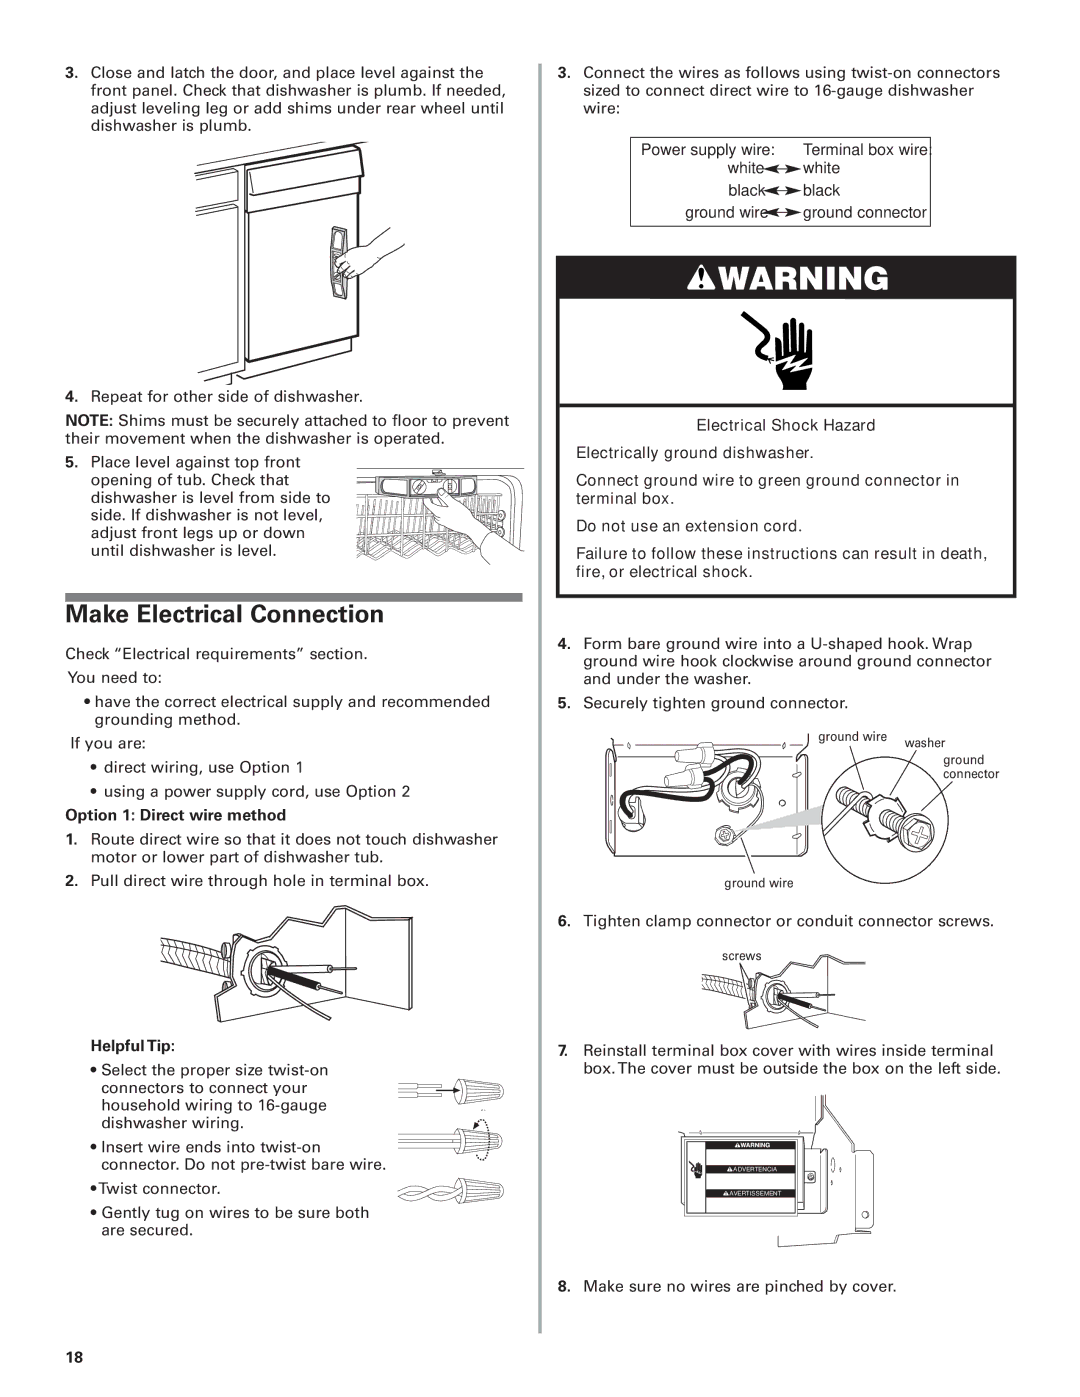
4.Form bare ground wire into a
5.Securely tighten ground connector.
ground wire | washer |
|
ground connector
ground wire
6.Tighten clamp connector or conduit connector screws.
screws
7.Reinstall terminal box cover with wires inside terminal box. The cover must be outside the box on the left side.
ADVERTENCIA |
AVERTISSEMENT |
8.Make sure no wires are pinched by cover.
18