Model A-9® Coffee Mill Operation
Before First Use
Wash the bean hopper, bean hopper lid, and measuring glass in hot, soapy water. Rinse and dry.
Model A-9® Coffee Mill Use
1.Unplug Coffee Mill.
2.Attach bean hopper to motor housing by turning bean hopper clockwise until snug.
3.Fill bean hopper with whole coffee beans. Attach lid to bean hopper by turning clockwise.
NOTE: Grinding flavoured coffee beans is not recommended. Flavoured beans will impart an
![]() WARNING
WARNING
Electrical Shock Hazard
Plug into a grounded 3 prong outlet.
Do not remove ground prong.
Do not use an adapter.
Failure to follow these instructions can result in death, fire or electrical shock.
4. Plug into a grounded
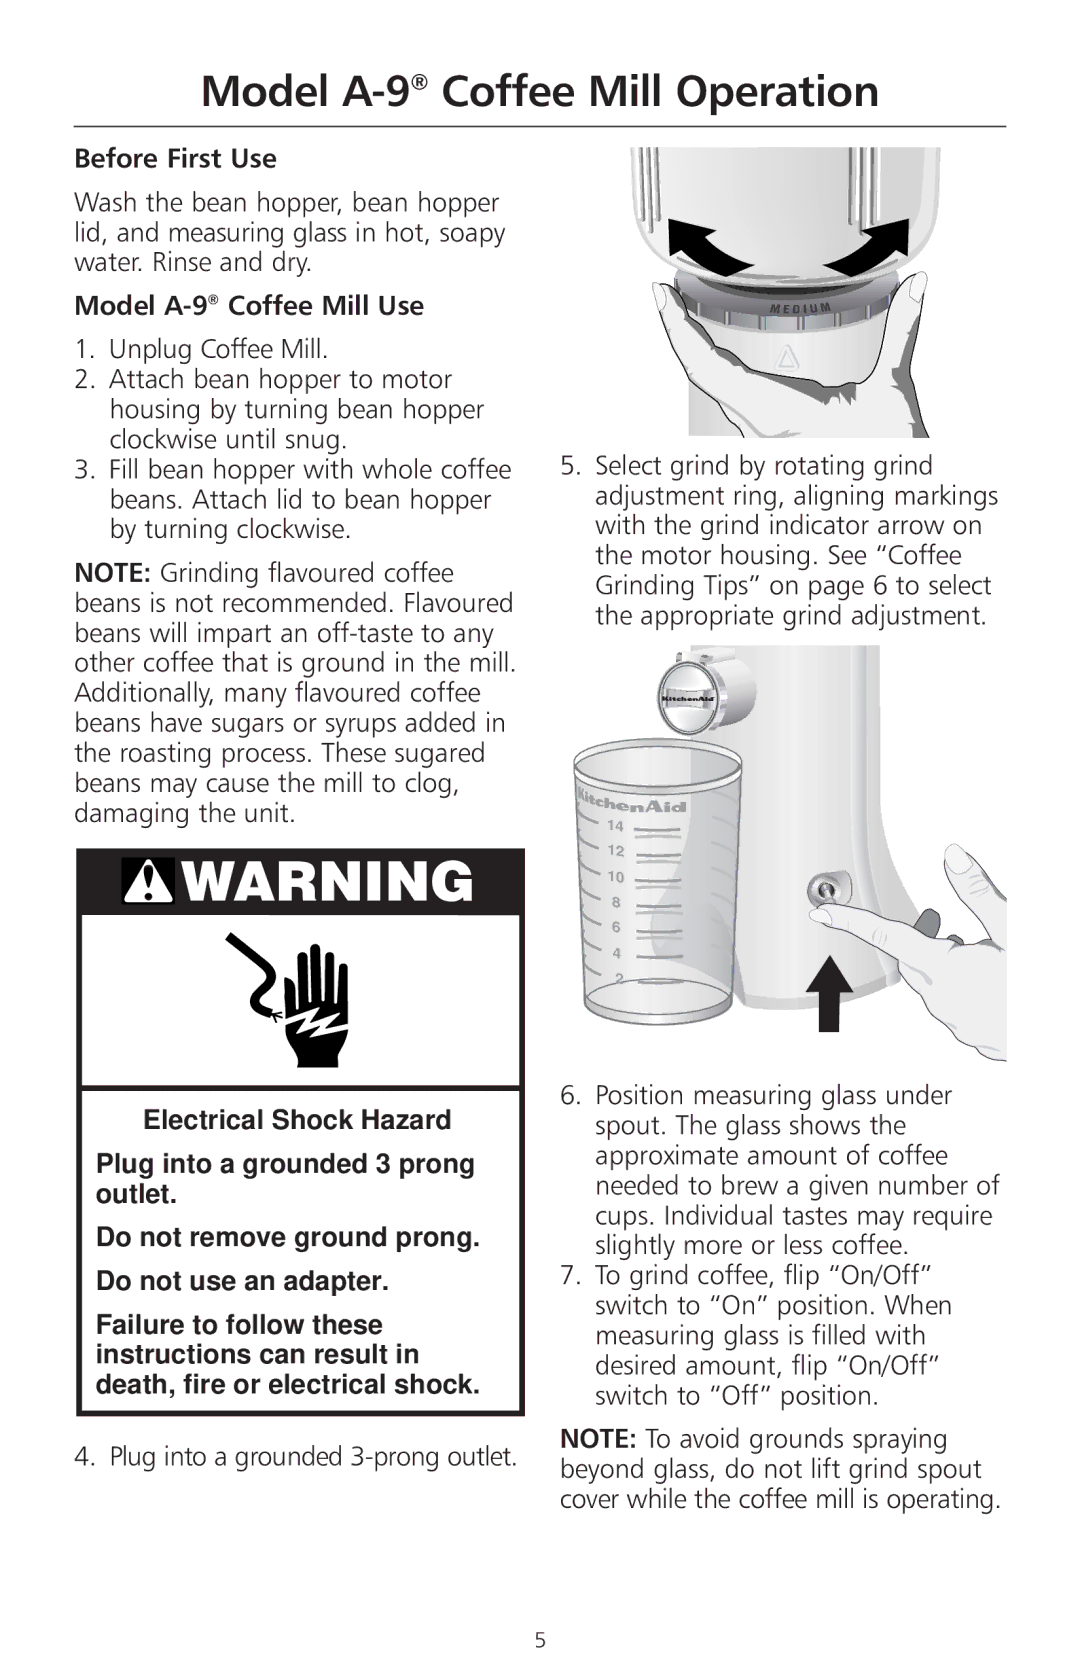
5.Select grind by rotating grind adjustment ring, aligning markings with the grind indicator arrow on the motor housing. See “Coffee Grinding Tips” on page 6 to select the appropriate grind adjustment.
14 12 10 8 6 4 2
6.Position measuring glass under spout. The glass shows the approximate amount of coffee needed to brew a given number of cups. Individual tastes may require slightly more or less coffee.
7.To grind coffee, flip “On/Off” switch to “On” position. When measuring glass is filled with desired amount, flip “On/Off” switch to “Off” position.
NOTE: To avoid grounds spraying beyond glass, do not lift grind spout cover while the coffee mill is operating.
5
