Using Your Smoker Box
(on some models and as an accessory)*
The smoker box can be used when grilling or when using your rotisserie.
1.Prepare wood chips/pellets following manufacturer’s directions.
2.Open smoker box lid and add prepared chips/pellets onto the grate inside the smoker box.
NOTE: For about 1 hour of smoking, fill the smoker box approximately
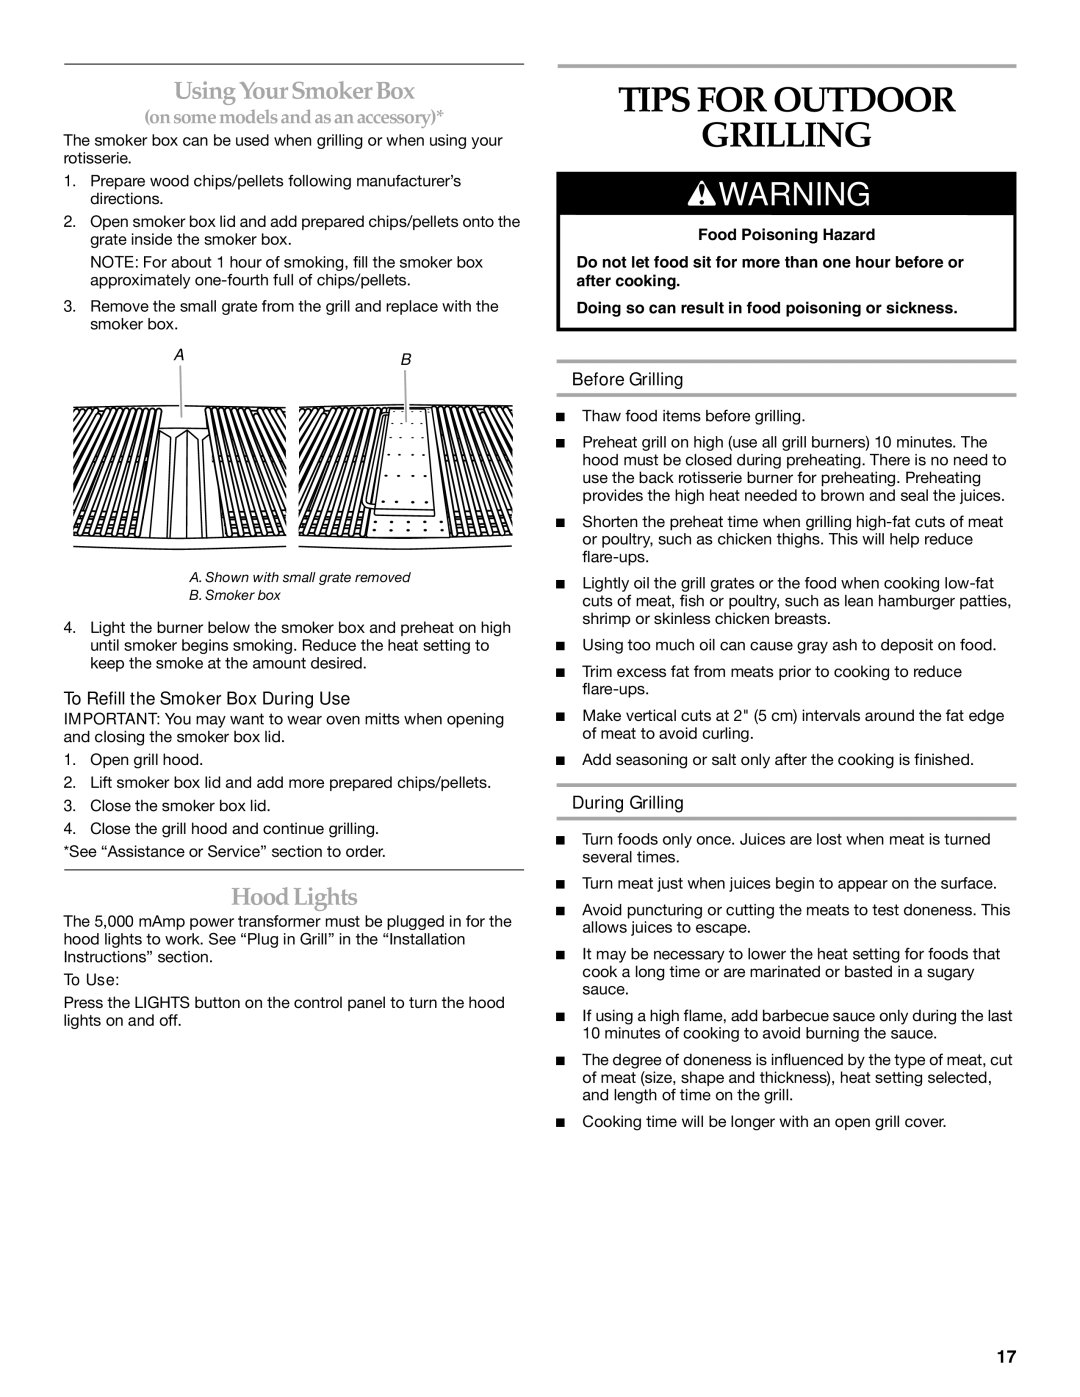
3.Remove the small grate from the grill and replace with the smoker box.
AB
TIPS FOR OUTDOOR
GRILLING
![]() WARNING
WARNING
Food Poisoning Hazard
Do not let food sit for more than one hour before or after cooking.
Doing so can result in food poisoning or sickness.
Before Grilling
A. Shown with small grate removed
B. Smoker box
4.Light the burner below the smoker box and preheat on high until smoker begins smoking. Reduce the heat setting to keep the smoke at the amount desired.
To Refill the Smoker Box During Use
IMPORTANT: You may want to wear oven mitts when opening and closing the smoker box lid.
1.Open grill hood.
2.Lift smoker box lid and add more prepared chips/pellets.
3.Close the smoker box lid.
4.Close the grill hood and continue grilling.
*See “Assistance or Service” section to order.
Hood Lights
The 5,000 mAmp power transformer must be plugged in for the hood lights to work. See “Plug in Grill” in the “Installation Instructions” section.
To Use:
Press the LIGHTS button on the control panel to turn the hood lights on and off.
■Thaw food items before grilling.
■Preheat grill on high (use all grill burners) 10 minutes. The hood must be closed during preheating. There is no need to use the back rotisserie burner for preheating. Preheating provides the high heat needed to brown and seal the juices.
■Shorten the preheat time when grilling
■Lightly oil the grill grates or the food when cooking
■Using too much oil can cause gray ash to deposit on food.
■Trim excess fat from meats prior to cooking to reduce
■Make vertical cuts at 2" (5 cm) intervals around the fat edge of meat to avoid curling.
■Add seasoning or salt only after the cooking is finished.
During Grilling
■Turn foods only once. Juices are lost when meat is turned several times.
■Turn meat just when juices begin to appear on the surface.
■Avoid puncturing or cutting the meats to test doneness. This allows juices to escape.
■It may be necessary to lower the heat setting for foods that cook a long time or are marinated or basted in a sugary sauce.
■If using a high flame, add barbecue sauce only during the last 10 minutes of cooking to avoid burning the sauce.
■The degree of doneness is influenced by the type of meat, cut of meat (size, shape and thickness), heat setting selected, and length of time on the grill.
■Cooking time will be longer with an open grill cover.
17
