OVEN DOOR EXTERIOR

Cleaning Method:

Glass cleaner and a soft cloth or sponge:

Apply glass cleaner to soft cloth or sponge, not directly on panel.

All-Purpose Appliance Cleaner Part Number 31682 (not included):

See “Assistance or Service” section to order.

OVEN DOOR INTERIOR

Cleaning Method:

Self-Cleaning cycle:

For optimal door cleaning result, wipe away any deposits with a damp sponge before running cycle.

CONTROL PANEL

Cleaning Method:

Glass cleaner and soft cloth or sponge:

Apply glass cleaner to soft cloth or sponge, not directly on panel.

All-Purpose Appliance Cleaner Part Number 31682 (not included):

See “Assistance or Service” section to order.

To avoid damage to the control panel, do not use abrasive cleaners, steel-wool pads, gritty washcloths or some paper towels.

OVEN CAVITY

Do not use oven cleaners.

Food spills should be cleaned when oven cools. At high temperatures, foods react with porcelain and staining, etching, pitting or faint white spots can result.

Cleaning Method:

Self-Cleaning cycle: See “Self-Cleaning Cycle” first.

OVEN RACKS AND ROASTING RACKS

Cleaning Method:

Self-Cleaning cycle:

See “Self-Cleaning Cycle” first. Remove racks or they will discolor and become harder to slide. If this happens, a light coating of vegetable oil applied to the rack guides will help them slide.

Steel-wool pad

BROILER PAN AND GRID (on some models)

Do not clean in the Self-Cleaning cycle.

Cleaning Method:

Mildly abrasive cleanser: Scrub with wet scouring pad.

Solution of ¹₂ cup (125 mL) ammonia to 1 gal. (3.75 L) water: Soak for 20 minutes, then scrub with scouring or steel-wool pad.

Porcelain enamel only, not chrome

Dishwasher

OvenLights

The oven lights are 12-volt, 5-watt maximum halogen bulbs. They will come on when the oven door is opened. On double oven models, both upper and lower lights will come on when either door is opened. The oven lights will not work during the Self- Cleaning cycle. When the oven door is closed, touch OVEN LIGHT to turn light on or off.

To Replace:

Before replacing the bulb, make sure the oven is off and cool.

1.Disconnect power.

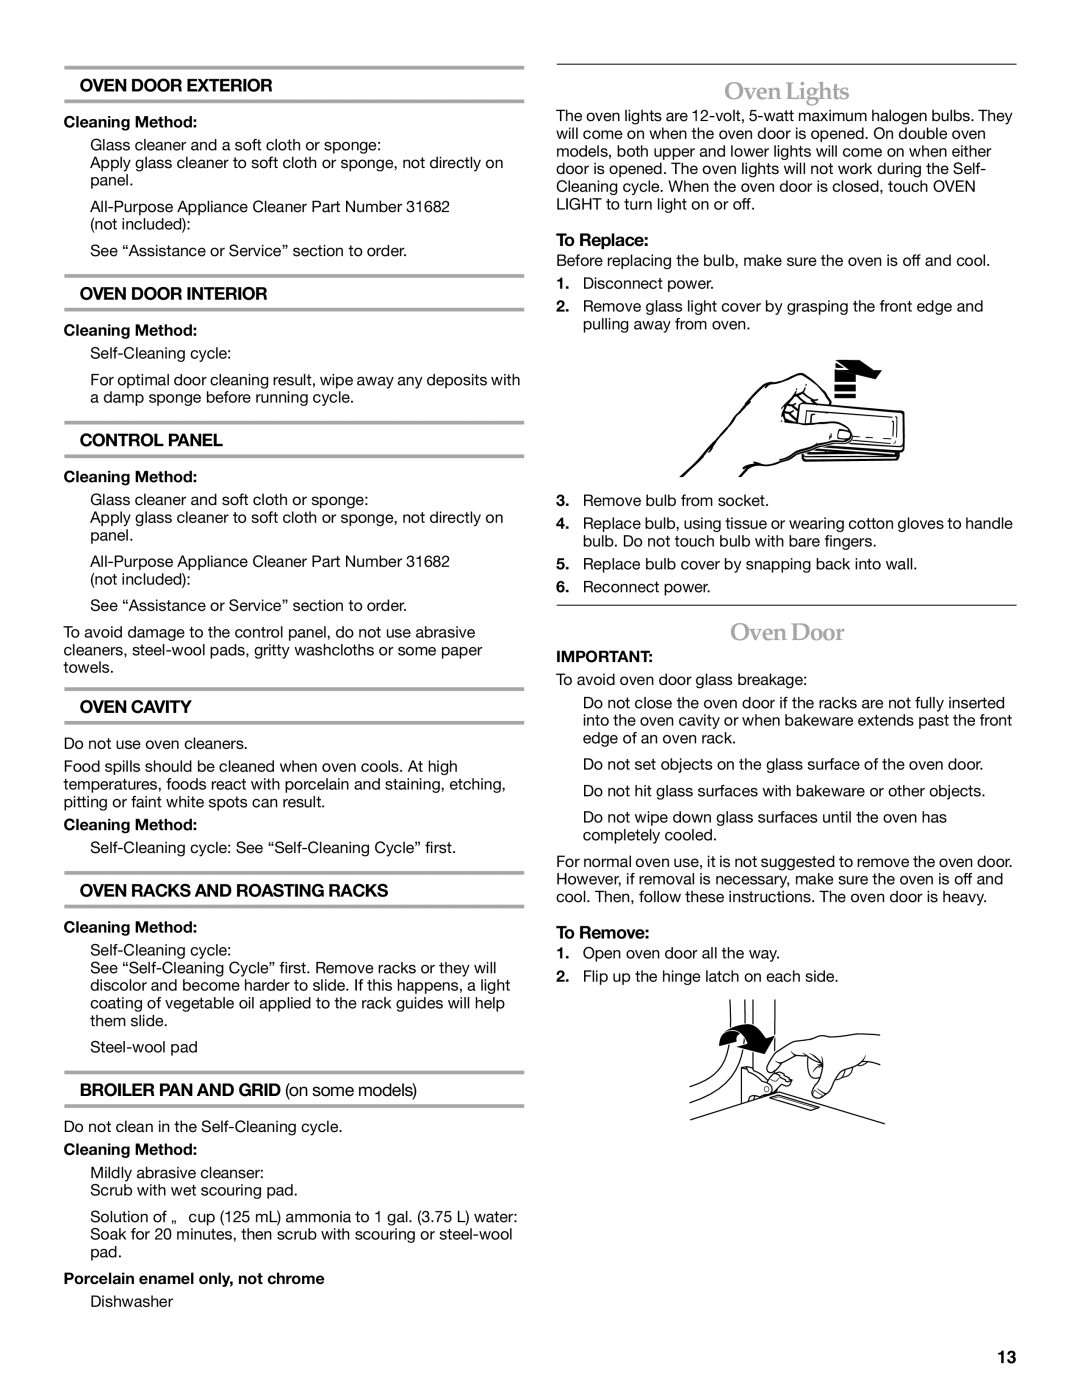
2.Remove glass light cover by grasping the front edge and pulling away from oven.

3.Remove bulb from socket.

4.Replace bulb, using tissue or wearing cotton gloves to handle bulb. Do not touch bulb with bare fingers.

5.Replace bulb cover by snapping back into wall.

6.Reconnect power.

OvenDoor

IMPORTANT:

To avoid oven door glass breakage:

Do not close the oven door if the racks are not fully inserted into the oven cavity or when bakeware extends past the front edge of an oven rack.

Do not set objects on the glass surface of the oven door.

Do not hit glass surfaces with bakeware or other objects.

Do not wipe down glass surfaces until the oven has completely cooled.

For normal oven use, it is not suggested to remove the oven door. However, if removal is necessary, make sure the oven is off and cool. Then, follow these instructions. The oven door is heavy.

To Remove:

1.Open oven door all the way.

2.Flip up the hinge latch on each side.

13

Page 13
Image 13
KitchenAid KEBK276, KEBK206 manual OvenLights, OvenDoor

KEBK206, KEBK276 specifications

The KitchenAid KEBK276 and KEBK206 are impressive countertop ovens that exemplify versatility and advanced technology, making them ideal for modern kitchens. Both models are designed to enhance cooking efficiency and provide an array of culinary options.

The KitchenAid KEBK276 features a spacious interior that can accommodate a variety of dishes, such as baked goods, roasts, and casseroles. Its powerful cooking system utilizes a convection fan to circulate hot air evenly around food, ensuring consistent cooking results. With multiple cooking modes, including bake, broil, toast, and reheat, the KEBK276 allows users to prepare meals with precision and ease.

On the other hand, the KEBK206 offers a slightly more compact design without compromising on functionality. This model also incorporates convection cooking, allowing users to achieve golden brown finishes and perfectly cooked meals in less time. Additionally, the KEBK206 features a rapid preheat function, which significantly reduces the waiting time before cooking begins. This is a game-changer for busy home cooks who need to streamline their meal preparation.

Both models come fitted with a user-friendly digital display that provides clear visibility of settings and cooking times. The intuitive control panel makes it easy to navigate through various functions, allowing users to customize their cooking experience effortlessly. The KEBK276 and KEBK206 also include a timer and automatic shut-off feature, providing peace of mind while cooking.

In terms of design, both ovens feature a sleek stainless-steel finish that adds a contemporary touch to any kitchen. Their compact designs ensure they don’t occupy too much countertop space, making them suitable for smaller kitchens or apartments. The interiors are easy to clean, and the removable crumb trays help maintain cleanliness with minimal effort.

For anyone seeking efficiency without sacrificing style, the KitchenAid KEBK276 and KEBK206 are standout options. They reflect KitchenAid’s commitment to quality and innovation, integrating essential features that cater to both novice and seasoned cooks. With these countertop ovens, anyone can easily enhance their culinary skills and elevate their cooking experience.