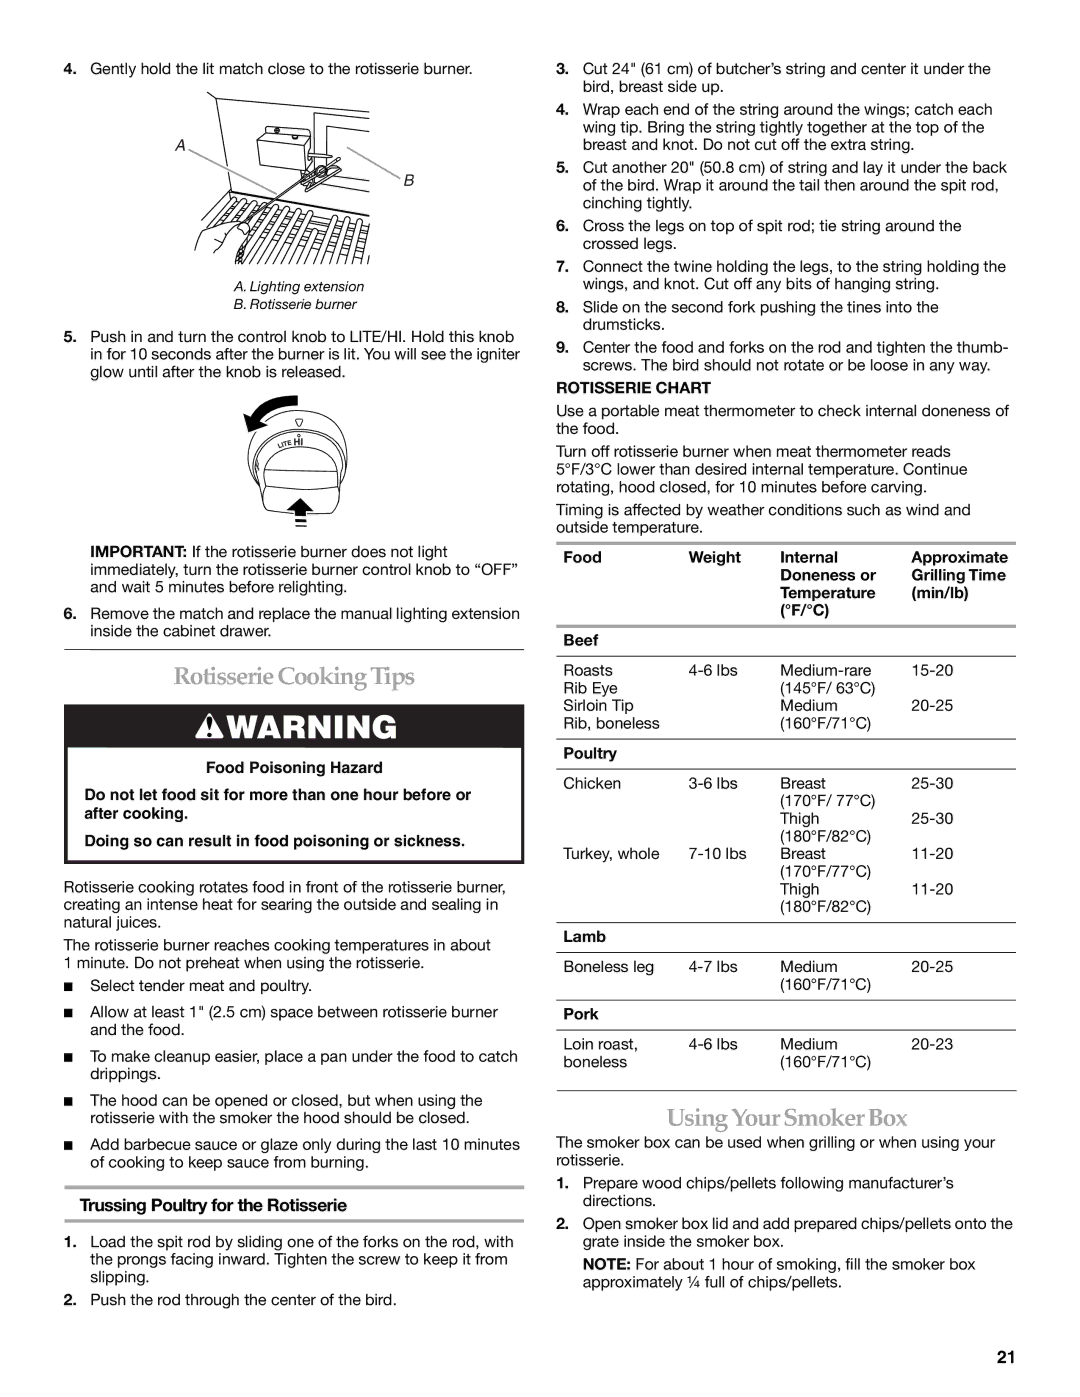
4.Gently hold the lit match close to the rotisserie burner.

A

B

A. Lighting extension

B. Rotisserie burner

5.Push in and turn the control knob to LITE/HI. Hold this knob in for 10 seconds after the burner is lit. You will see the igniter glow until after the knob is released.

IMPORTANT: If the rotisserie burner does not light immediately, turn the rotisserie burner control knob to “OFF” and wait 5 minutes before relighting.

6.Remove the match and replace the manual lighting extension inside the cabinet drawer.

Rotisserie Cooking Tips

WARNING

Food Poisoning Hazard

Do not let food sit for more than one hour before or after cooking.

Doing so can result in food poisoning or sickness.

Rotisserie cooking rotates food in front of the rotisserie burner, creating an intense heat for searing the outside and sealing in natural juices.

The rotisserie burner reaches cooking temperatures in about 1 minute. Do not preheat when using the rotisserie.

Select tender meat and poultry.

Allow at least 1" (2.5 cm) space between rotisserie burner and the food.

To make cleanup easier, place a pan under the food to catch drippings.

The hood can be opened or closed, but when using the rotisserie with the smoker the hood should be closed.

Add barbecue sauce or glaze only during the last 10 minutes of cooking to keep sauce from burning.

Trussing Poultry for the Rotisserie

1.Load the spit rod by sliding one of the forks on the rod, with the prongs facing inward. Tighten the screw to keep it from slipping.

2.Push the rod through the center of the bird.

3.Cut 24" (61 cm) of butcher’s string and center it under the bird, breast side up.

4.Wrap each end of the string around the wings; catch each wing tip. Bring the string tightly together at the top of the breast and knot. Do not cut off the extra string.

5.Cut another 20" (50.8 cm) of string and lay it under the back of the bird. Wrap it around the tail then around the spit rod, cinching tightly.

6.Cross the legs on top of spit rod; tie string around the crossed legs.

7.Connect the twine holding the legs, to the string holding the wings, and knot. Cut off any bits of hanging string.

8.Slide on the second fork pushing the tines into the drumsticks.

9.Center the food and forks on the rod and tighten the thumb- screws. The bird should not rotate or be loose in any way.

ROTISSERIE CHART

Use a portable meat thermometer to check internal doneness of the food.

Turn off rotisserie burner when meat thermometer reads 5°F/3°C lower than desired internal temperature. Continue rotating, hood closed, for 10 minutes before carving.

Timing is affected by weather conditions such as wind and outside temperature.

Food

Weight

Internal

Approximate


Doneness or

Grilling Time


Temperature

(min/lb)


(°F/°C)


Beef


Roasts

4-6 lbs

Medium-rare

15-20

Rib Eye


(145°F/ 63°C)


Sirloin Tip


Medium

20-25

Rib, boneless


(160°F/71°C)


Poultry


Chicken

3-6 lbs

Breast

25-30


(170°F/ 77°C)

25-30


Thigh


(180°F/82°C)


Turkey, whole

7-10 lbs

Breast

11-20


(170°F/77°C)


Thigh

11-20


(180°F/82°C)


Lamb


Boneless leg

4-7 lbs

Medium

20-25


(160°F/71°C)


Pork


Loin roast,

4-6 lbs

Medium

20-23

boneless


(160°F/71°C)


Using Your Smoker Box

The smoker box can be used when grilling or when using your rotisserie.

1.Prepare wood chips/pellets following manufacturer’s directions.

2.Open smoker box lid and add prepared chips/pellets onto the grate inside the smoker box.

NOTE: For about 1 hour of smoking, fill the smoker box approximately ¼ full of chips/pellets.

21

Page 21
Image 21
KitchenAid KFRU488T Rotisserie Cooking Tips, Using Your Smoker Box, Trussing Poultry for the Rotisserie, Rotisserie Chart

KFRU488T, KBNU487T, KBNU367T, KFRU368T specifications

The KitchenAid KFRU368T, KBNU367T, KBNU487T, and KFRU488T models represent the pinnacle of culinary innovation and design within the KitchenAid suite of appliances. Each model offers a blend of functionality, durability, and aesthetic appeal tailored to meet diverse kitchen needs.

The KFRU368T is particularly noted for its impressive 36-inch width, accommodating larger cooking tasks while adding a professional flair to any kitchen. It features a powerful 20,000 BTU burner that delivers high heat for rapid boiling, perfect for searing meats or achieving that elusive simmer for sauces. The dual fuel feature allows users to enjoy the precise temperature control of gas cooking combined with the even heating of an electric oven. This model also comes equipped with an advanced convection system that enhances airflow, ensuring perfectly baked goods every time.

The KBNU367T and KBNU487T models are designed for those who appreciate both craft and technology in their cooking process. The KBNU367T features a seamless design with a digital display that facilitates easy monitoring of cooking progress. The oven's self-cleaning feature saves time and effort, allowing users to focus on meal preparation. In terms of performance, this model boasts multiple cooking modes, including baking and broiling, providing versatility for various culinary projects.

On the other hand, the KBNU487T takes this functionality a step further by integrating smart features that connect seamlessly with mobile devices. This allows for remote monitoring, making it easy for chefs to adjust cooking settings from anywhere in the house. Additionally, its expansive oven capacity can accommodate multiple dishes on different racks, enhancing cooking efficiency during gatherings or family meals.

The KFRU488T model rounds out this line-up with its unique focus on user-friendly operation. It features robust knobs and a window viewing capability, allowing chefs to keep an eye on their creations without opening the oven door. Furthermore, with its precision temperature probe, this model ensures meats are cooked to perfection, avoiding the guesswork often associated with grilling and roasting.

These KitchenAid models not only prioritize cooking performance but also emphasize energy efficiency through innovative insulation design. With sleek stainless steel finishes and customizable color options, these appliances elevate kitchen aesthetics while providing top-tier performance that home chefs and enthusiasts can depend on. Whether you're an aspiring cook or a seasoned chef, the KFRU368T, KBNU367T, KBNU487T, and KFRU488T are ideal companions in any culinary journey.