Use the following steps to remove doors during installation.
1.Loosen and remove the four Torx®† 27
2.Lift the doors up and away from the refrigerator and set them aside.
Use the following steps to reinstall the door.
1.Position the doors so the mounting screw holes on top of both hinges are aligned.
2.Insert the four Torx®† 27
3.Tighten the screws on the hinge.
Door Height Adjustment
Use the following steps to adjust the door height, up or down, after the doors have been leveled.
1.Open the freezer or refrigerator door. Locate the bottom hinge and remove the door stop screw.
Classic and Architect® Models
Remove the door stop screw from the bottom side of the hinge.
AB C
A.Bushing
B.Door stop screw
C.Locking plate
Overlay Models
Remove the two door stop screws: one from the bottom side using a ³⁄₈" open end wrench and one from the top side using an Allen wrench.
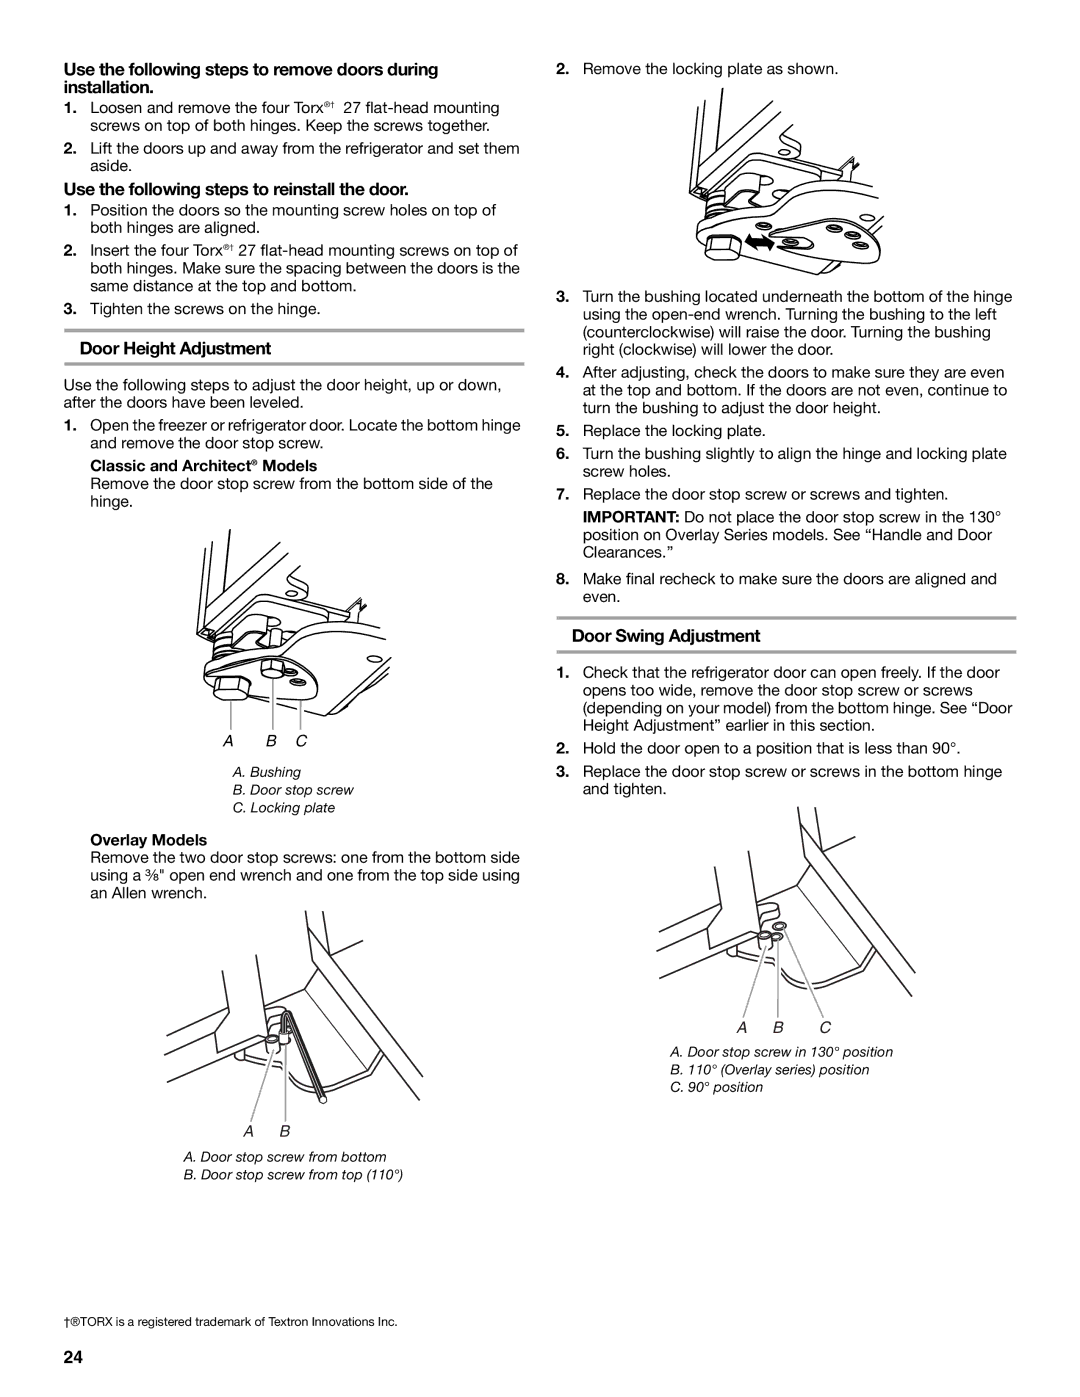
2.Remove the locking plate as shown.
3.Turn the bushing located underneath the bottom of the hinge using the
4.After adjusting, check the doors to make sure they are even at the top and bottom. If the doors are not even, continue to turn the bushing to adjust the door height.
5.Replace the locking plate.
6.Turn the bushing slightly to align the hinge and locking plate screw holes.
7.Replace the door stop screw or screws and tighten.
IMPORTANT: Do not place the door stop screw in the 130° position on Overlay Series models. See “Handle and Door Clearances.”
8.Make final recheck to make sure the doors are aligned and even.
Door Swing Adjustment
1.Check that the refrigerator door can open freely. If the door opens too wide, remove the door stop screw or screws (depending on your model) from the bottom hinge. See “Door Height Adjustment” earlier in this section.
2.Hold the door open to a position that is less than 90°.
3.Replace the door stop screw or screws in the bottom hinge and tighten.
A B C
A. Door stop screw in 130° position
B. 110° (Overlay series) position
C. 90° position
AB
A.Door stop screw from bottom
B.Door stop screw from top (110°)
†®TORX is a registered trademark of Textron Innovations Inc.
24