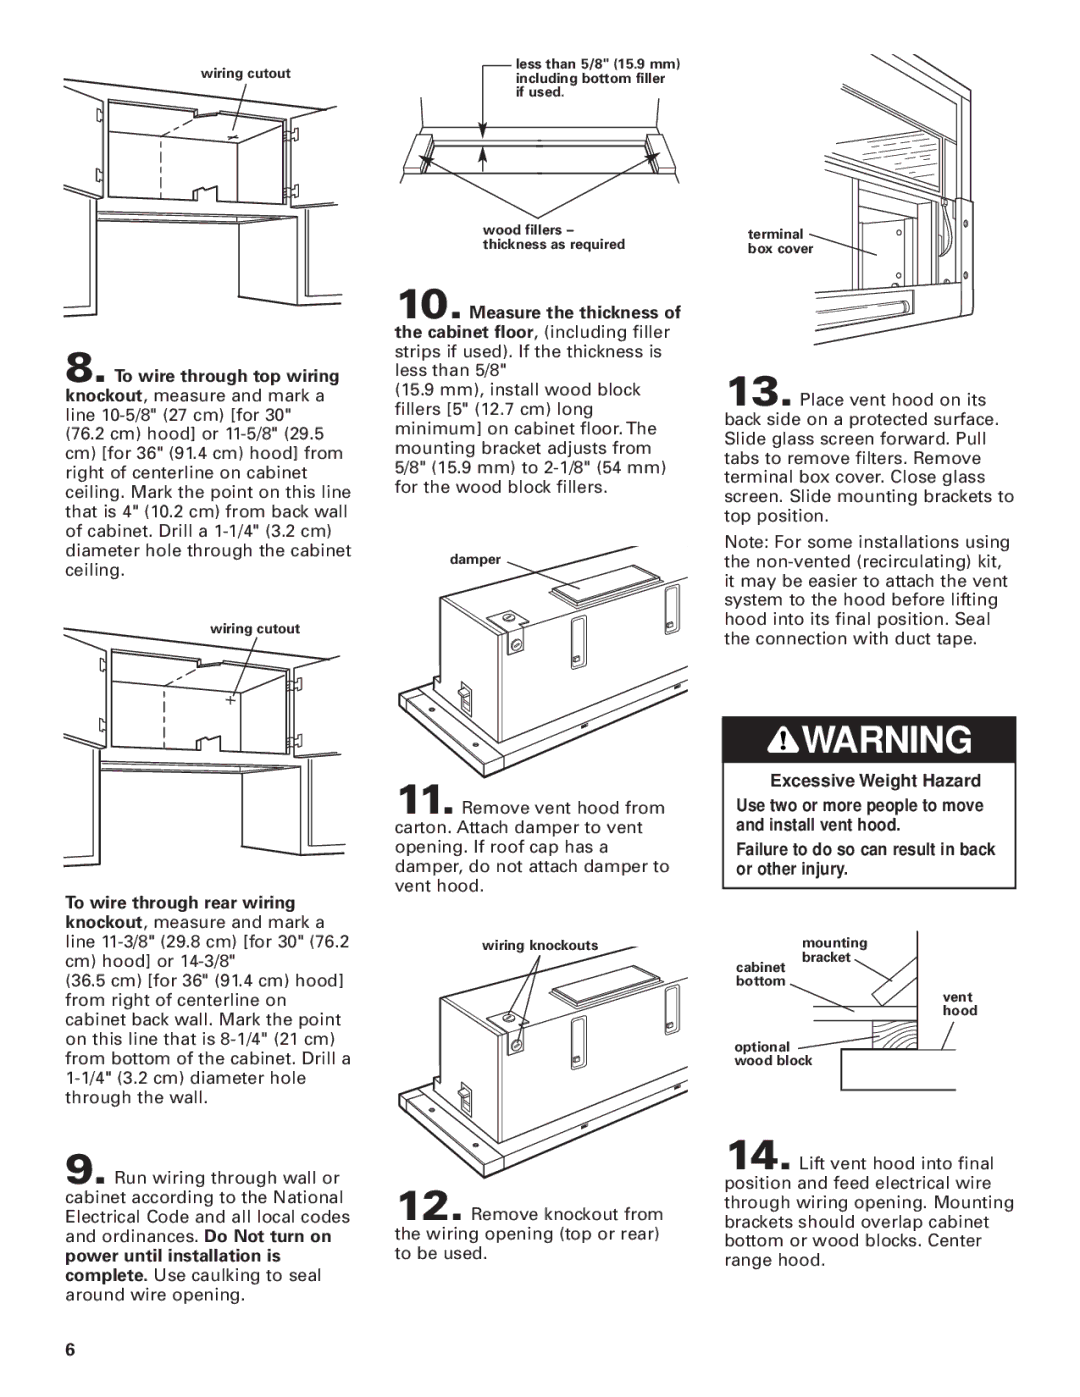
Slide-out Vent Hood specifications
The KitchenAid Slide-out Vent Hood offers an innovative solution to maintaining a clean and comfortable kitchen environment. Designed to seamlessly blend into cabinetry, this vent hood provides functionality without compromising aesthetics. Its slide-out feature allows for easy access and efficient ventilation whenever cooking activities heat up, and it can be conveniently tucked away when not in use, preserving the sleek lines of your kitchen design.One of the main features of the KitchenAid Slide-out Vent Hood is its powerful ventilation system, which effectively captures smoke, steam, and odors, ensuring that your kitchen remains fresh and free from airborne particles. With multiple fan speeds, users can easily adjust the airflow according to their cooking needs. The high-performance blower efficiently moves air, making it suitable for various cooking methods, from gentle simmering to high-heat frying.
In addition to its robust ventilation, this slide-out vent hood is equipped with bright, energy-efficient LED lighting. These lights illuminate the cooking surface below, enhancing visibility and ensuring that every culinary task is well-lit. The LEDs are not only long-lasting but also consume less energy, helping to reduce electricity bills while providing excellent illumination.
The KitchenAid Slide-out Vent Hood features a stainless steel construction, which is not only durable but also adds a modern touch to any kitchen decor. Its easy-to-clean design means that maintenance doesn’t become a chore; simply wipe down the surfaces to keep it looking new.
Another significant characteristic of this vent hood is its integrated grease filters, which are designed to capture and collect grease and other particles effectively. These filters are dishwasher-safe, making them convenient to clean and maintain, allowing for a more hygienic cooking environment.
Moreover, the KitchenAid Slide-out Vent Hood integrates seamlessly with other KitchenAid appliances, creating a cohesive look and feel within your kitchen. With options for customizable sizes and configurations, it can fit perfectly into a variety of kitchen layouts.
In summary, the KitchenAid Slide-out Vent Hood combines style, power, and convenience, making it an essential appliance for any home chef. Its advanced features, modern design, and user-friendly technologies elevate the kitchen experience, ensuring that cooking remains a pleasure rather than a chore.

