Remove Doors and Hinges
![]() WARNING
WARNING
Electrical Shock Hazard
Disconnect power before removing doors.
Failure to do so can result in death or electrical shock.
IMPORTANT:
■Remove food and any adjustable door or utility bins from doors.
■All graphics referenced in the following instructions are included later in this section after “Final Steps.”
TOOLS NEEDED: ⁵⁄₁₆", ³⁄₈", ¹⁄₄"
1.Unplug refrigerator or disconnect power.
2.Keep the refrigerator doors closed until you are ready to lift them free from the cabinet.
NOTE: Provide additional support for the refrigerator door while the hinges are being removed. Do not depend on the door gasket magnets to hold the door in place while you are working.
3.Starting with the
4.Remove the shim from the bottom hinge pin and keep it for later use. See Bottom Hinge graphic.
5.Before removing the
NOTE: The green, ground wire remains attached to the hinge.
6.Remove the parts for the top hinge as shown in Top Hinge graphic. Lift the
7.Remove the shim from the bottom hinge pin and keep it for later use. See Bottom Hinge graphic.
Replace Doors and Hinges
1.Assemble the parts for the top hinge as shown in Top Hinge graphic. Do not tighten the screws completely.
2.Replace the parts for the bottom hinge as shown in Bottom Hinge graphic. Tighten screws. Replace the refrigerator door.
NOTE: Provide additional support for the refrigerator door while the hinges are being moved. Do not depend on the door gasket magnets to hold the door in place while you are working.
3.Align the door so that the bottom of the refrigerator door aligns evenly with the top of the freezer drawer. Tighten all screws.
4.Reconnect the wire harness on top of the
5.Replace the top hinge covers.
Freezer Drawer
Graphics are included later in this section.
Remove Drawer
IMPORTANT: Two people may be required to complete this procedure.
1.Open the freezer drawer to full extension.
2.Remove all articles from baskets.
3.Pull the upper wire basket out to full extension and lift out to remove.
4.Lift lower basket straight up and out to remove.
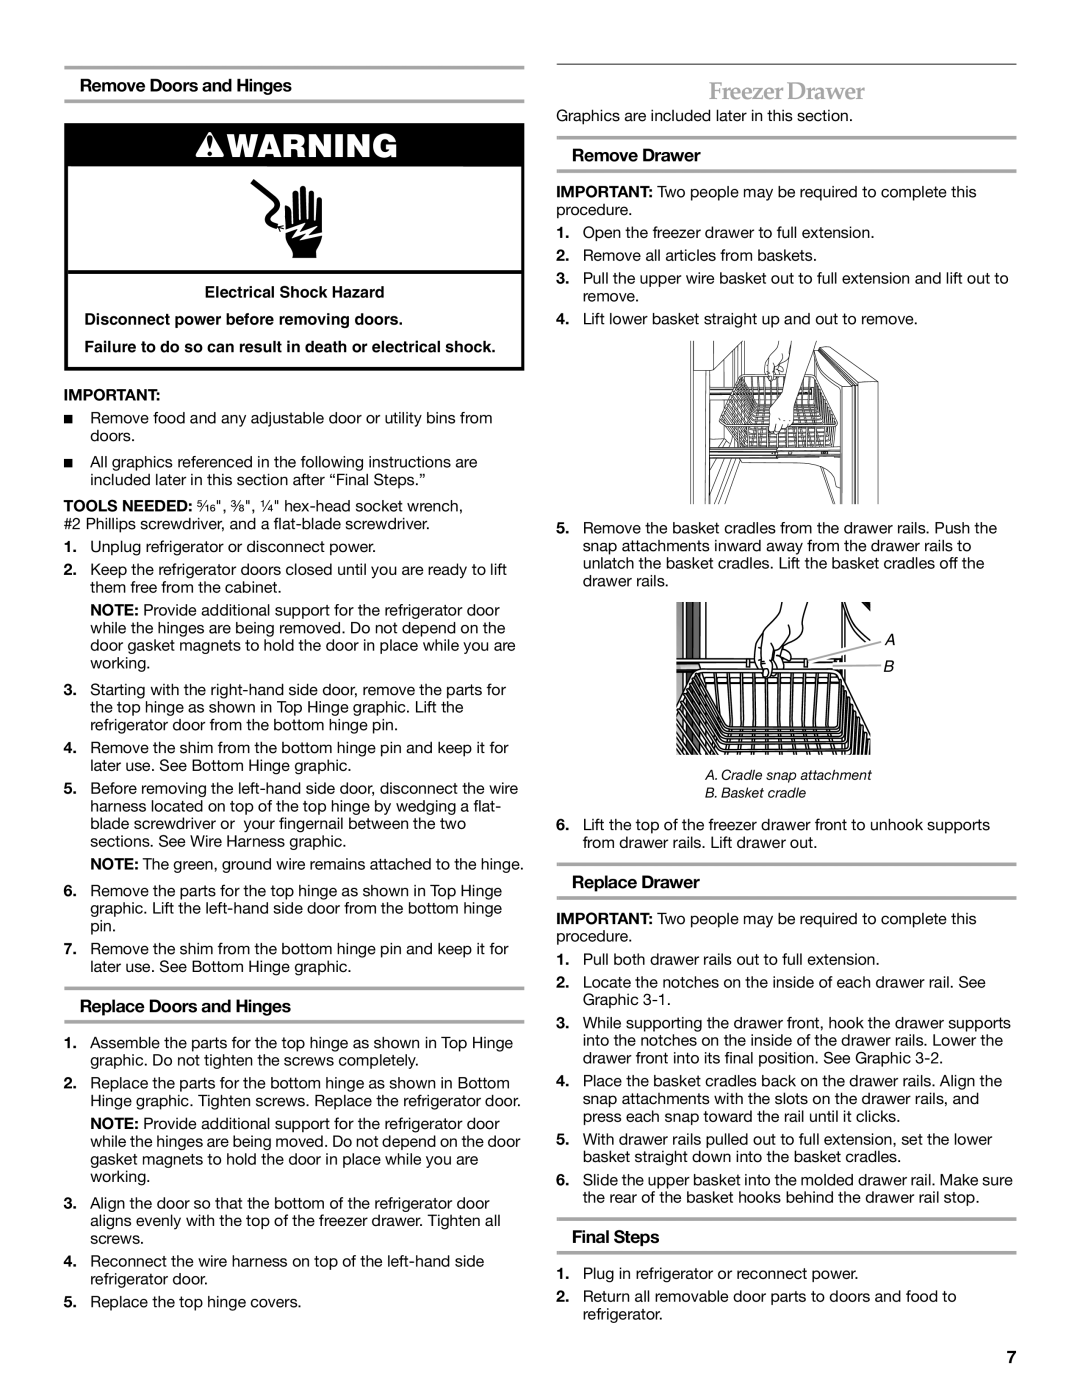
5.Remove the basket cradles from the drawer rails. Push the snap attachments inward away from the drawer rails to unlatch the basket cradles. Lift the basket cradles off the drawer rails.
A
B |
A. Cradle snap attachment
B. Basket cradle
6.Lift the top of the freezer drawer front to unhook supports from drawer rails. Lift drawer out.
Replace Drawer
IMPORTANT: Two people may be required to complete this procedure.
1.Pull both drawer rails out to full extension.
2.Locate the notches on the inside of each drawer rail. See Graphic
3.While supporting the drawer front, hook the drawer supports into the notches on the inside of the drawer rails. Lower the drawer front into its final position. See Graphic
4.Place the basket cradles back on the drawer rails. Align the snap attachments with the slots on the drawer rails, and press each snap toward the rail until it clicks.
5.With drawer rails pulled out to full extension, set the lower basket straight down into the basket cradles.
6.Slide the upper basket into the molded drawer rail. Make sure the rear of the basket hooks behind the drawer rail stop.
Final Steps
1.Plug in refrigerator or reconnect power.
2.Return all removable door parts to doors and food to refrigerator.
7