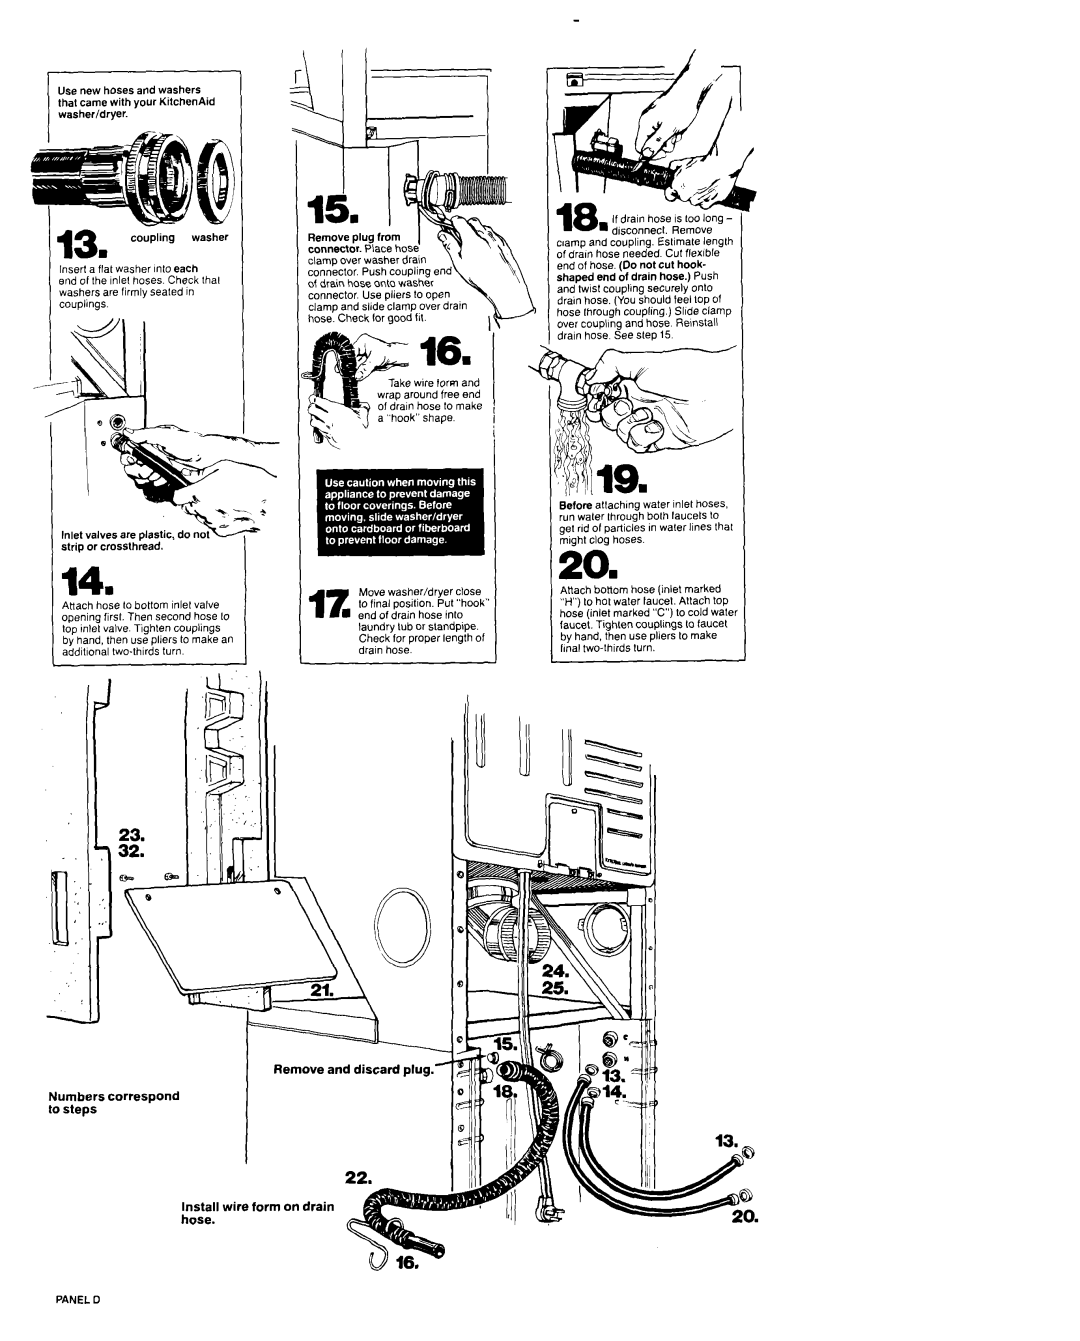
Use new hoses and washers that came with your KitchenAid washer/dryer.
13 coupling washer m
Insert a flat washer Into each
end of the lnlel hoses. Check lhal washers are firmly sealed in couplings.
connector. Use pliers | lo open | \ |
clamp and slide clamp over drain |
| |
hose. Check for good | fll. | I |
dlsconnecL Remove clamp and coupling. Estimate length of dram hose needed. Cut flexible end of hose. (Do not cut hook- shaped end of drain hose.) Push
and twlsl couplmg securely onto I drain hose. (You should tee1 lop Of hose through coupling.) Slide clamp over couplmg and hose. Remstall drain hose. See slep 15.
16n
wire Iorm and wrap around free end of drain hose lo make a “hook” shape.
Met valves are plastic, d strip or crossthread.
Before atlachmg water Inlet hoses, run waler through both laucets IO get rid of particles in waler lines Ihat might clog hoses.
20.
Attach hose to bottom inlet valve opening first. Then second hose IO lop inlet valve. Tighlen couplings by hand, then use pliers to make an addillonal
Numbers correspond to steps
Install wire hose.
Move washer/dryer close
17 lo final position. Put “hook” a end of drain hose into
laundry tub or standpipe. Check for proper length of drain hose.
Remove and discard plug.’
form on drain
Atiach botiom hose (inlet marked “H”) lo hot waler taucel. Attach top hose (inlet marked “C”)lo cold wale1 faucet. Tighten couplings lo faucet by hand, then use pliers to make fmal