
YKHMS175M specifications
The KitchenAid YKHMS175M is a versatile and efficient countertop appliance designed to elevate your culinary experience. This compact microwave oven combines elegance with functionality, making it an ideal addition to any modern kitchen. With a sleek design and a range of impressive features, it stands out as a reliable choice for both seasoned chefs and home cooks alike.One of the key features of the YKHMS175M is its powerful 1.75 cubic feet capacity, allowing for ample cooking space. This model is equipped with a 1000-watt cooking power, enabling it to handle a variety of cooking tasks with ease. Whether you're reheating leftovers, defrosting meats, or preparing popcorn, this microwave provides consistent and efficient results.
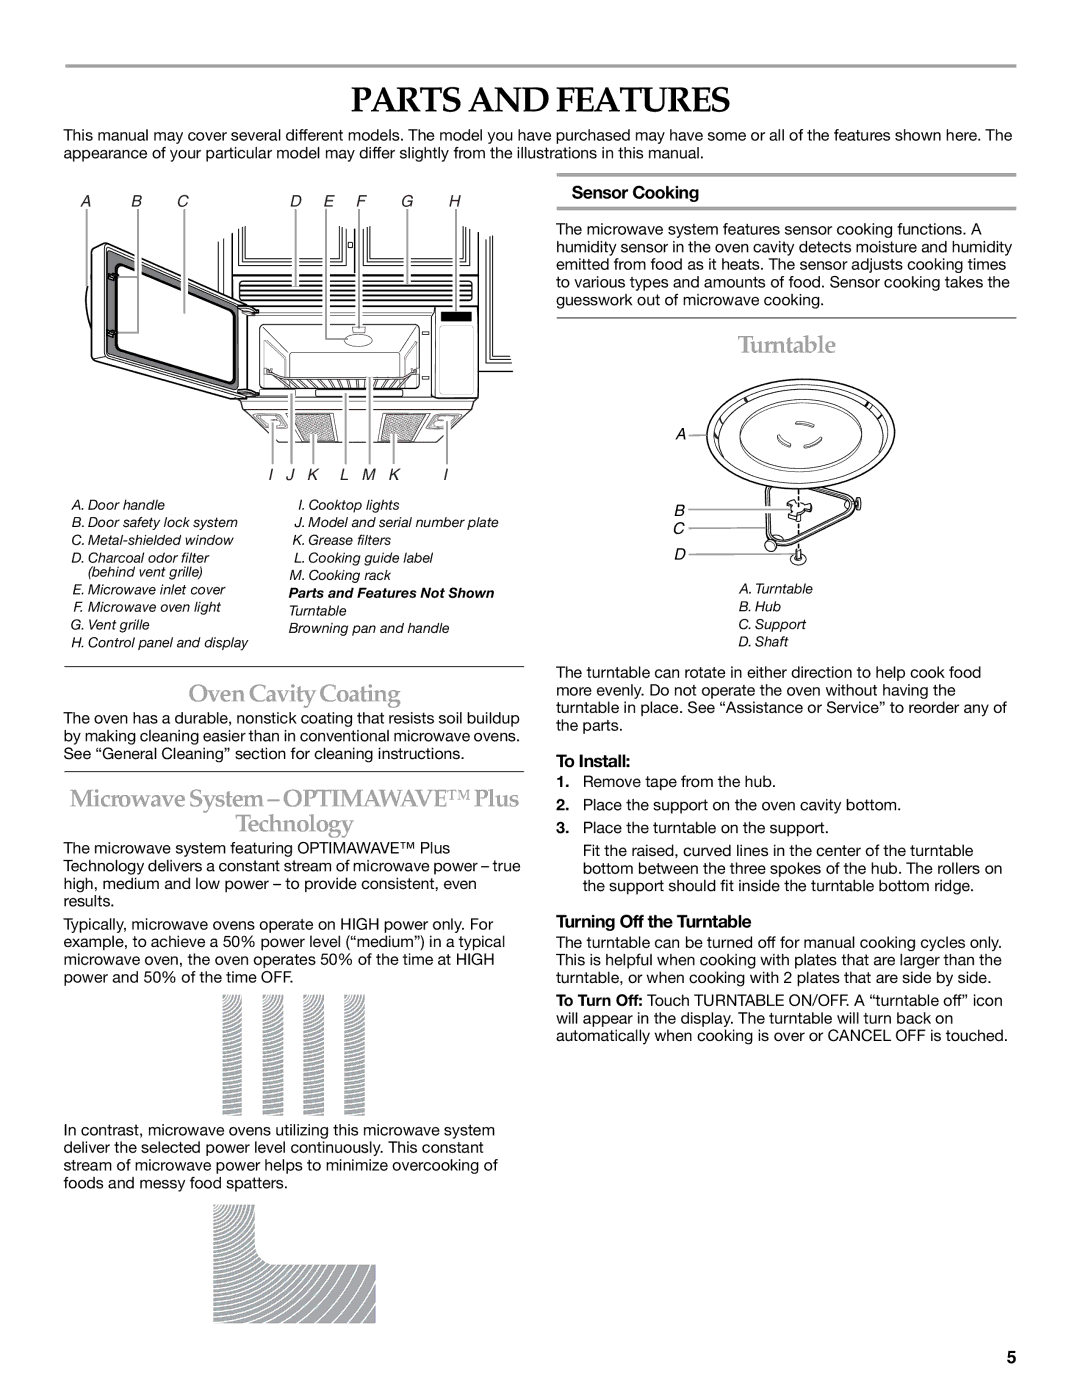
The YKHMS175M integrates innovative cooking technologies, including the Sensor Cooking feature. This technology automatically adjusts cooking times and power levels based on the moisture released during cooking, ensuring optimal results for different food types. Additionally, the microwave offers a range of pre-programmed cooking settings that make meal preparation hassle-free. With quick access to options for popcorn, pizza, and more, cooking favorites has never been easier.
Another standout characteristic of the YKHMS175M is its convenience-focused design. The easy-to-use control panel features a combination of push buttons and a digital display, allowing you to navigate through settings effortlessly. The interior is equipped with a durable and easy-to-clean non-stick coating, keeping maintenance simple and straightforward.
Style is not overlooked in the YKHMS175M, as it features a stainless steel finish that not only complements various kitchen aesthetics but also ensures durability. The microwave can be built into your cabinetry, providing a seamless look while saving counter space.
Safety is a priority with the YKHMS175M. It comes equipped with a child lock, preventing accidental operation and giving parents peace of mind.
The KitchenAid YKHMS175M is a prime example of how advanced technology and thoughtful design come together, making cooking not just easier but also more enjoyable. With its powerful performance, sleek appearance, and rich feature set, it is a top choice for anyone seeking to enhance their kitchen capabilities.