20
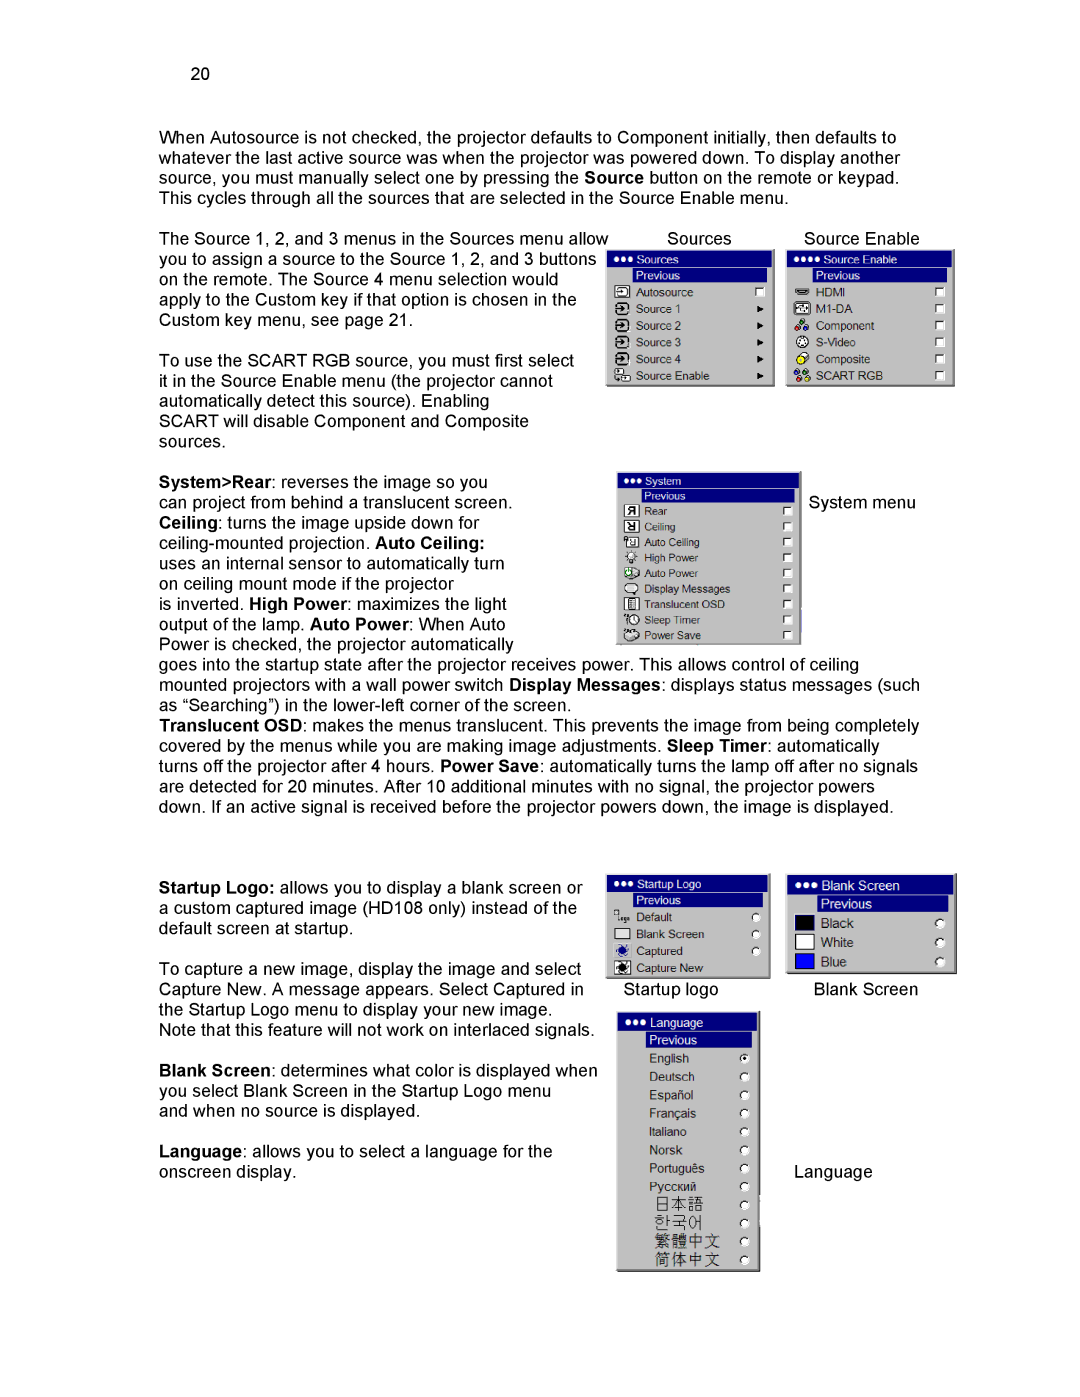
When Autosource is not checked, the projector defaults to Component initially, then defaults to whatever the last active source was when the projector was powered down. To display another source, you must manually select one by pressing the Source button on the remote or keypad. This cycles through all the sources that are selected in the Source Enable menu.
The Source 1, 2, and 3 menus in the Sources menu allow | Sources | Source Enable |
you to assign a source to the Source 1, 2, and 3 buttons |
|
|
on the remote. The Source 4 menu selection would |
|
|
apply to the Custom key if that option is chosen in the |
|
|
Custom key menu, see page 21. |
|
|
To use the SCART RGB source, you must first select it in the Source Enable menu (the projector cannot automatically detect this source). Enabling SCART will disable Component and Composite sources.
System>Rear: reverses the image so you
can project from behind a translucent screen.System menu Ceiling: turns the image upside down for
is inverted. High Power: maximizes the light
output of the lamp. Auto Power: When Auto Power is checked, the projector automatically
goes into the startup state after the projector receives power. This allows control of ceiling mounted projectors with a wall power switch Display Messages: displays status messages (such as “Searching”) in the
Translucent OSD: makes the menus translucent. This prevents the image from being completely
covered by the menus while you are making image adjustments. Sleep Timer: automatically
turns off the projector after 4 hours. Power Save: automatically turns the lamp off after no signals are detected for 20 minutes. After 10 additional minutes with no signal, the projector powers down. If an active signal is received before the projector powers down, the image is displayed.
Startup Logo: allows you to display a blank screen or a custom captured image (HD108 only) instead of the default screen at startup.
To capture a new image, display the image and select |
|
|
Capture New. A message appears. Select Captured in | Startup logo | Blank Screen |
the Startup Logo menu to display your new image. |
|
|
Note that this feature will not work on interlaced signals. |
|
|
Blank Screen: determines what color is displayed when |
|
|
you select Blank Screen in the Startup Logo menu |
|
|
and when no source is displayed. |
|
|
Language: allows you to select a language for the |
|
|
onscreen display. |
| Language |
