22
Maintenance
Cleaning the lens
1Apply a
•Avoid using an excessive amount of cleaner, and don’t apply the cleaner directly to the lens. Abrasive cleaners, solvents or other harsh chemicals might scratch the lens.
2 Lightly wipe the cleaning cloth over the lens in a circular motion.
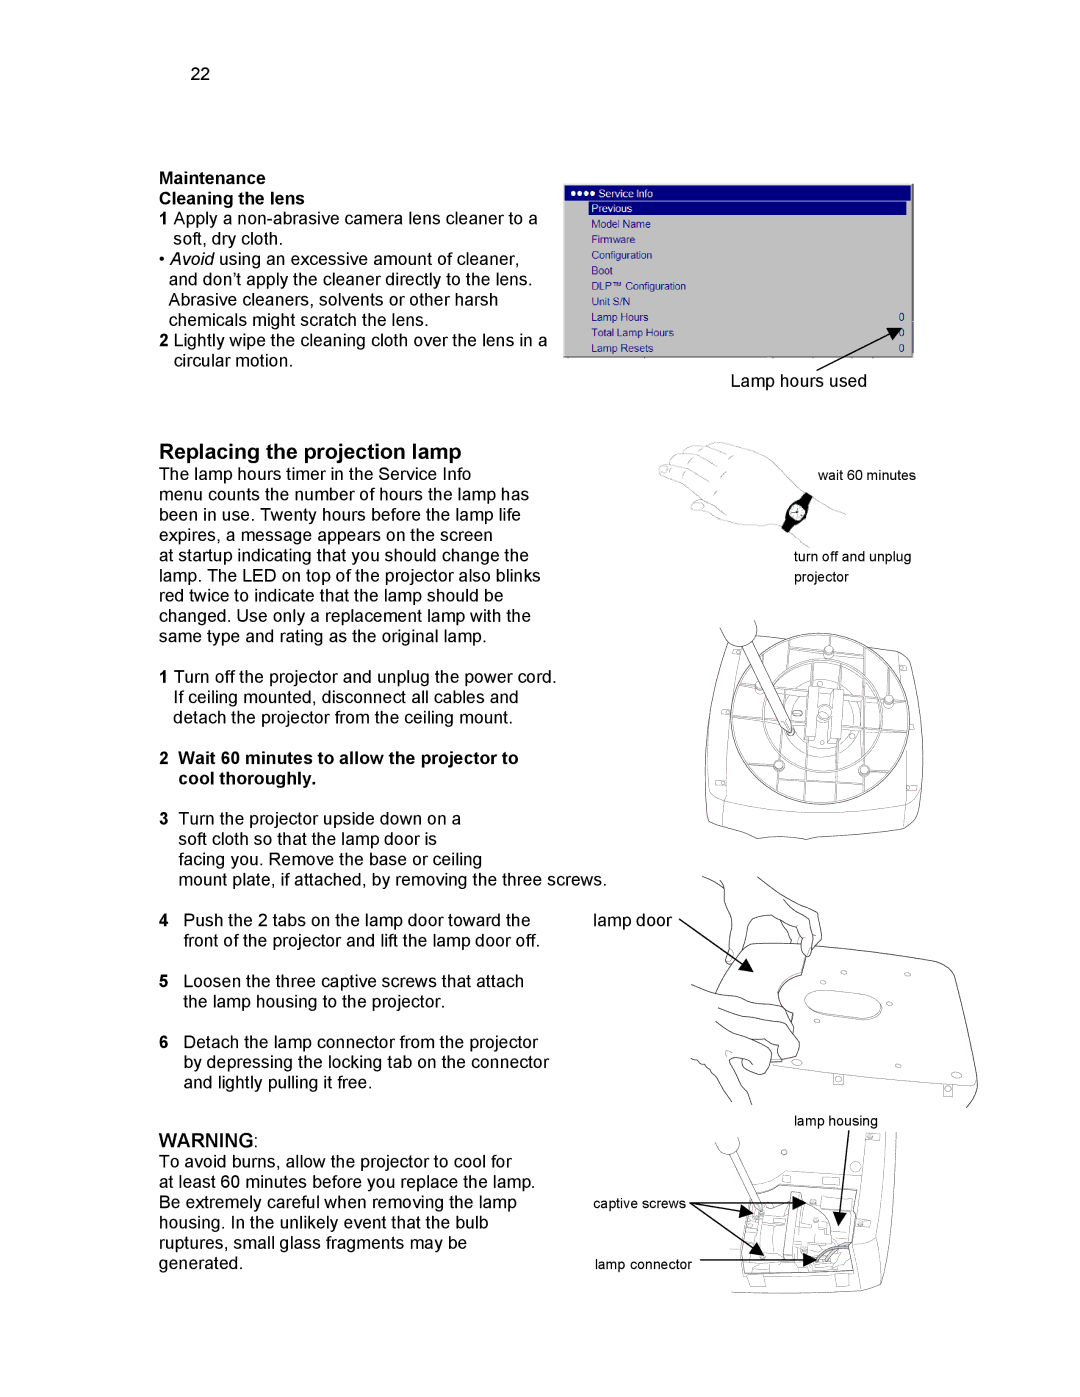
Lamp hours used
Replacing the projection lamp
The lamp hours timer in the Service Info
menu counts the number of hours the lamp has been in use. Twenty hours before the lamp life expires, a message appears on the screen
at startup indicating that you should change the lamp. The LED on top of the projector also blinks red twice to indicate that the lamp should be changed. Use only a replacement lamp with the same type and rating as the original lamp.
1 Turn off the projector and unplug the power cord. If ceiling mounted, disconnect all cables and detach the projector from the ceiling mount.
2Wait 60 minutes to allow the projector to cool thoroughly.
3Turn the projector upside down on a soft cloth so that the lamp door is facing you. Remove the base or ceiling
mount plate, if attached, by removing the three screws.
wait 60 minutes
turn off and unplug projector
4 | Push the 2 tabs on the lamp door toward the | lamp door |
| front of the projector and lift the lamp door off. |
|
5 | Loosen the three captive screws that attach |
|
| the lamp housing to the projector. |
|
6 | Detach the lamp connector from the projector |
|
| by depressing the locking tab on the connector |
|
| and lightly pulling it free. |
|
lamp housing
WARNING:
To avoid burns, allow the projector to cool for
at least 60 minutes before you replace the lamp. Be extremely careful when removing the lamp housing. In the unlikely event that the bulb ruptures, small glass fragments may be generated.
captive screws |
lamp connector
