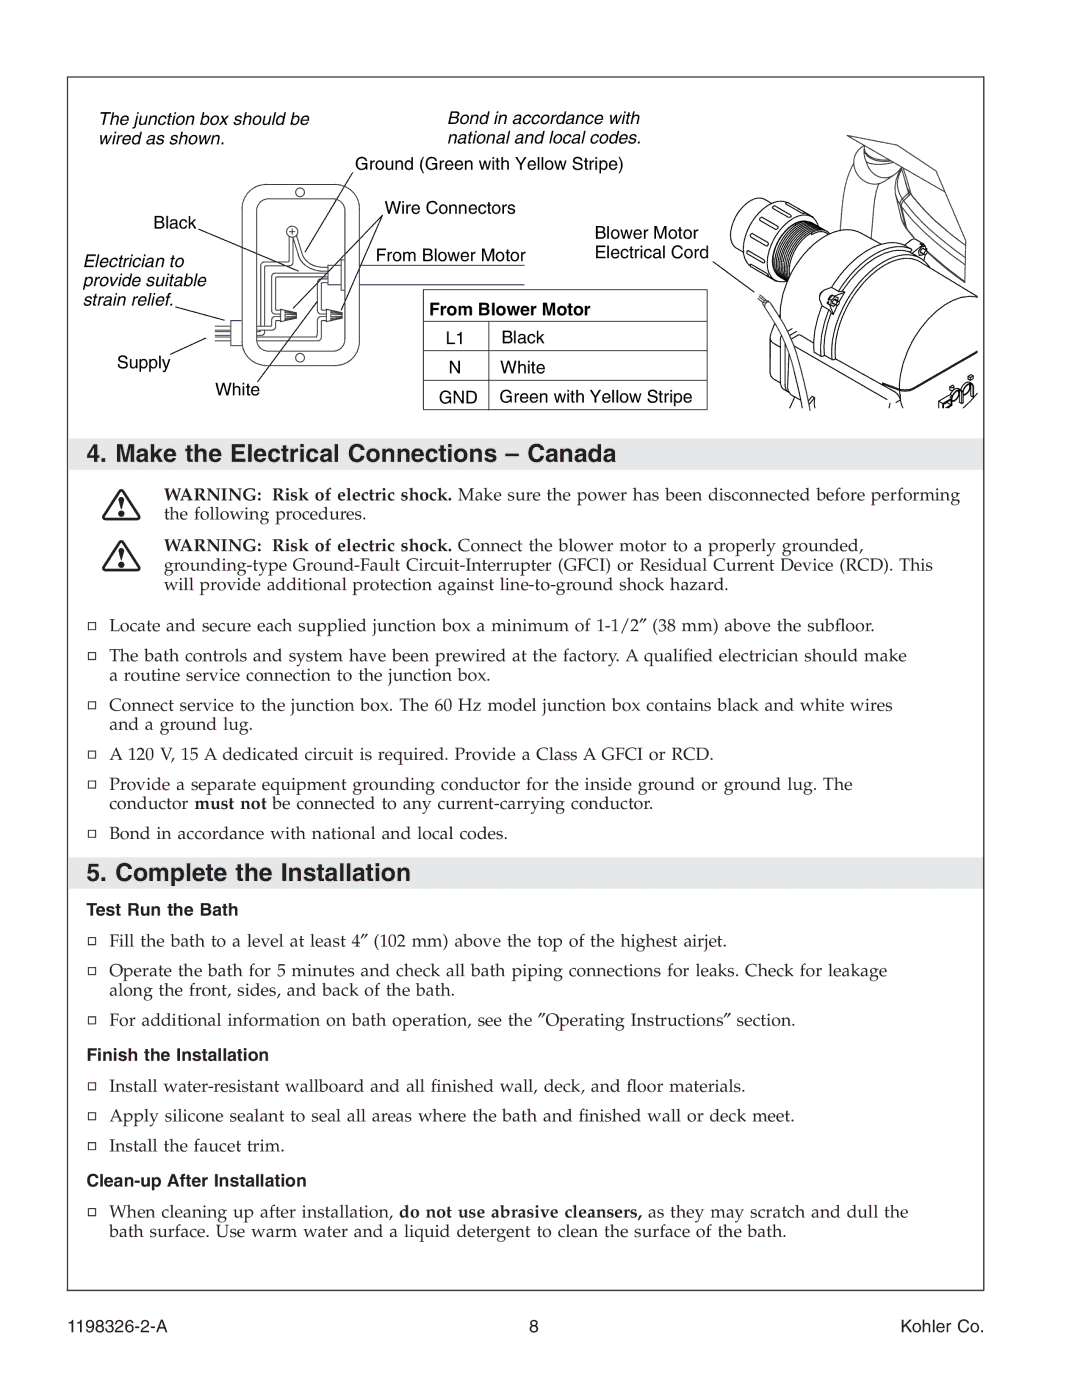
The junction box should be wired as shown.
Black
Electrician to provide suitable strain relief.
Supply
White
Bond in accordance with national and local codes.
Ground (Green with Yellow Stripe)
| Wire Connectors | Blower Motor | ||||
| ||||||
|
|
|
|
|
| |
| From Blower Motor |
| Electrical Cord | |||
|
|
|
|
|
| |
|
|
|
|
| ||
|
| From Blower Motor |
| |||
|
|
|
|
| ||
|
| L1 | Black |
| ||
|
|
| ||||
|
|
|
|
| ||
|
| N | White |
| ||
|
|
|
| |||
|
| GND | Green with Yellow Stripe | |||
4. Make the Electrical Connections – Canada
WARNING: Risk of electric shock. Make sure the power has been disconnected before performing the following procedures.
WARNING: Risk of electric shock. Connect the blower motor to a properly grounded,
Locate and secure each supplied junction box a minimum of
The bath controls and system have been prewired at the factory. A qualified electrician should make a routine service connection to the junction box.
Connect service to the junction box. The 60 Hz model junction box contains black and white wires and a ground lug.
A 120 V, 15 A dedicated circuit is required. Provide a Class A GFCI or RCD.
Provide a separate equipment grounding conductor for the inside ground or ground lug. The conductor must not be connected to any
Bond in accordance with national and local codes.
5. Complete the Installation
Test Run the Bath
Fill the bath to a level at least 4″ (102 mm) above the top of the highest airjet.
Operate the bath for 5 minutes and check all bath piping connections for leaks. Check for leakage along the front, sides, and back of the bath.
For additional information on bath operation, see the ″Operating Instructions″ section.
Finish the Installation
Install
Apply silicone sealant to seal all areas where the bath and finished wall or deck meet.
Install the faucet trim.
Clean-up After Installation
When cleaning up after installation, do not use abrasive cleansers, as they may scratch and dull the bath surface. Use warm water and a liquid detergent to clean the surface of the bath.
8 | Kohler Co. |
