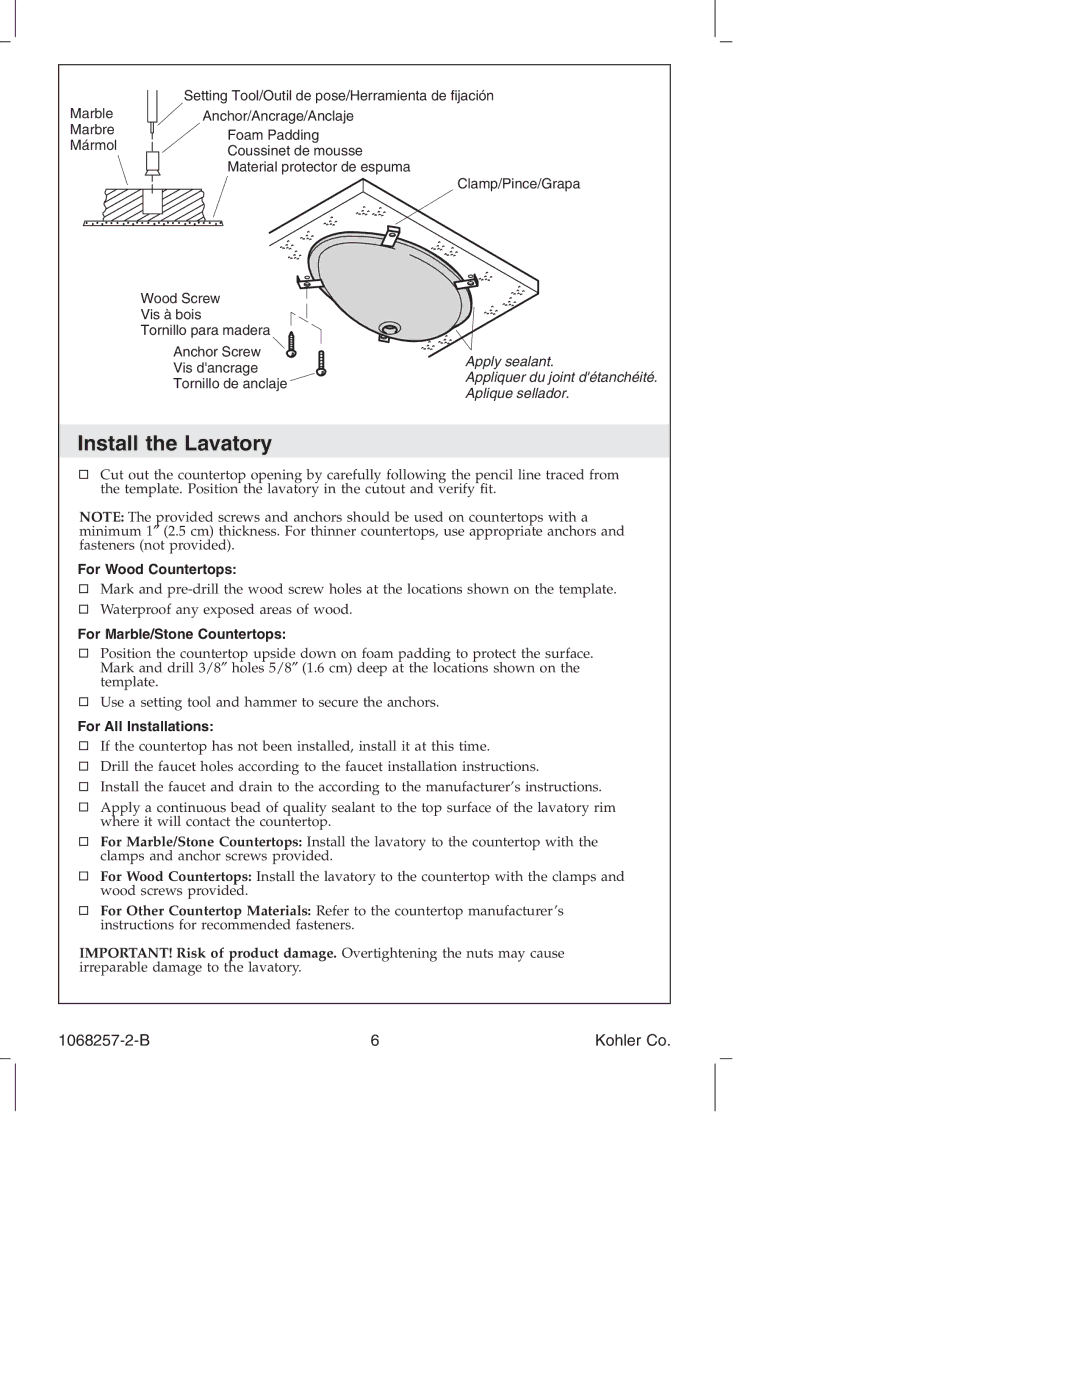
K-2210, K-2209, K-2205, K-2214, K-2211 specifications
Kohler is a renowned name in bathroom and kitchen fixtures, and their range of toilets exemplifies innovation and quality. The Kohler K-2210, K-2211, K-2205, K-2214, and K-2209 are exemplary models, each designed to offer unique features and advanced technology to enhance user experience.The Kohler K-2210 is a one-piece toilet that stands out for its sleek design and compact footprint. This model incorporates the revolutionary AquaPiston flushing system, which delivers a powerful flush with minimal water usage. The K-2210 is also ADA-compliant, ensuring comfort and accessibility for all users.
Next in line, the K-2211 model presents a modern aesthetic combined with efficiency. Similar to the K-2210, it employs the AquaPiston technology, guaranteeing a clean and effective flush every time. The K-2211 features a comfortable height that allows for easy accessibility, making it a great choice for families and individuals with mobility challenges.
The Kohler K-2205 model introduces a unique design that makes it a focal point in any bathroom. It includes the Comfort Height feature, providing a taller bowl for added convenience. This model is also equipped with the Ingenium flushing system, designed to optimize water usage while ensuring powerful performance. The K-2205’s streamlined style enhances both form and function, making it suitable for modern home aesthetics.
The K-2214 model offers an exceptional balance of style and performance. Its dual flush system allows users to select between a full flush or a reduced flush, promoting water conservation. The K-2214 is designed for ease of cleaning with its seamless, one-piece construction, eliminating hard-to-reach areas where dirt and grime can accumulate.
Finally, the K-2209 model combines elegance and efficiency with a sophisticated elongated bowl design. This model utilizes the innovative CleanCoat technology, which repels water and helps maintain a cleaner bowl for longer periods. The K-2209’s ergonomic height offers added comfort, making it a popular choice for those seeking both functionality and style in their bathroom fixtures.
Together, these Kohler models represent the brand’s commitment to quality, cutting-edge technology, and user-centered design. With features that prioritize comfort, efficiency, and ease of maintenance, these toilets are excellent additions to any modern bathroom. Choosing a Kohler toilet means investing in long-lasting performance and timeless style.