Electrical Connection
WARNING! This appliance is equipped with a
This unit requires a 15 amp polarized and grounded wall outlet. Failure to proper polarize the outlet may cause erratic discharges from the burner spark system. This unit is supplied with a
Room Ventilation
An exhaust fan may be used with the appliance; in each case it shall be installed in conformity with all Federal, state and local building codes. Please note that the use of an exhaust hood may affect other vented appliances
Conversion of unit to operate on L.P. Gas
WARNING! This conversion must be performed by a certified and licensed gas installer. Failure to comply may result in improper operation, which could result in injury or death. Please consult your local governing officials for all Federal, State and local building codes. Failure to comply may result in the voiding of the product warranty.
Note:
This unit is shipped from the factory to operate on NATURAL gas. The following procedures are to covert from NAT to Liquid propane (L.P.) operation.
Replacement procedure- burner orifices
1)Remove all burner grates and place in a secured location.
2)Remove all five burner caps and flame spreader and place in a secured location.
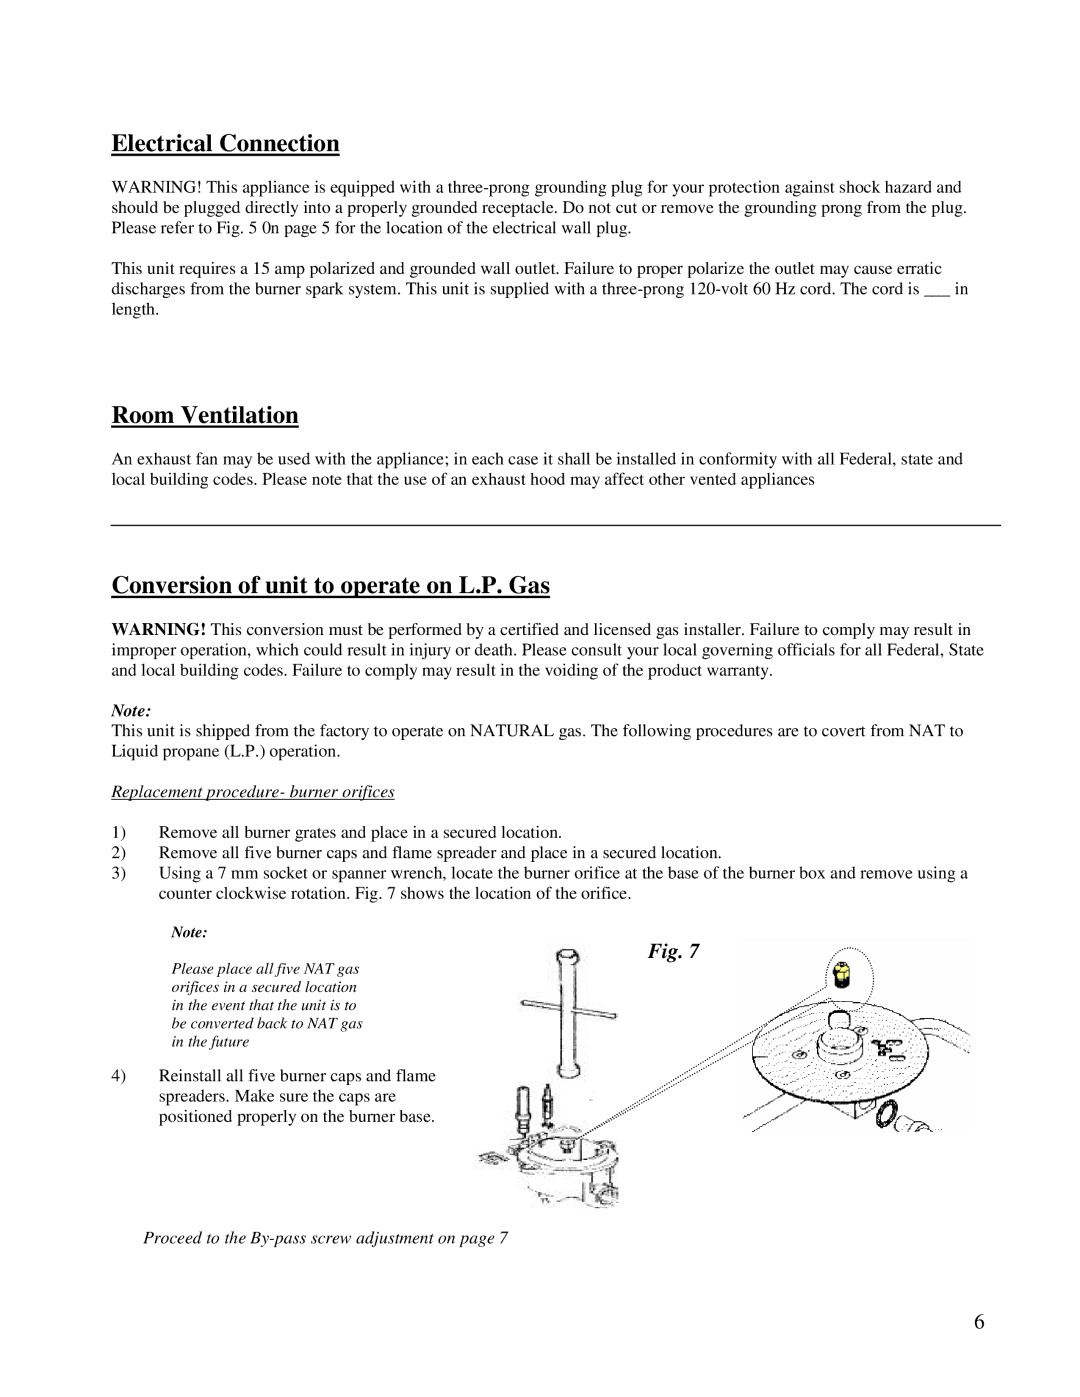
3)Using a 7 mm socket or spanner wrench, locate the burner orifice at the base of the burner box and remove using a counter clockwise rotation. Fig. 7 shows the location of the orifice.
Note:
Fig. 7
Please place all five NAT gas orifices in a secured location in the event that the unit is to be converted back to NAT gas in the future
4)Reinstall all five burner caps and flame spreaders. Make sure the caps are positioned properly on the burner base.
Proceed to the By-pass screw adjustment on page 7
6
