2.Press and hold the SET key for about 2 seconds, then the "RESET" icon will appear at the bottom part of the LCD.
3.Press the + key once, then the stored value will be reset to the current value
| and current time. |
4. | Press the ALARM key to return to normal display mode. |
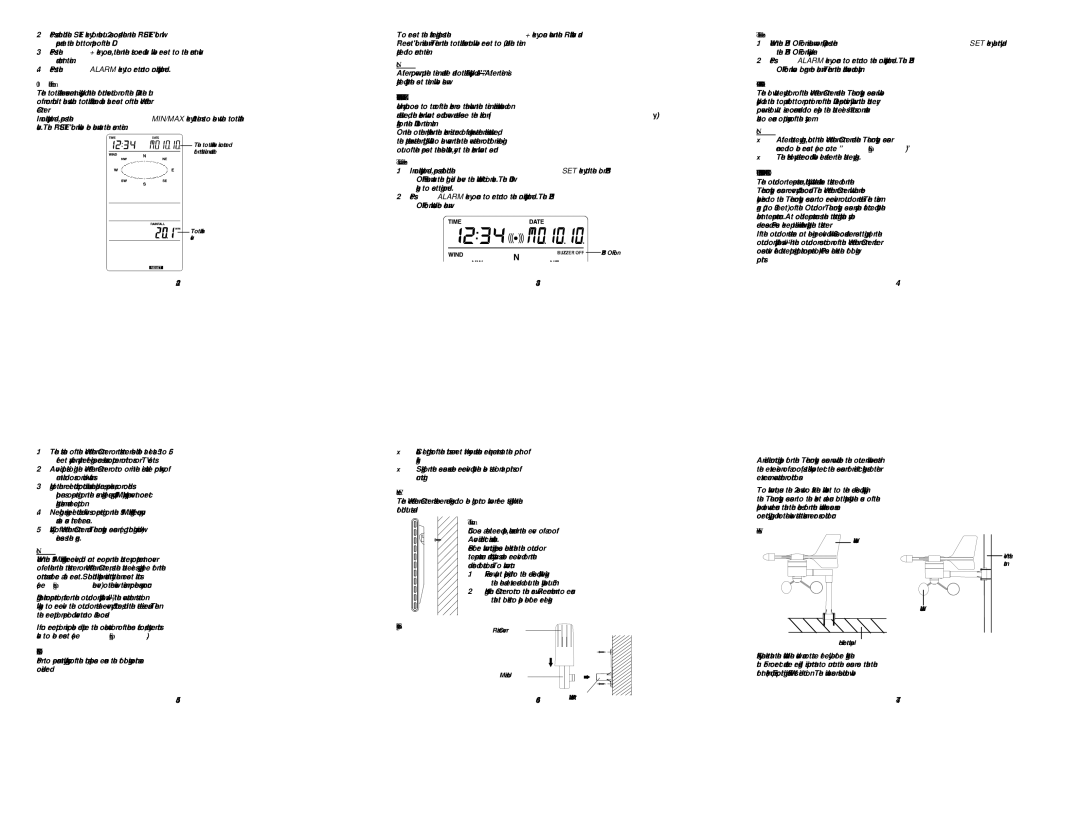
10.Total rainfall amount
The total rainfall measurement is displayed in the fourth section of the LCD, in the unit of mm or inch. It shows the total rainfall accumulated since last reset of the Weather Center.
In normal display mode, press the MIN/MAX key 10 times to show the total rainfall value. The "RESET" icon will also be shown at the same time.
![]()
![]()
![]()
![]() The total rainfall value is counted from this time and date
The total rainfall value is counted from this time and date
![]()
![]()
![]() Total rainfall
Total rainfall
value
42
1.The distance of the Weather Center or transmitter should be at least 5 to 6.5 feet away from any interfering sources such as computer monitors or TV sets.
2.Avoid positioning the Weather Center onto or in the immediate proximity of metal doors or window frames.
3.Using other electrical products such as headphones, speakers, or cordless phones operating on the same signal frequency (915 MHz) may prevent correct signal transmission and reception.
4.Neighbors using electrical devices operating on the 915 MHz signal frequency can also cause interference.
5.“Visibility” of Weather Center and
Note:
When the 915 MHz signal is received, do not
During normal operation, after the outdoor display shows "- -
If no reception is possible despite the observation of these factors, all system units have to be reset (see Setting up).
POSITIONING
Prior to permanently affixing any of the units, please ensure the following points are considered:
45
To reset the rainfall reading, press the + key once when the Rainfall value and "Reset" icon is shown. Then the total rainfall amount will be reset to 0, and the time updated to current time.
Note:
After power up, the time and date and total rainfall is displayed as "- -
SWITCHING ON/OFF THE BUZZER
User may choose to turn off the buzzer so that when the time alarm is switched on and activated, the buzzer will not sound but we can still see the alarm icon (((y)))
flashing on the LCD for time alarm.
On the other hand, when the buzzer is turned off and any weather alarm is activated, the particular weather digits will flash to show user that the weather condition is being out of the preset threshold value, yet the buzzer will not sound.
To switch off the buzzer:
1.In normal display mode, press and hold the SET key until the icon "BUZZER OFF" is shown at the right side above the Wind direction scale. The LCD will change to setting mode.
2.Press ALARM key once to return to the normal display mode. The "BUZZER OFF" icon will still be shown.
![]()
![]()
![]()
![]()
![]()
![]()
![]() BUZZER OFF icon
BUZZER OFF icon
43
•Cable lengths of the units meet with your distance requirements at the point of fixing
•Signals from the sensors can be received by the base station at points of mounting
Weather Center
The Weather Center has been designed to be hung onto wall or free standing with the foldout stand.
To wall mount
Choose a sheltered place, such as under the eve of a roof. Avoid direct rain and sunshine.
Before wall mounting, please check that the outdoor temperature and humidity values can be received from the desired locations. To wall mount:
1. Fix a screw (not supplied) into the desired wall, leaving the head extended out the by about 5mm.
2. Hang the Center onto the screw. Remember to ensure that it locks into place before releasing.
Rain Cover |
|
| |
|
| ||
|
|
| |
| Main Unit |
| |
|
| ||
|
| ||
|
| ||
|
|
|
|
46 | Wall Bracket |
To re-enable the buzzer:
1.When the BUZZER OFF icon is shown on LCD, press the SET key shortly and the BUZZER OFF icon will disappear.
2.Press ALARM key once to return to the normal display mode. The "BUZZER OFF" icon will no longer be shown. Then the alarm will sound normally.
LOW BATTERY INDICATOR
The low battery indicator of the Weather Center and the
Note:
•After battery change, both the Weather Center and the
•The History data record will be clear after the battery change.
OUTDOOR TRANSMITTER 915 MHz RECEPTION
The outdoor temperature, humidity, wind data and rainfall are transmitted from the
If the outdoor data are not being received within 30 seconds after setting up (or the outdoor display shows “- -
44
An ideal mounting place for the
To wall mount, use the 2 screws to affix the wall bracket to the desired wall, plug in the
Wind Sensor
Wind vane
Vertical mast
Wind fan
Horizontal panel
Firstly, check that the
47