∙LCD contrast selectable
∙Low battery indicator
∙Storage of 140 sets of history weather data recorded in
∙Wireless transmission at 915 MHz
∙Transmission range up to 330 feet/100 meters
The Thermo-hygro Transmitter
∙Remote transmission of the outdoor temperature and humidity to the Weather Center at 915 MHz (open air)
∙Rain resistant casing
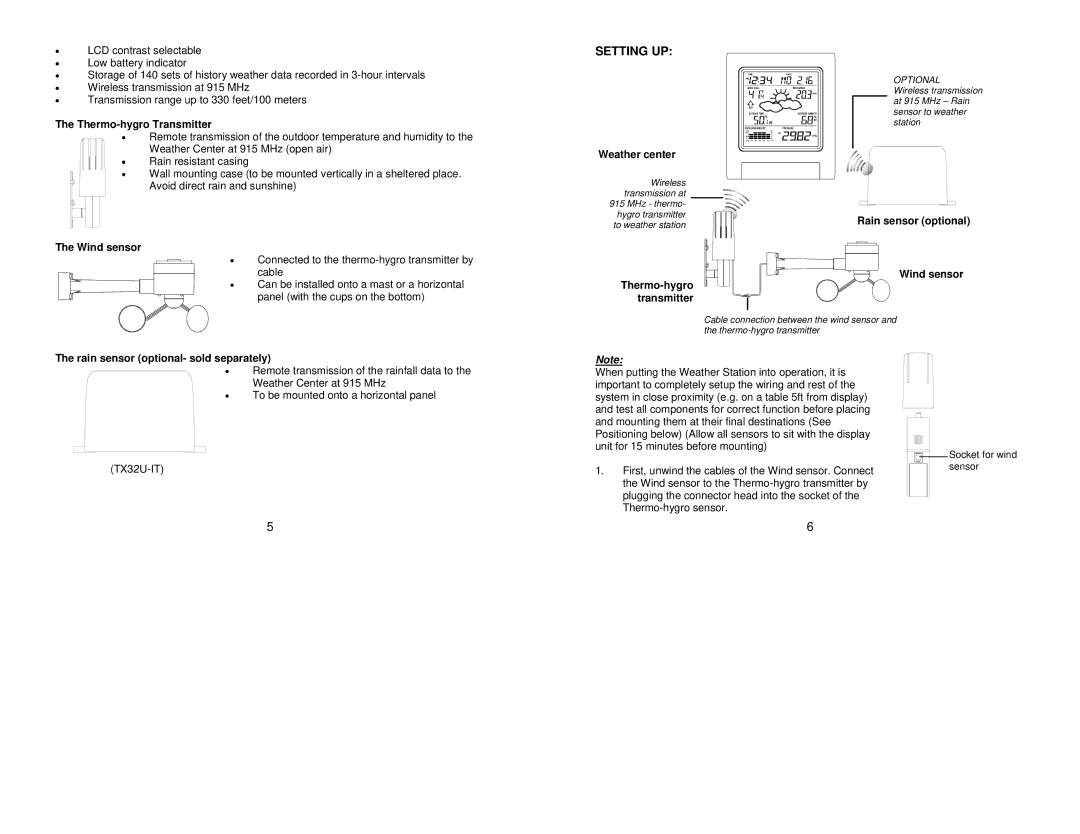
SETTING UP:
Weather center
OPTIONAL
Wireless transmission at 915 MHz – Rain sensor to weather station
∙ Wall mounting case (to be mounted vertically in a sheltered place. Avoid direct rain and sunshine)
The Wind sensor
∙ Connected to the
∙ Can be installed onto a mast or a horizontal panel (with the cups on the bottom)
Wireless transmission at
915MHz - thermo- hygro transmitter
to weather station
Rain sensor (optional)
Wind sensor
Cable connection between the wind sensor and the
The rain sensor (optional- sold separately)
∙ Remote transmission of the rainfall data to the Weather Center at 915 MHz
∙To be mounted onto a horizontal panel
5
Note:
When putting the Weather Station into operation, it is important to completely setup the wiring and rest of the system in close proximity (e.g. on a table 5ft from display) and test all components for correct function before placing and mounting them at their final destinations (See Positioning below) (Allow all sensors to sit with the display unit for 15 minutes before mounting)
1.First, unwind the cables of the Wind sensor. Connect the Wind sensor to the
6
![]() Socket for wind
Socket for wind ![]() sensor
sensor
