Land Pride | Table of Contents |
Section 1: Assembly &
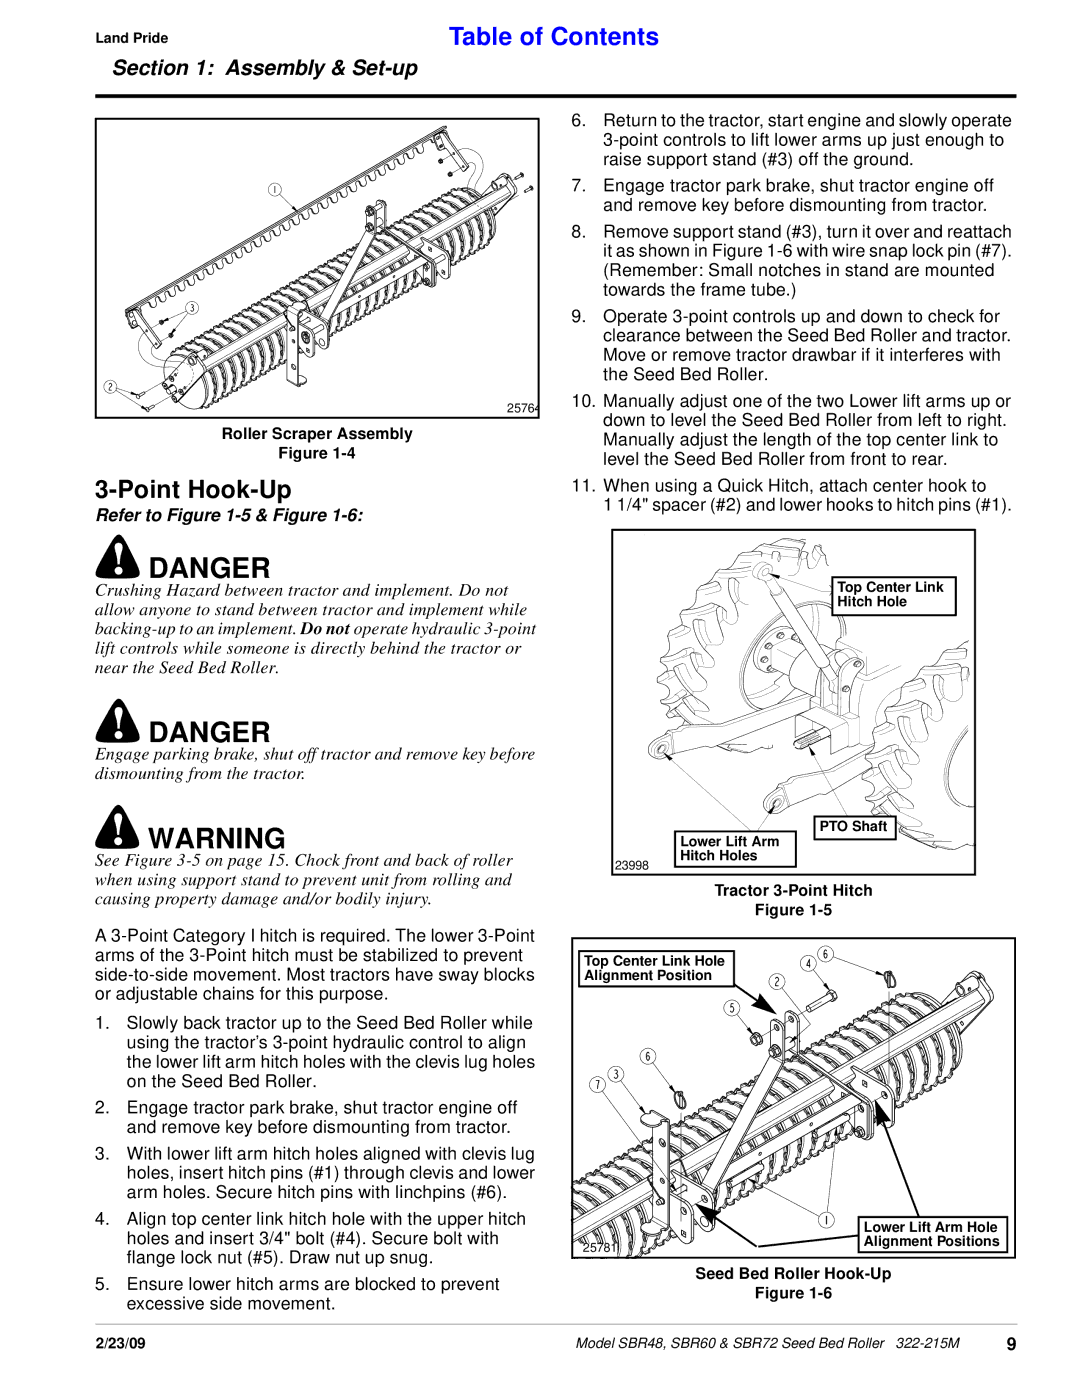
25764 |
Roller Scraper Assembly
Figure
3-Point Hook-Up
Refer to Figure 1-5 & Figure 1-6:
!DANGER
Crushing Hazard between tractor and implement. Do not allow anyone to stand between tractor and implement while
!DANGER
Engage parking brake, shut off tractor and remove key before dismounting from the tractor.
!WARNING
See Figure
A
1.Slowly back tractor up to the Seed Bed Roller while using the tractor’s
2.Engage tractor park brake, shut tractor engine off and remove key before dismounting from tractor.
3.With lower lift arm hitch holes aligned with clevis lug holes, insert hitch pins (#1) through clevis and lower arm holes. Secure hitch pins with linchpins (#6).
4.Align top center link hitch hole with the upper hitch holes and insert 3/4" bolt (#4). Secure bolt with flange lock nut (#5). Draw nut up snug.
5.Ensure lower hitch arms are blocked to prevent excessive side movement.
6.Return to the tractor, start engine and slowly operate
7.Engage tractor park brake, shut tractor engine off and remove key before dismounting from tractor.
8.Remove support stand (#3), turn it over and reattach it as shown in Figure
9.Operate
10.Manually adjust one of the two Lower lift arms up or down to level the Seed Bed Roller from left to right. Manually adjust the length of the top center link to level the Seed Bed Roller from front to rear.
11.When using a Quick Hitch, attach center hook to
1 1/4" spacer (#2) and lower hooks to hitch pins (#1).
![]()
![]() Top Center Link
Top Center Link
![]()
![]()
![]()
![]()
![]()
![]() Hitch Hole
Hitch Hole
PTO Shaft
Lower Lift Arm
Hitch Holes
23998 |
|
Tractor | |
| Figure |
Top Center Link Hole |
|
Alignment Position |
|
| Lower Lift Arm Hole |
25781 | Alignment Positions |
| |
Seed Bed Roller
Figure
2/23/09 | Model SBR48, SBR60 & SBR72 Seed Bed Roller | 9 |