E93 specifications
The Lenovo E93 is a powerful and versatile desktop computer that caters to the needs of both business and personal users. This compact system is designed to deliver high performance while occupying minimal desk space, making it an ideal choice for modern work environments where efficiency and productivity are paramount.One of the standout features of the Lenovo E93 is its performance. Powered by the latest Intel Core processors, it provides ample processing power for multitasking and demanding applications. Users can choose from different configurations that include varying RAM options, generally starting from 8GB and can be expanded up to 32GB, facilitating smooth operation even when running multiple applications simultaneously.
In terms of storage, the E93 offers a range of SSD and HDD options. With SSD drives, users experience faster boot times, reduced load times for applications, and overall increased responsiveness. The device also supports hybrid storage configurations, allowing for an ideal balance between speed and capacity.
The E93 incorporates advanced connectivity options, which are crucial for any modern desktop. It features multiple USB 3.2 ports, HDMI, and DisplayPort outputs, ensuring compatibility with a wide range of peripherals and external displays. Users can easily connect to high-speed networks, with support for both wired Ethernet and wireless connectivity options.
Security is a key focus of the Lenovo E93. It includes features such as a Trusted Platform Module (TPM) for secure encryption, and various biometric options like a fingerprint scanner, which ensures that sensitive data remains protected from unauthorized access. In addition, it has been designed to meet various compliance standards, making it suitable for enterprise environments.
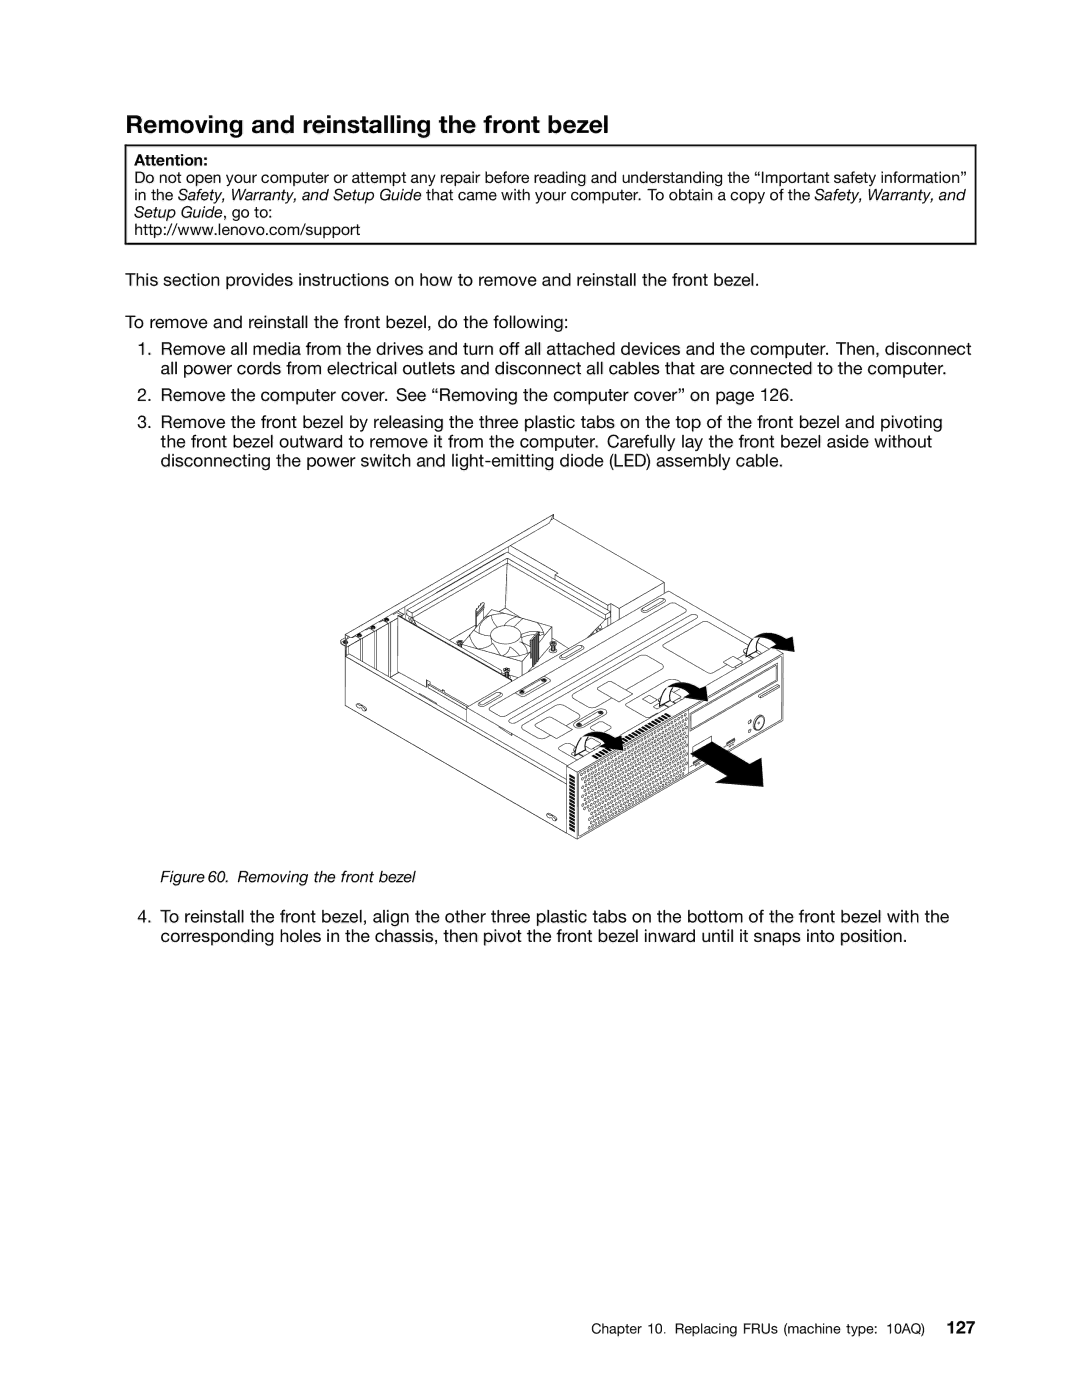
The design of the E93 is both functional and aesthetically pleasing. It sports a compact chassis that can be easily integrated into different workspace setups. The convenience of tool-less access to components also enhances serviceability, allowing for easy upgrades and repairs.
For users who place importance on energy efficiency, the Lenovo E93 is ENERGY STAR certified. This makes it an environmentally friendly choice, reducing energy costs while lessening its overall carbon footprint.
Overall, the Lenovo E93 stands out as a robust desktop solution tailored to meet the diverse needs of users in both professional and personal contexts. With its impressive performance, comprehensive security features, and potential for future upgrades, it is well-equipped to handle today's demanding computing tasks while being mindful of efficiency and design.