Manuals
/
Lenovo
/
Computer Equipment
/
Laptop
Lenovo
Y471A
manual
Appendix. CRU instructions
Models:
Y471A
1
41
49
49
Download
49 pages
44.41 Kb
38
39
40
41
42
43
44
45
Troubleshooting
Password
Indicators Volume buttons
„ Connecting to the power
„ Software configuration
Display problems
„ Checking battery status
Performing dust cleaning
„ Creating a recovery discs
Wi-Fi
Page 41
Image 41
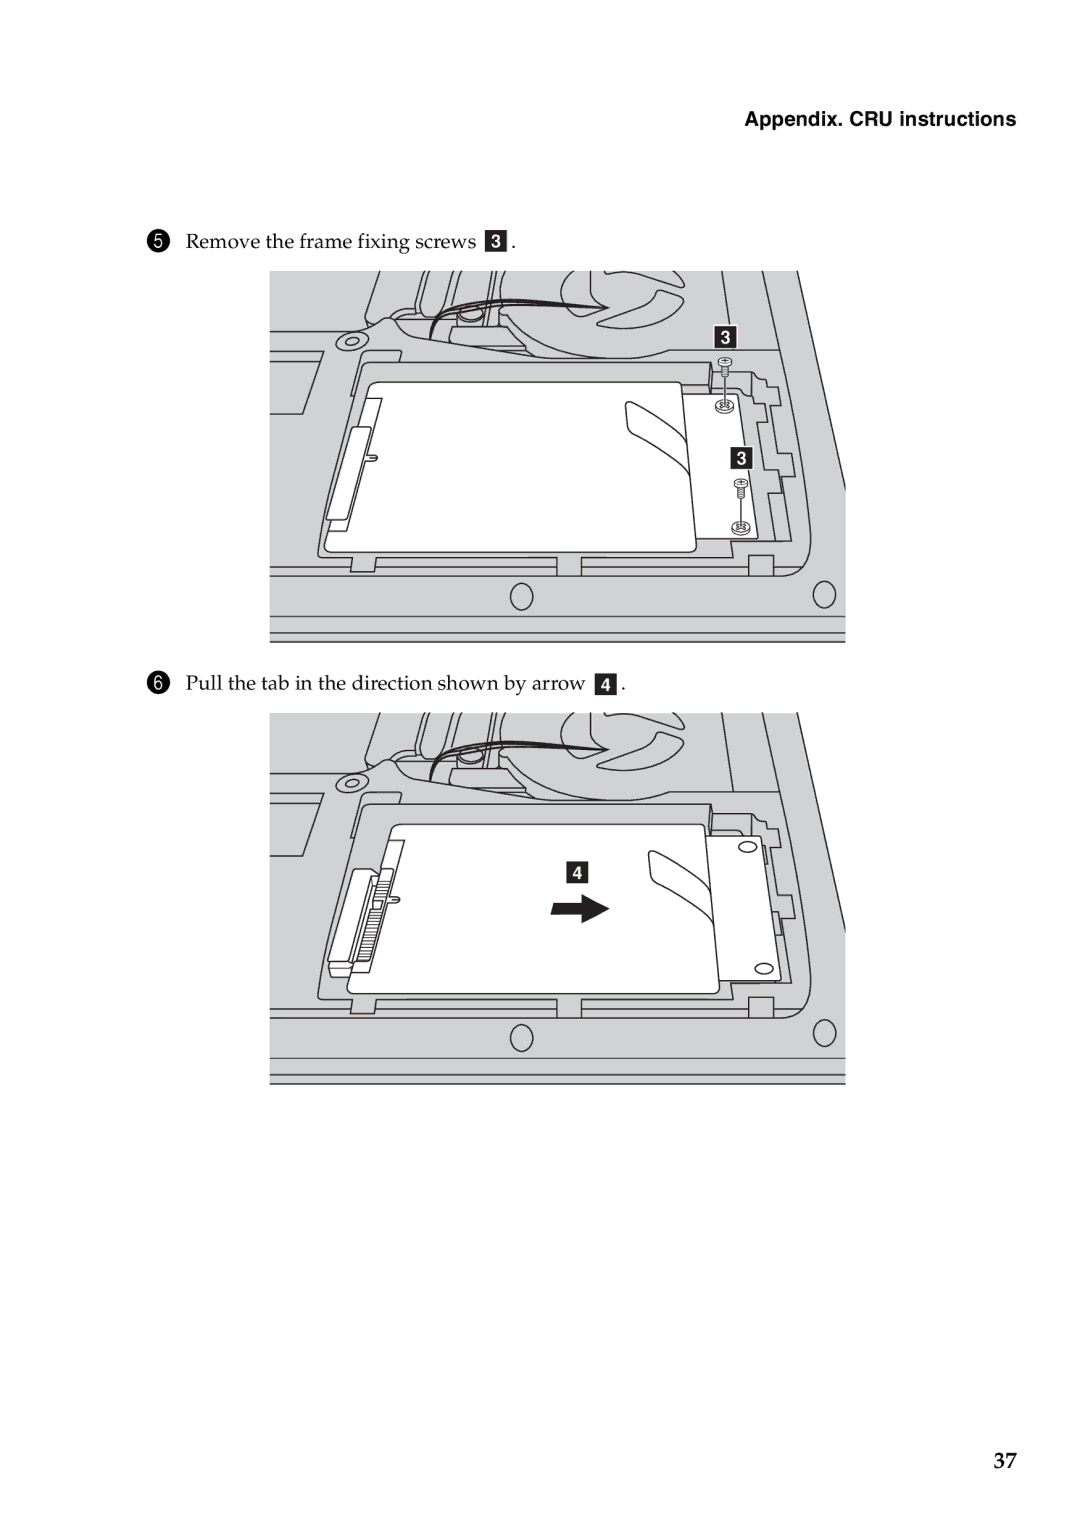
Appendix. CRU instructions
5
Remove the frame fixing screws
c
.
c
c
6
Pull the tab in the direction shown by arrow
d
.
d
37
Page 40
Page 42
Page 41
Image 41
Page 40
Page 42
Contents
IdeaPad Y471A
Regulatory Notice First Edition May Copyright Lenovo
Contents
Page
Top view
Getting to know your computer
Power button
Wireless module
Indicators Volume buttons
Getting to know your computer
USB port
RJ-45 port
Microphone jack
Headphone jack
Jack Kensington slot
AC power adapter
USB combo port Optical drive
System status
Bottom view
Battery pack Battery latch manual
„ Configuring the operating system
„ Connecting to the power
Learning the basics
„ Reading the manuals
Shutting down your computer
Learning the basics
Putting your computer into sleep state
„ Charging the battery
„ Checking battery status
„ Removing the battery pack
„ Handling the battery
Touchpad button
Using the touchpad
„ Function key combinations
„ Numeric keypad
Learning the basics
Removing a memory card
„ Using memory cards not supplied
Inserting a memory card
„ Connecting USB devices
Enabling Bluetooth communications on your computer
„ Connecting a Bluetooth device
„ OneKey Rescue system button a
„ Volume buttons b- d
Mute/Unmute Volume down Volume up
Movie mode
Normal mode
Intelligent mode
„ OneKey Theater button e
Super silent mode
Standard mode
Efficient thermal dissipation mode
Performing dust cleaning
F g
Page
„ Attaching a security lock not supplied
„ Using VeriFace
„ Using passwords
AMD Muxless ATI Switchable Graphics Technology PowerXpress
Switching between Mode 1 and Mode
Switchable Graphics in two modes on select models
„ Software configuration
Connecting to the Internet
„ Hardware connection
Cable
Connecting to the Internet
„ Using Wi-Fi/WiMAX
Enabling wireless connection
Software configuration
„ Introduction
OneKey Rescue system
OneKey Rescue system
„ Creating a recovery discs
Frequently asked questions
Troubleshooting
When do I need to restore the system to the factory status?
Troubleshooting
Keyboard problems
Display problems
Password problem
Sound problems
Troubleshooting Sleep or hibernation problems
Computer screen problems
Hard disk drive problem
Troubleshooting Battery problems
Startup problem
OneKey Rescue system problems
Troubleshooting Other problems
Appendix. CRU instructions
Handling a hard disk drive
Appendix. CRU instructions
Appendix. CRU instructions
Appendix. CRU instructions
Appendix. CRU instructions
Sdram
Appendix. CRU instructions
Appendix. CRU instructions
Removing the optical drive
Trademarks
Page
New World. New Thinking.TM
Top
Page
Image
Contents