SECTION 4 - MAINTENANCE
WARNING
Before ANY cleaning or servicing of the oven, perform the following procedure:
1.Switch off the oven and allow it to cool. Do NOT service the oven while it is warm.
2.Turn the
3.Turn off the electric supply circuit breaker(s) and disconnect the electric supply to the oven.
4.If it is necessary to move a gas oven for cleaning or servicing, disconnect the gas supply before moving the oven.
When all cleaning and servicing is complete: | 4. | Turn on the | |
1. | If the oven was moved for servicing, return the oven to its |
| connections for leaks using approved leak test sub- |
| original location. |
| stances or thick soap suds. |
2. | Reconnect the gas supply. | 5. | Turn on the electric supply circuit breaker(s). |
3. | Reconnect the electrical supply. | 6. | Perform the normal startup procedure. |
WARNING
Possibility of injury from moving parts and electrical shock exists in this oven. Switch off and lockout/tagout the electric supply BEFORE beginning to disassemble, clean, or service any oven. Never disassemble or clean an oven with the BLOWER (![]() ) switch or any other circuit of the oven switched on.
) switch or any other circuit of the oven switched on.
CAUTION
NEVER use a water hose or pressurized
NOTE
ANY replacement parts that require access to the interior of the oven may ONLY be replaced by a Middleby Marshall Authorized Service Agent. It is also strongly recommended that the
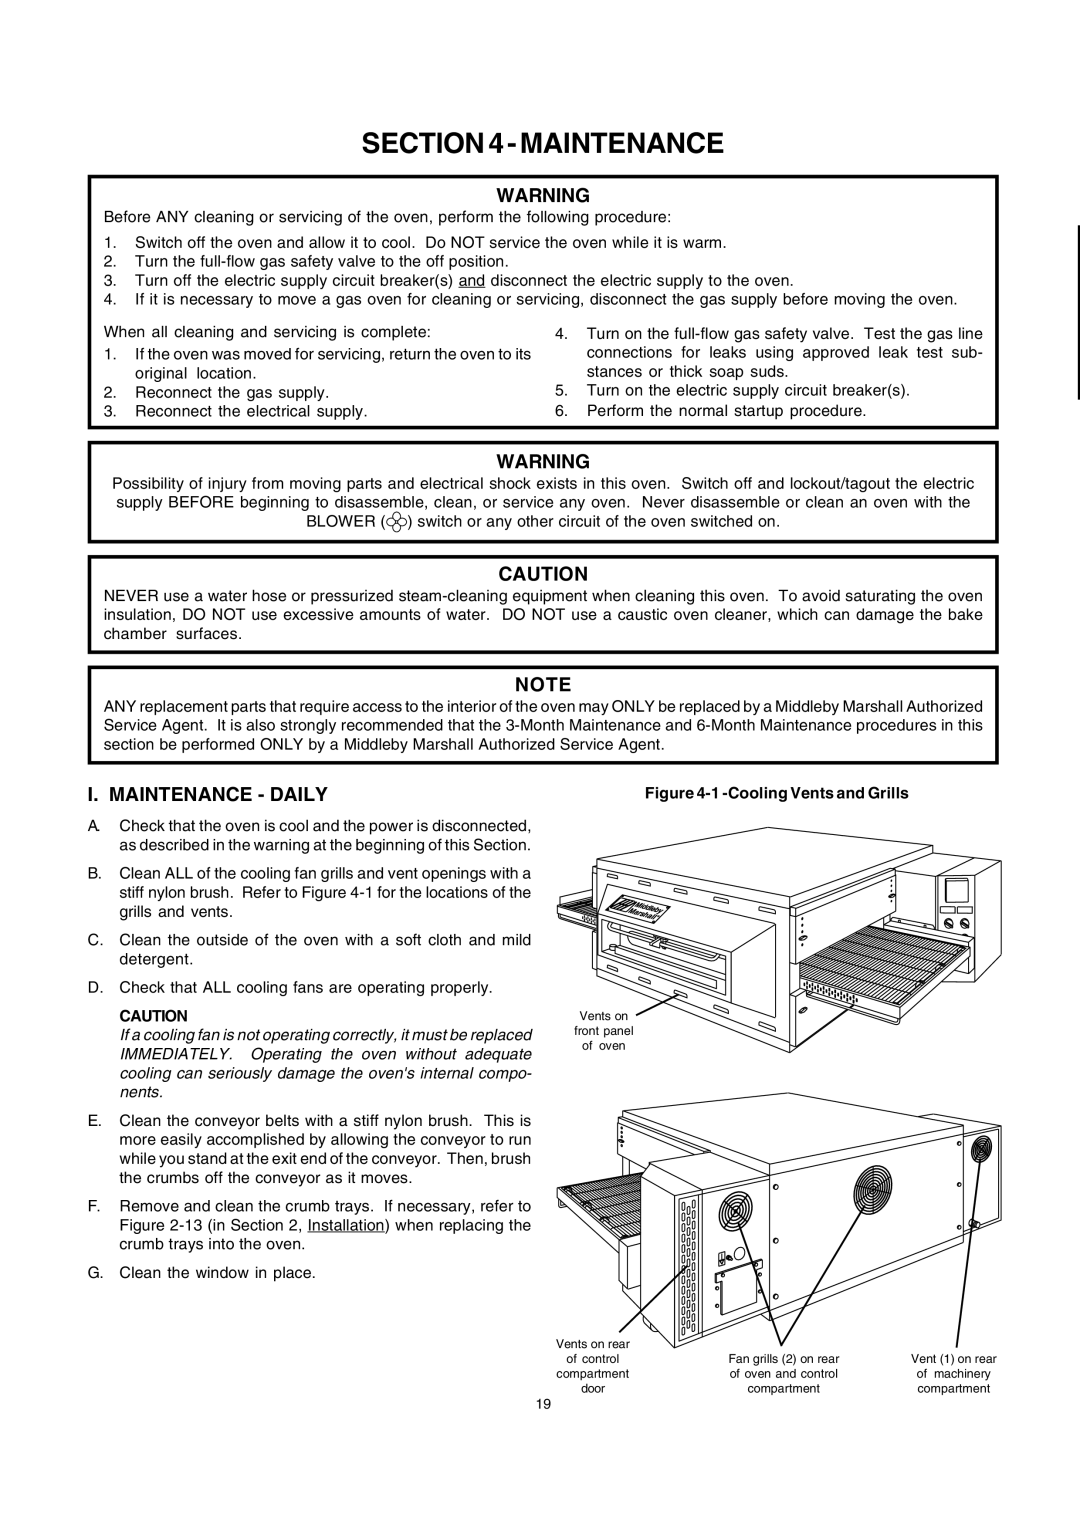
I. MAINTENANCE - DAILY | Figure |
ENGLISH
A.Check that the oven is cool and the power is disconnected, as described in the warning at the beginning of this Section.
B.Clean ALL of the cooling fan grills and vent openings with a stiff nylon brush. Refer to Figure
C.Clean the outside of the oven with a soft cloth and mild detergent.
D.Check that ALL cooling fans are operating properly.
CAUTION
If a cooling fan is not operating correctly, it must be replaced IMMEDIATELY. Operating the oven without adequate cooling can seriously damage the oven's internal compo- nents.
E.Clean the conveyor belts with a stiff nylon brush. This is more easily accomplished by allowing the conveyor to run while you stand at the exit end of the conveyor. Then, brush the crumbs off the conveyor as it moves.
F.Remove and clean the crumb trays. If necessary, refer to Figure
G.Clean the window in place.
Vents on  front panel
of oven
Vents on rear |
|
|
of control | Fan grills (2) on rear | Vent (1) on rear |
compartment | of oven and control | of machinery |
door | compartment | compartment |
19