NOTE : Only one jumper should be installed on the jumper connector.
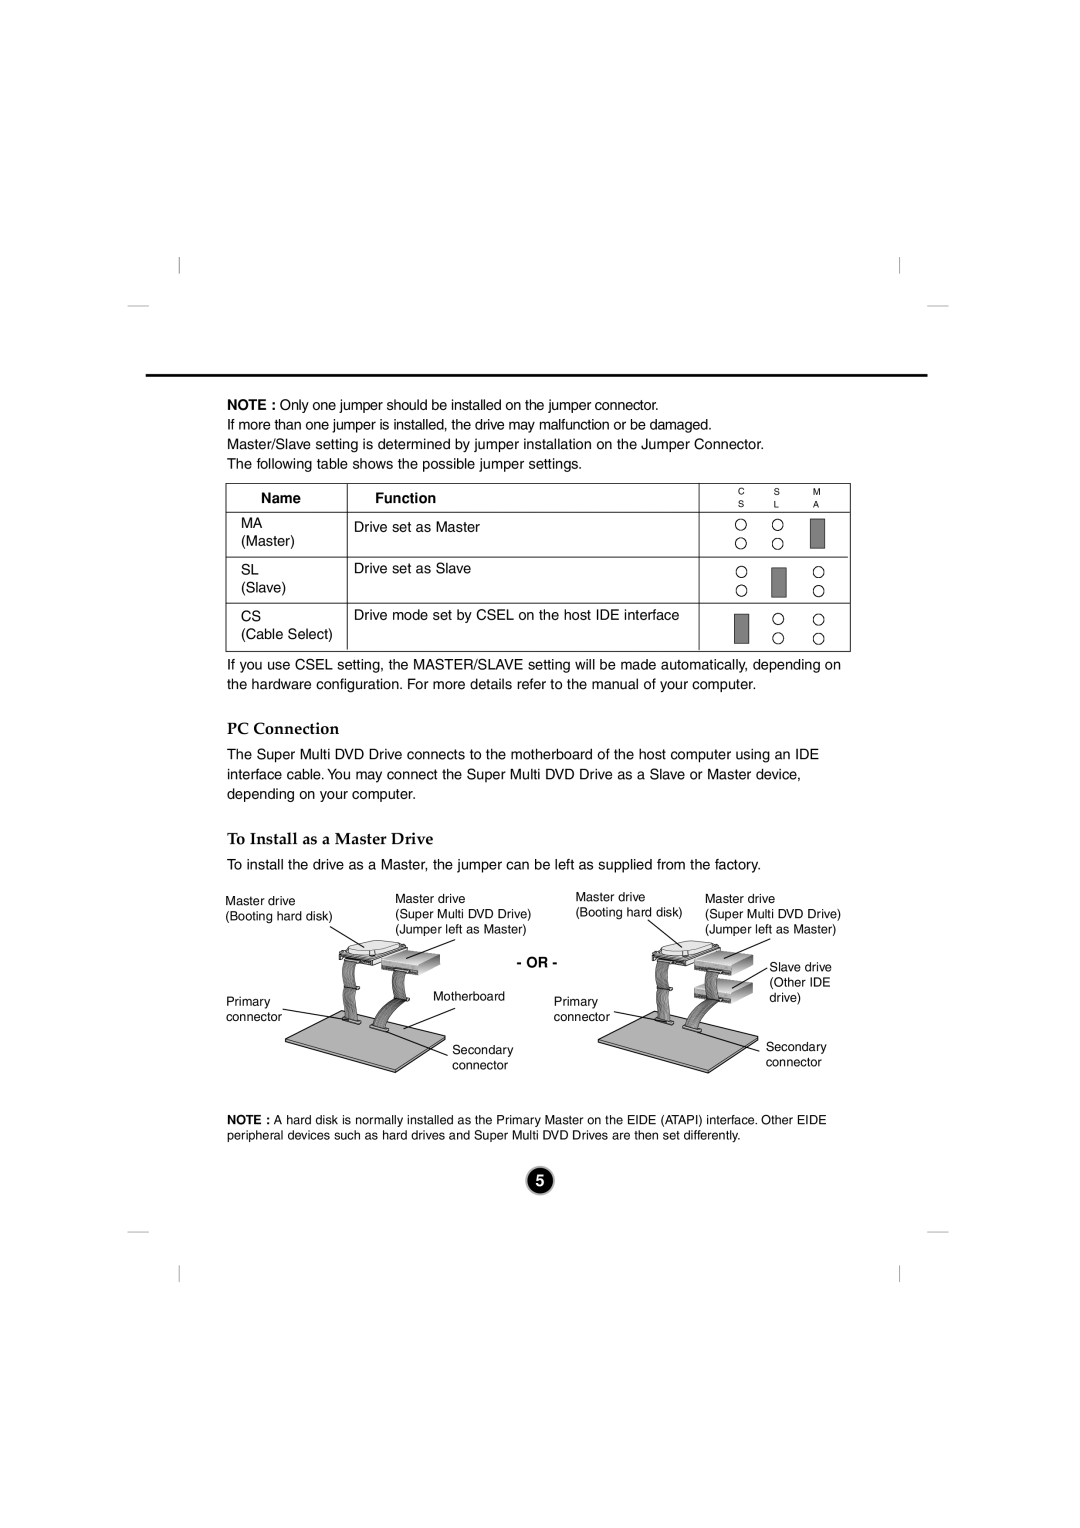
If more than one jumper is installed, the drive may malfunction or be damaged. Master/Slave setting is determined by jumper installation on the Jumper Connector. The following table shows the possible jumper settings.
Name | Function | C | S | M | |
S | L | A | |||
|
| ||||
MA | Drive set as Master |
|
|
| |
(Master) |
|
|
|
| |
SL | Drive set as Slave |
|
|
| |
(Slave) |
|
|
|
| |
CS | Drive mode set by CSEL on the host IDE interface |
|
|
| |
(Cable Select) |
|
|
|
|
If you use CSEL setting, the MASTER/SLAVE setting will be made automatically, depending on the hardware configuration. For more details refer to the manual of your computer.
PC Connection
The Super Multi DVD Drive connects to the motherboard of the host computer using an IDE interface cable. You may connect the Super Multi DVD Drive as a Slave or Master device, depending on your computer.
To Install as a Master Drive
To install the drive as a Master, the jumper can be left as supplied from the factory.
Master drive | Master drive | Master drive | Master drive |
(Booting hard disk) | (Super Multi DVD Drive) | (Booting hard disk) | (Super Multi DVD Drive) |
| (Jumper left as Master) |
| (Jumper left as Master) |
|
| - OR - | Slave drive |
| Motherboard |
| (Other IDE |
Primary | Primary | drive) | |
|
| ||
connector |
| connector |
|
| Secondary |
| Secondary |
| connector |
| connector |
NOTE : A hard disk is normally installed as the Primary Master on the EIDE (ATAPI) interface. Other EIDE peripheral devices such as hard drives and Super Multi DVD Drives are then set differently.
5
