STEP 2: Prepare The Venting System
NOTE: The ductwork you need for outside ventilation is not included with your oven. The standard ductwork fittings and length are shown in Figure 10, page 9.
W A R N I N G
THIS OVEN MUST BE PROPERLY VENTED!
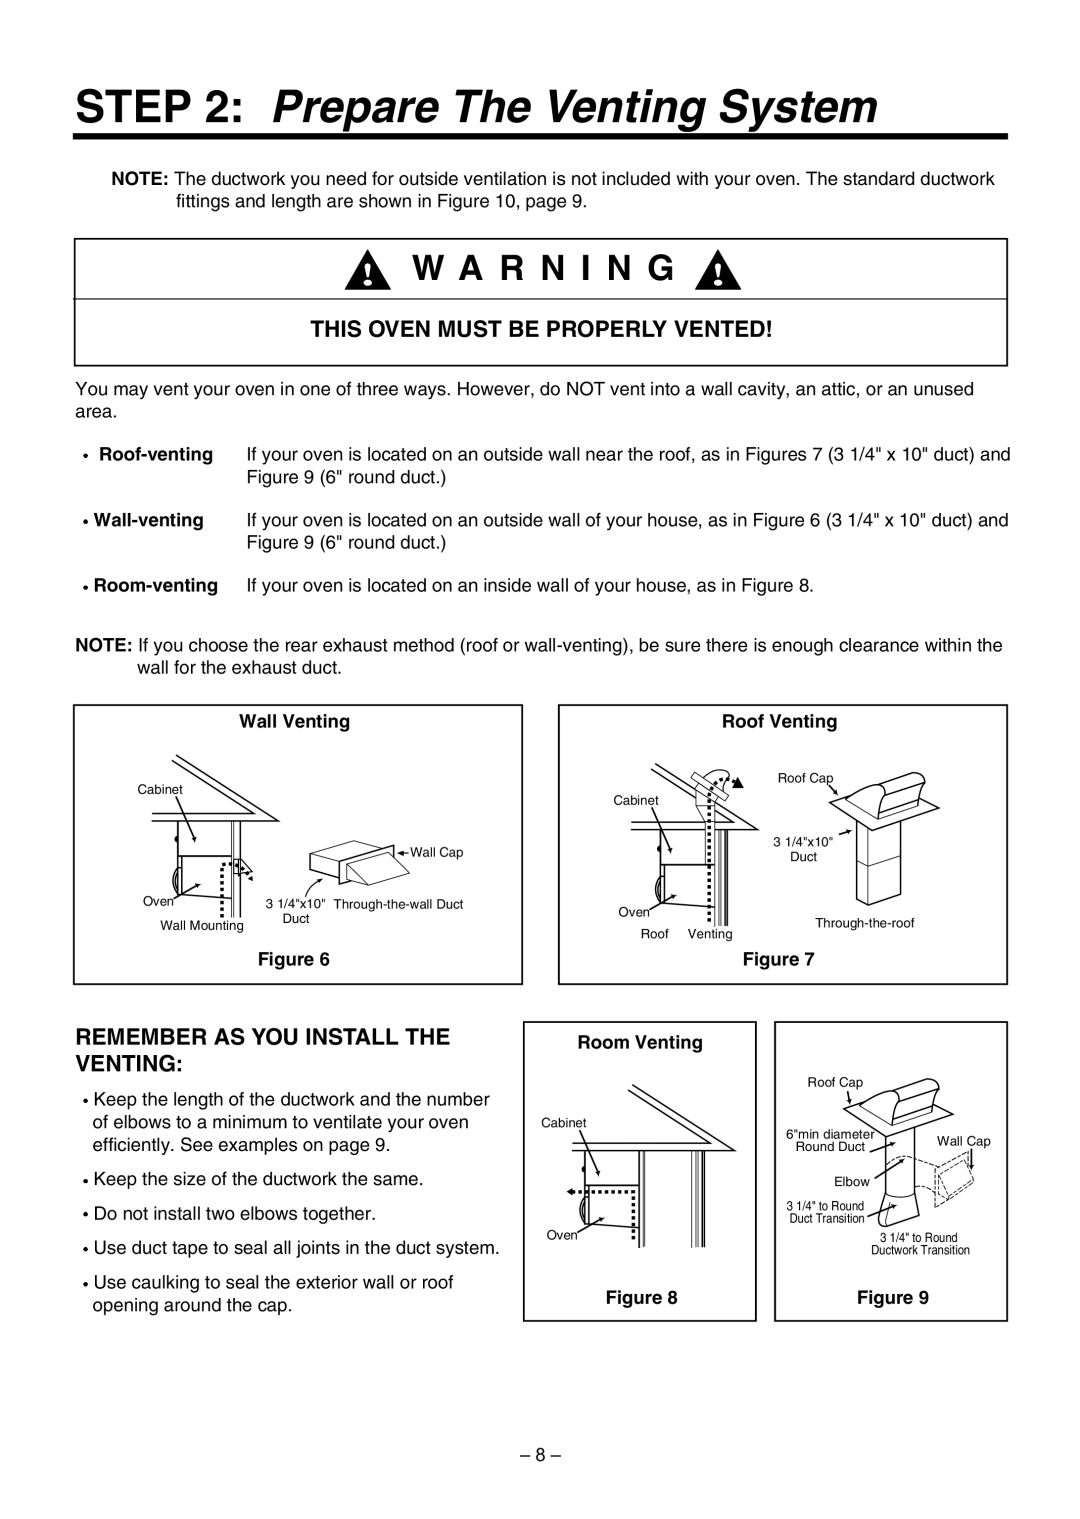
You may vent your oven in one of three ways. However, do NOT vent into a wall cavity, an attic, or an unused area.
![]()
![]() Wall-venting
Wall-venting
![]() Room-venting
Room-venting
NOTE: If you choose the rear exhaust method (roof or
| Wall Venting | |
Cabinet |
|
|
|
| Wall Cap |
Oven |
| 3 1/4"x10" |
Wall Mounting | Duct | |
| ||
Figure 6
Roof Venting
Roof Cap
Cabinet
3 1/4"x10"
Duct
Oven
Roof Venting
Figure 7
REMEMBER AS YOU INSTALL THE VENTING:
![]() Keep the length of the ductwork and the number of elbows to a minimum to ventilate your oven efficiently. See examples on page 9.
Keep the length of the ductwork and the number of elbows to a minimum to ventilate your oven efficiently. See examples on page 9.
![]() Keep the size of the ductwork the same.
Keep the size of the ductwork the same.
![]() Do not install two elbows together.
Do not install two elbows together.
![]() Use duct tape to seal all joints in the duct system.
Use duct tape to seal all joints in the duct system.
Room Venting
Cabinet
Oven
Roof Cap
6"min diameter | Wall Cap | |
Round Duct |
| |
|
| |
Elbow |
|
|
3 1/4" to Round |
|
|
Duct Transition |
|
|
|
| 3 1/4" to Round |
| Ductwork Transition | |
![]() Use caulking to seal the exterior wall or roof opening around the cap.
Use caulking to seal the exterior wall or roof opening around the cap.
Figure 8 | Figure 9 |
– 8 –
