Putting into operation
![]() WARNING
WARNING
Fire hazard and danger of damage!
u Do not place appliances emitting heat e.g. microwaves, toasters etc. on the appliance!
![]() WARNING
WARNING
Blocked ventilation openings pose a risk of fire and damage! u Always keep the ventilation openings clear. Always ensure
that the appliance is properly ventilated!
u Detach the connecting cable from the rear of the appliance, removing the cable holder at the same time because other- wise there will be vibratory noise!
u Remove the protective film from the outside of the appli- ance.*
NOTICE
The stainless steel doors are provided with a
Otherwise the surface coating will be affected.
u Wipe the coated door surfaces using a soft, clean cloth only.
u Apply a stainless steel cleaner only to the stainless steel side walls evenly, wiping with the grain. Subsequent cleaning becomes easier as a result.
u Wipe side walls with a paint finish using a soft, clean cloth only.
uRemove all transit supports.
uDispose of packaging material (see 4.5) .
NOTICE
Risk of damage due to condensate!
If your appliance is not a
u do not install the appliance directly alongside a further refrig- erator/freezer.
u Align the appliance so that it stands firmly and on a level by applying the accompanying spanner to the adjustable- height feet (A) and using a spirit level.
When a
u Proceed according to the
Note
u Clean the appliance (see 6.2) .
If the appliance is installed in a very damp environment, condensate may form on the outside of the appliance.
u Always see to good ventilation at the installation site.
4.3 Changing over the door hinges
You can change over the door hinges if necessary.
NOTICE
Risk of damage to
When a
u Do not change over the door hinges.
Ensure that the following tools are to hand: q Torx® 25
q Torx® 15 q Screwdriver
q Cordless screwdriver, if necessary
q Second person for fitting work, if needed q Accompanying Allen key size 2*
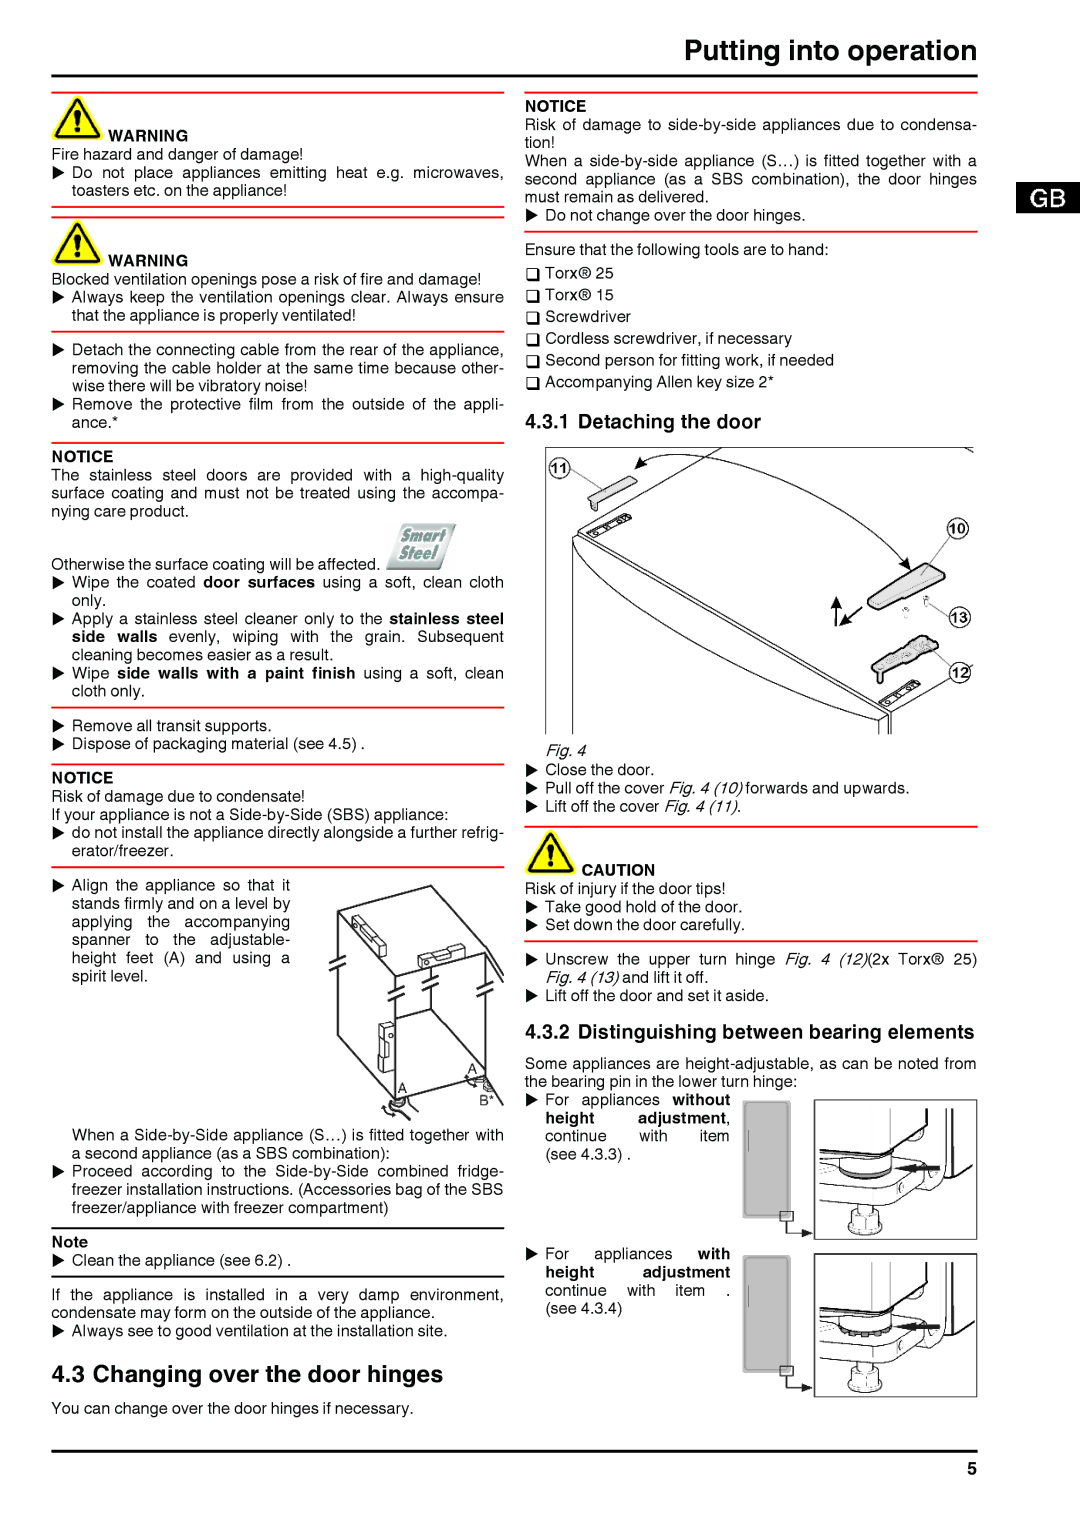
4.3.1 Detaching the door
Fig. 4
uClose the door.
uPull off the cover Fig. 4 (10) forwards and upwards.
uLift off the cover Fig. 4 (11).
![]() CAUTION
CAUTION
Risk of injury if the door tips! u Take good hold of the door. u Set down the door carefully.
u Unscrew the upper turn hinge Fig. 4 (12)(2x Torx® 25) Fig. 4 (13) and lift it off.
u Lift off the door and set it aside.
4.3.2 Distinguishing between bearing elements
Some appliances are
u For appliances without
height adjustment,
continue with item (see 4.3.3) .
u For appliances with
height adjustment continue with item . (see 4.3.4)
5