9.Carefully feed the wires back into the top of the CONSOLE SUPPORT ASSEMBLY (#6) and attach the DISPLAY CONSOLE (#7) to the CONSOLE SUPPORT ASSEMBLY using the four CONSOLE SCREWS (#4) and a Phillips screwdriver. Tighten the four SCREWS in a
NOTE: BE CAREFUL NOT TO
THE SCREWS.
MISE EN GARDE : VEILLER À NE PAS TROP SERRER LA
VIS.
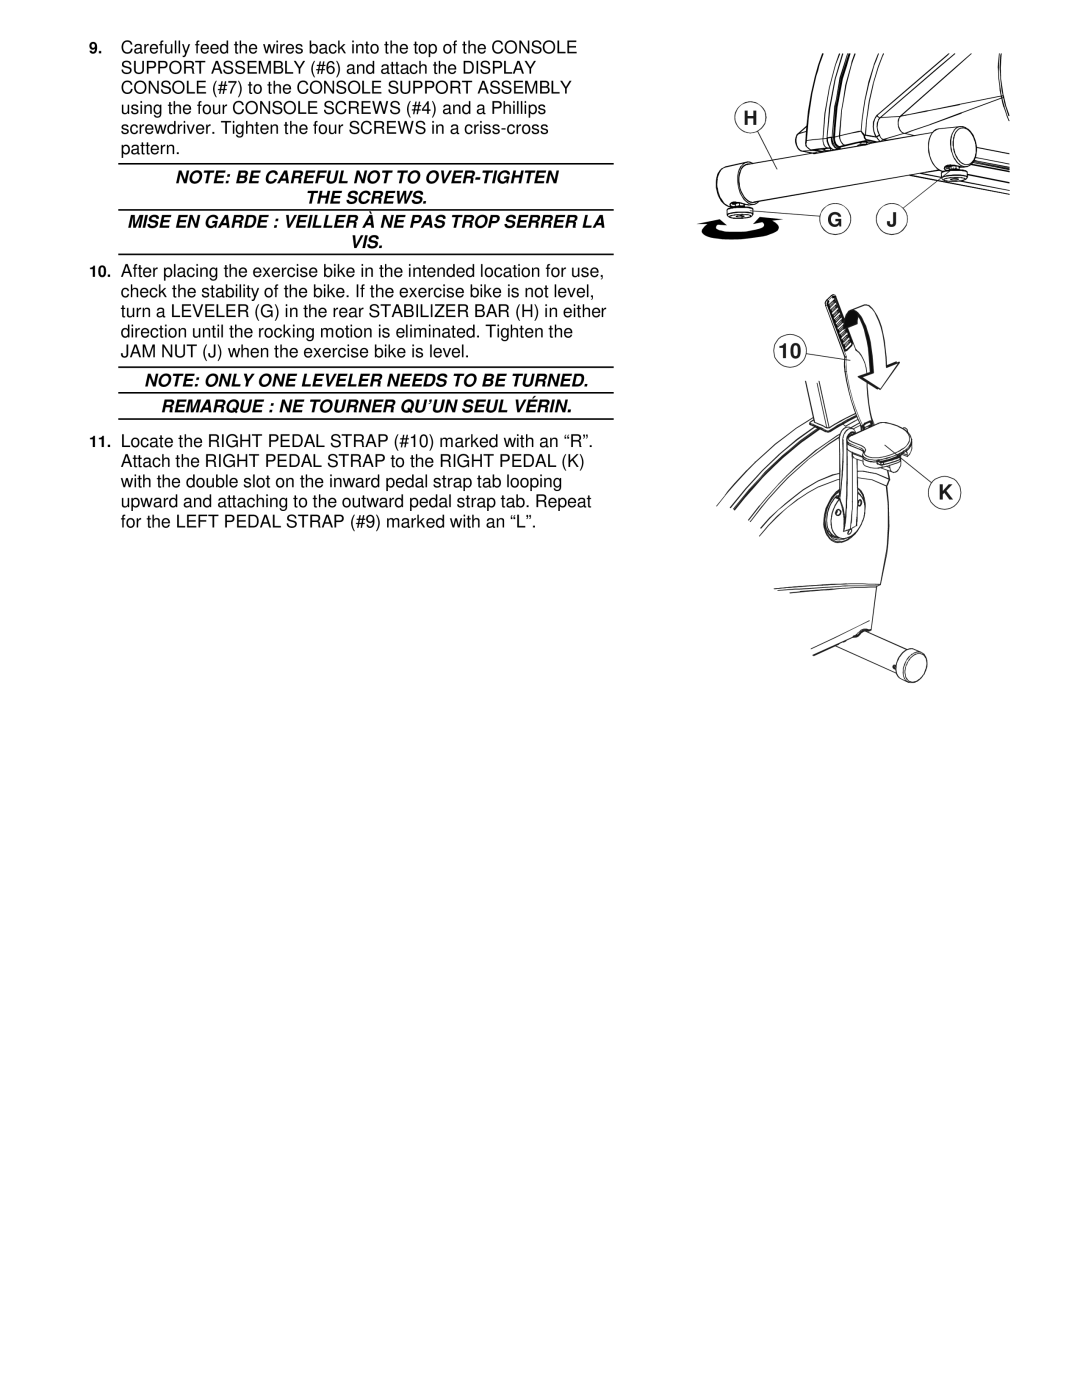
10.After placing the exercise bike in the intended location for use, check the stability of the bike. If the exercise bike is not level, turn a LEVELER (G) in the rear STABILIZER BAR (H) in either direction until the rocking motion is eliminated. Tighten the JAM NUT (J) when the exercise bike is level.
NOTE: ONLY ONE LEVELER NEEDS TO BE TURNED.
REMARQUE : NE TOURNER QU’UN SEUL VÉRIN.
11.Locate the RIGHT PEDAL STRAP (#10) marked with an “R”. Attach the RIGHT PEDAL STRAP to the RIGHT PEDAL (K) with the double slot on the inward pedal strap tab looping upward and attaching to the outward pedal strap tab. Repeat for the LEFT PEDAL STRAP (#9) marked with an “L”.
H
G J
10
K