Step 3: Console Assembly
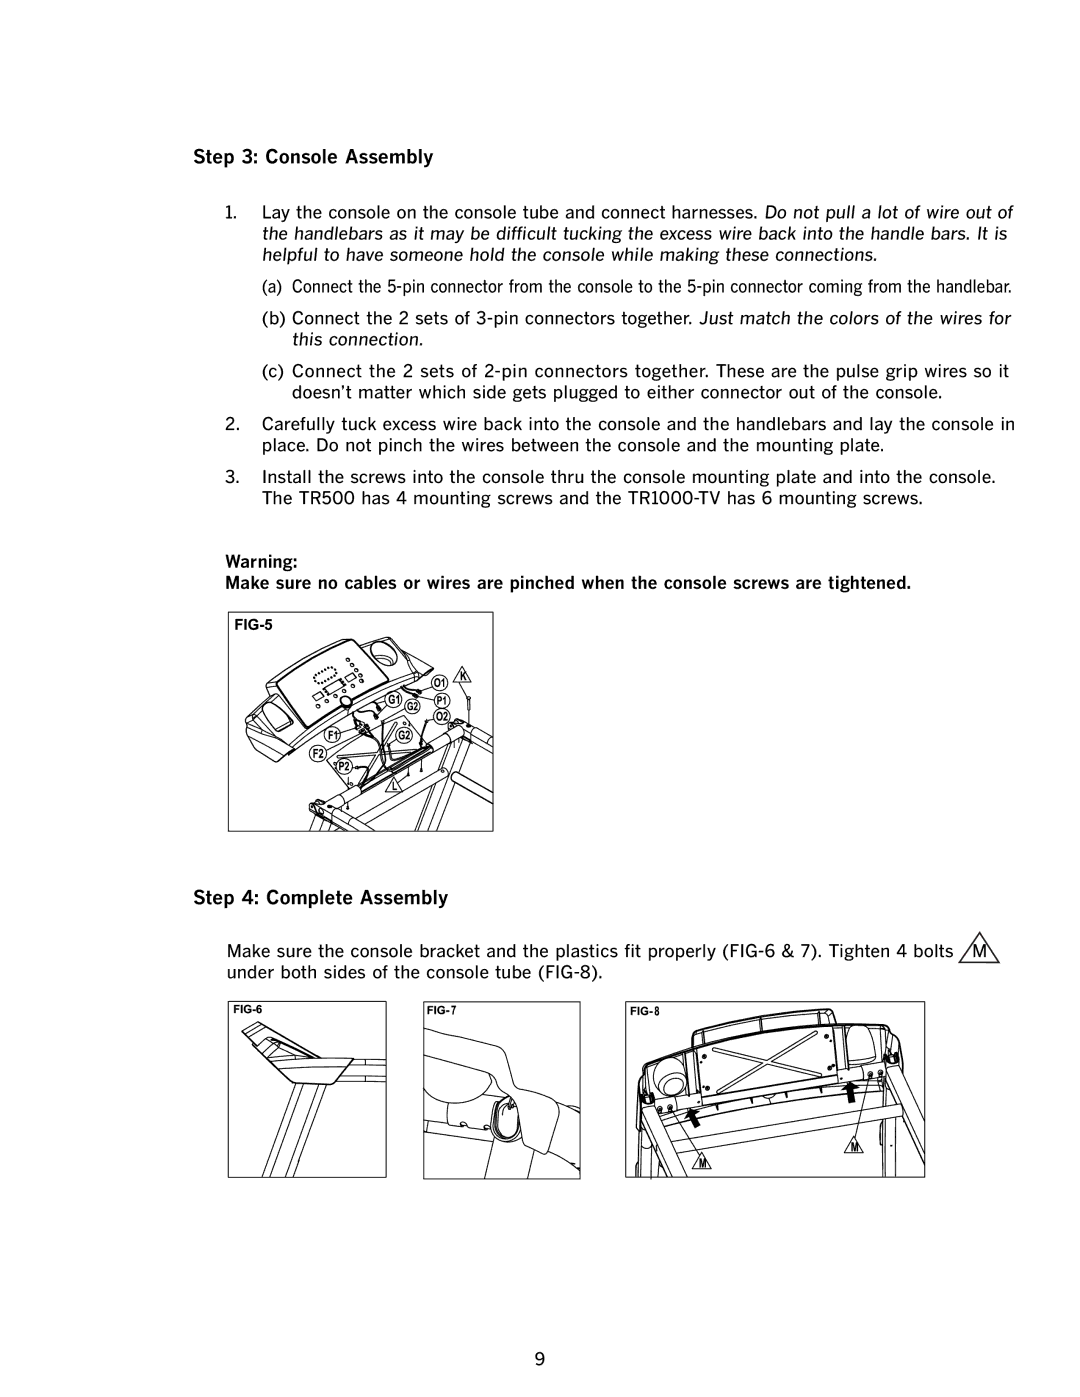
1.Lay the console on the console tube and connect harnesses. Do not pull a lot of wire out of the handlebars as it may be difficult tucking the excess wire back into the handle bars. It is helpful to have someone hold the console while making these connections.
(a)Connect the
(b)Connect the 2 sets of
(c)Connect the 2 sets of
2.Carefully tuck excess wire back into the console and the handlebars and lay the console in place. Do not pinch the wires between the console and the mounting plate.
3.Install the screws into the console thru the console mounting plate and into the console. The TR500 has 4 mounting screws and the
Warning:
Make sure no cables or wires are pinched when the console screws are tightened.
Step 4: Complete Assembly
Make sure the console bracket and the plastics fit properly
9
