
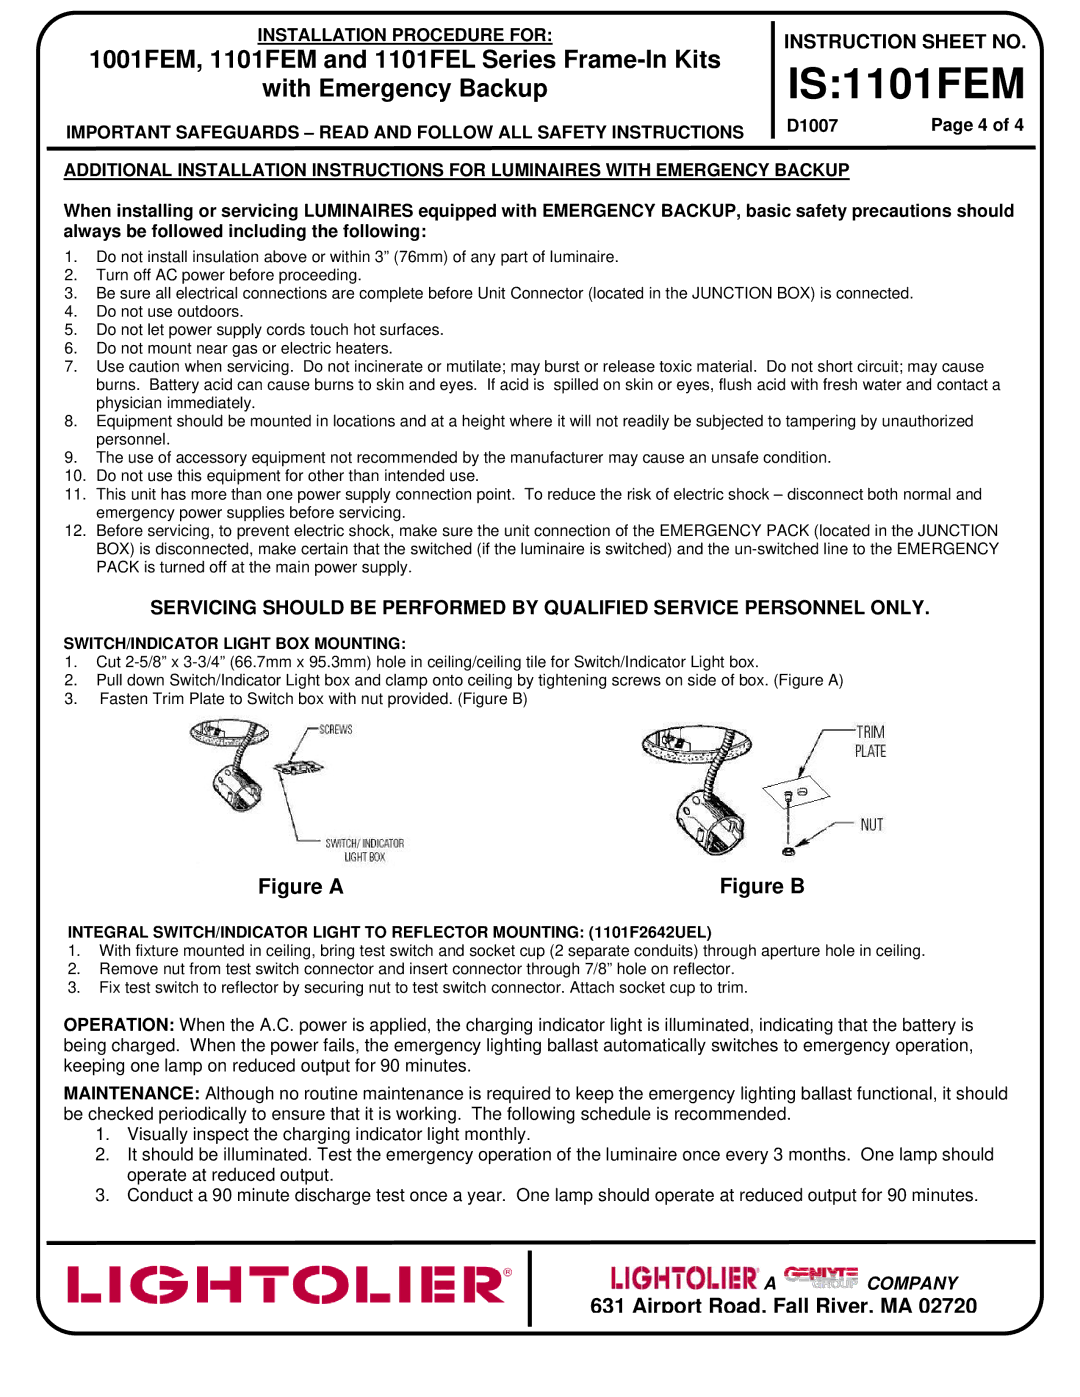
1001FEM Series, 1101FEM Series, 1101FEL Series specifications
Lightolier has long been a name synonymous with innovation and quality in the lighting industry. Among its impressive lineup, the Lightolier 1101FEL Series, 1101FEM Series, and 1001FEM Series stand out for their advanced features and versatile applications.The Lightolier 1101FEL Series offers a refined combination of form and function, designed primarily for recessed lighting. One of its key features is the high efficiency of its LED technology, which significantly reduces energy consumption while delivering bright and uniform light output. This series is equipped with a sleek, low-profile design that seamlessly blends into various ceiling types, making it ideal for both residential and commercial spaces. With adjustable trim options, light direction can be customized to accentuate specific areas or artwork, enhancing the aesthetic of any environment.
Next, the Lightolier 1101FEM Series embodies a slightly different approach, focusing on both functionality and stylish design. This series is particularly notable for its enhanced dimming capabilities, providing users with complete control over ambient lighting levels to create the perfect atmosphere. The integration of smart technology allows compatibility with various home automation systems, enabling users to adjust lighting via smartphone apps or voice commands. This blend of technology and convenience makes the 1101FEM Series a favorite among tech-savvy homeowners and commercial property managers alike.
Finally, the Lightolier 1001FEM Series rounds out this impressive trio with its exceptional quality and performance. Designed for more commercial applications, it offers robust construction and a range of lumen outputs to meet diverse lighting needs. Its unique thermal management system ensures efficient heat dissipation, prolonging the life of the LED components. This series also features easy installation options and is often integrated into larger lighting networks, supporting a cohesive lighting design across vast spaces.
In conclusion, the Lightolier 1101FEL, 1101FEM, and 1001FEM Series represent the pinnacle of modern lighting solutions with their energy efficiency, smart technologies, and versatile design characteristics. Whether for residential or commercial applications, these series provide innovative lighting options tailored to meet the evolving needs of users while enhancing the ambiance and functionality of any space.