Lightwave Communications | PC ServerSwitch 2x16 |
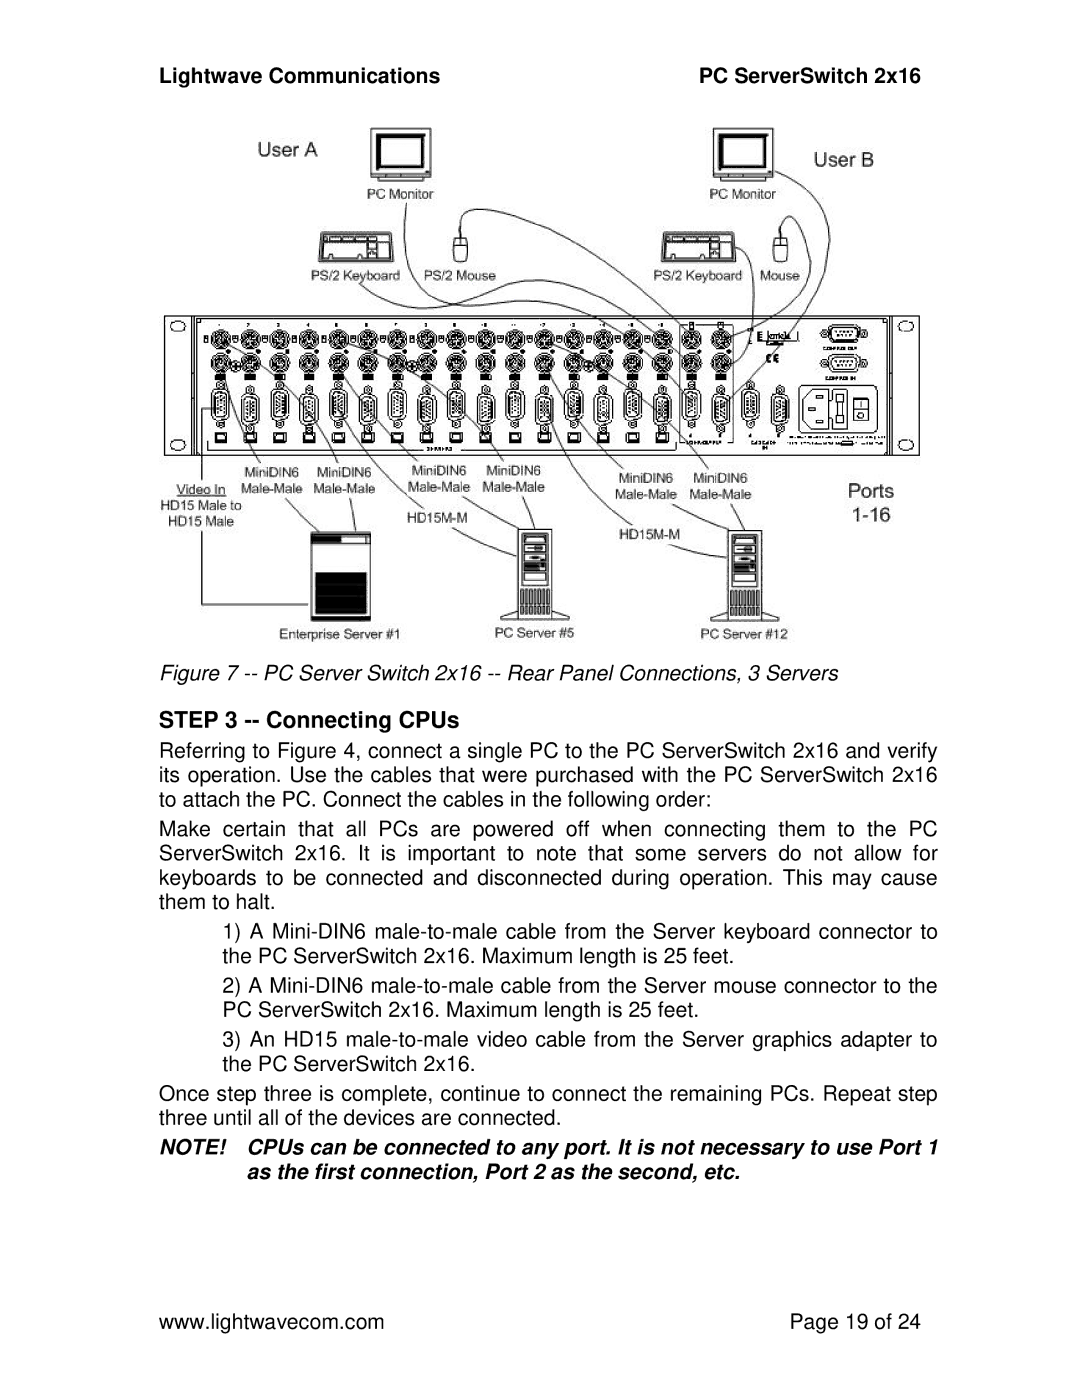
Figure 7 -- PC Server Switch 2x16 -- Rear Panel Connections, 3 Servers
STEP 3 -- Connecting CPUs
Referring to Figure 4, connect a single PC to the PC ServerSwitch 2x16 and verify its operation. Use the cables that were purchased with the PC ServerSwitch 2x16 to attach the PC. Connect the cables in the following order:
Make certain that all PCs are powered off when connecting them to the PC ServerSwitch 2x16. It is important to note that some servers do not allow for keyboards to be connected and disconnected during operation. This may cause them to halt.
1)A
2)A
3)An HD15
Once step three is complete, continue to connect the remaining PCs. Repeat step three until all of the devices are connected.
NOTE! CPUs can be connected to any port. It is not necessary to use Port 1 as the first connection, Port 2 as the second, etc.
www.lightwavecom.com | Page 19 of 24 |