INSTALLATION | ||
|
|
|
3.Unscrew the wing nut and remove the pilot lead of the torch cable from the pilot stud.
4.Loosen the strain relief cap using channel locks if necessary. Then loosen and unscrew the strain relief from the conduit lock nut.
5.Slide the cable through the conduit lock nut and out through the hole in the case front.
D.To assemble a torch to the
1.Slide the end of the cable through the hole in the case front. Then slide the conduit lock nut over the end of the cable.
2.With a 5/8" wrench tighten the fitting at the end of the gas tube onto the bulkhead union.
3.Place the ring lug of the pilot leads from the cable over the pilot stud. Place the wing nut on the pilot stud and tighten.
4.Connect the two molex connectors from the torch to the molex connectors in the
5.Loosen the cap on the strain relief. Slide the strain relief into the hole in the case front. Screw the conduit lock nut on to the strain relief and tighten the strain relief with channel locks. Hand tighten the strain relief cap and then tighten the cap an additional 1/2 turn with channel locks.
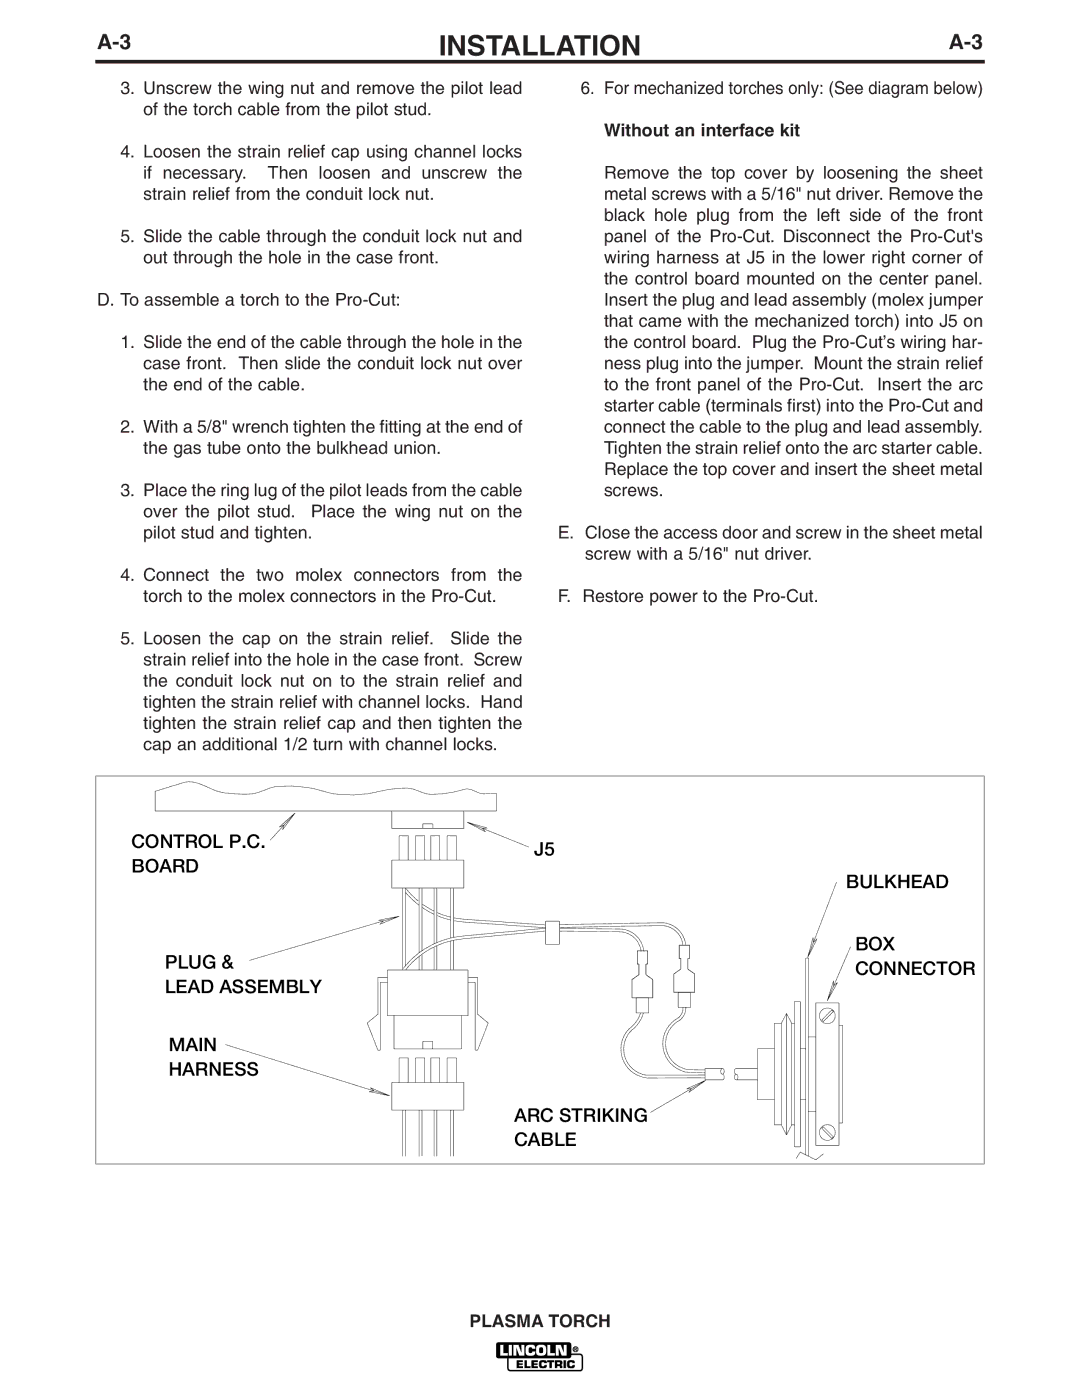
6.For mechanized torches only: (See diagram below)
Without an interface kit
Remove the top cover by loosening the sheet metal screws with a 5/16" nut driver. Remove the black hole plug from the left side of the front panel of the
E.Close the access door and screw in the sheet metal screw with a 5/16" nut driver.
F.Restore power to the
CONTROL P.C. | J5 | |
BOARD | ||
BULKHEAD | ||
| ||
PLUG & | BOX | |
CONNECTOR | ||
LEAD ASSEMBLY | ||
|
MAIN
HARNESS
ARC STRIKING
CABLE
PLASMA TORCH