INSTALLATION | ||
|
|
|
GENERAL DESCRIPTION
The Magnum PCT125/PCT125M plasma torches have been designed for use on a
The
Two styles of mechanized torches are available. The robotic torch features an 8” (203mm) long,
CNC or Robotic interface kits are available as a field installed option for those customer desiring automated plasma cutting. The kits provide remote triggering, remote output control and give a signal once a cutting arc has been established.
All of the plasma torches use the same consumables. In order to operate, a torch must have an electrode, swirl ring, nozzle and shield cup. There are three cut- ting nozzles available to give optimum arc perfor- mance at low, medium and high output. A gouging nozzle is also available. Drag cutting can be done by placing a wire standoff guide on to the shield cup or by using a contact cutting attachment and contact cutting insulator in place of the shield cup.
Operation from bottled compressed air or gas cylinders is not recommended due to the large volume of gas required for plasma cutting.
INSTALLATION
![]() WARNING
WARNING
ELECTRIC SHOCK can kill.
•Only qualified personnel should per- form this installation.
•Turn the input power OFF at the dis- connect switch or fuse box before working on this equipment.
•Do not touch electrically hot parts.
•Do not operate with covers removed.
TOOLS REQUIRED:
5/16” nut driver
5/8” open end wrench channel locks
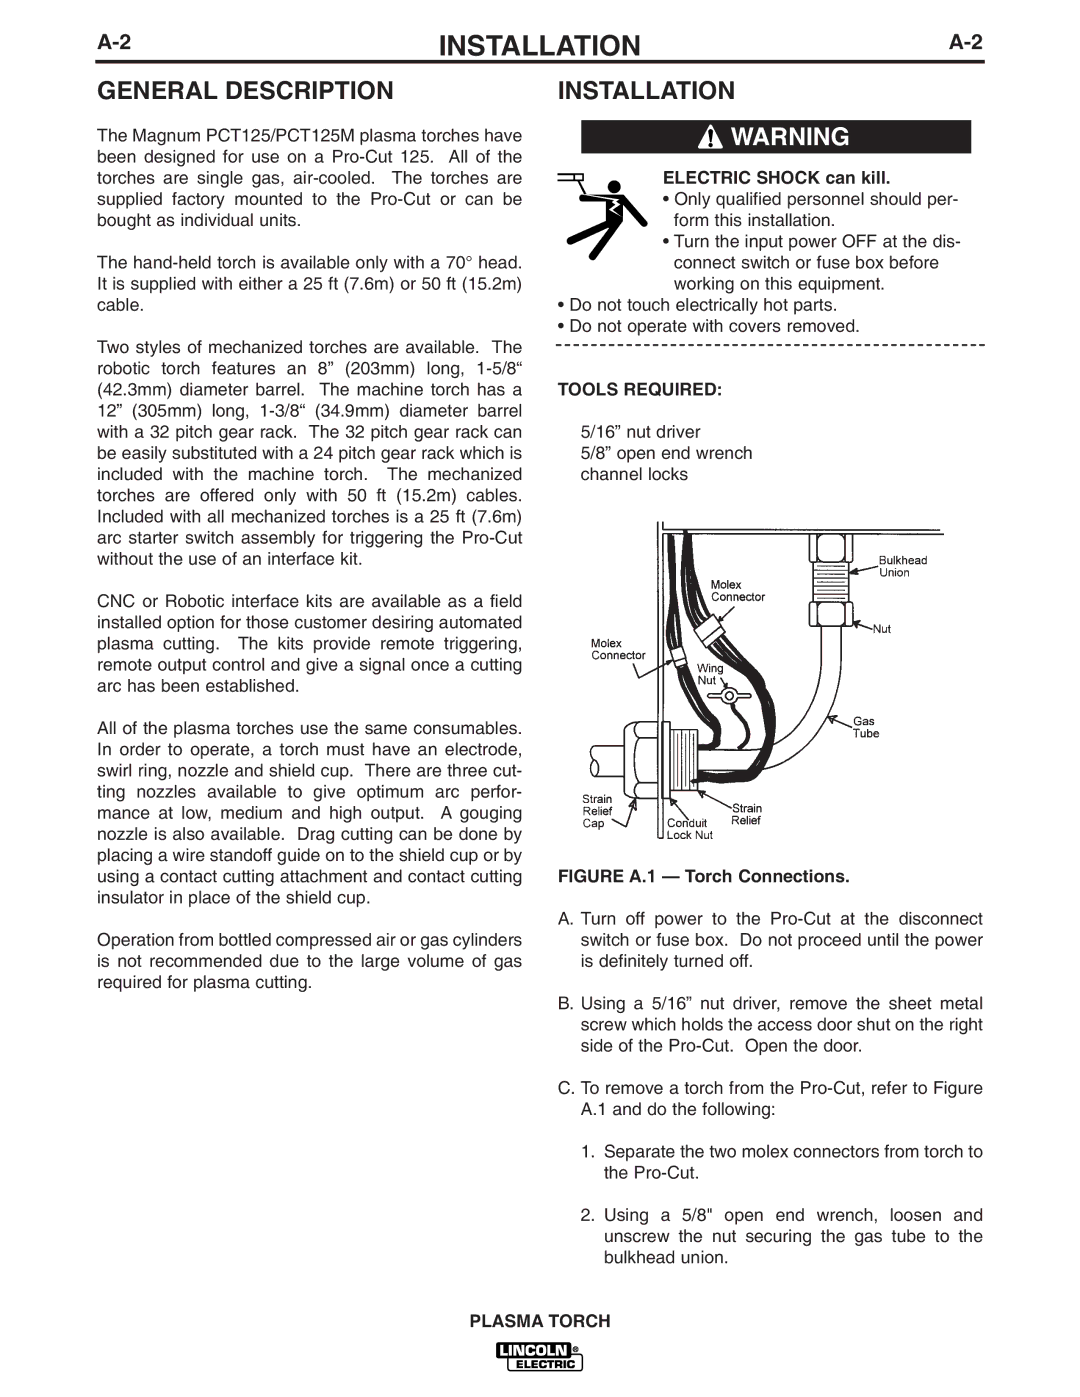
FIGURE A.1 — Torch Connections.
A. Turn off power to the
B. Using a 5/16” nut driver, remove the sheet metal screw which holds the access door shut on the right side of the
C. To remove a torch from the
A.1 and do the following:
1.Separate the two molex connectors from torch to the
2.Using a 5/8" open end wrench, loosen and unscrew the nut securing the gas tube to the bulkhead union.
PLASMA TORCH
