will clear all the computer and user names and set all parameters back to the factory defaults. To avoid activating this function by accident the administrator must confirm the reset instruction by pressing F8.
4.14 Querying the routing status
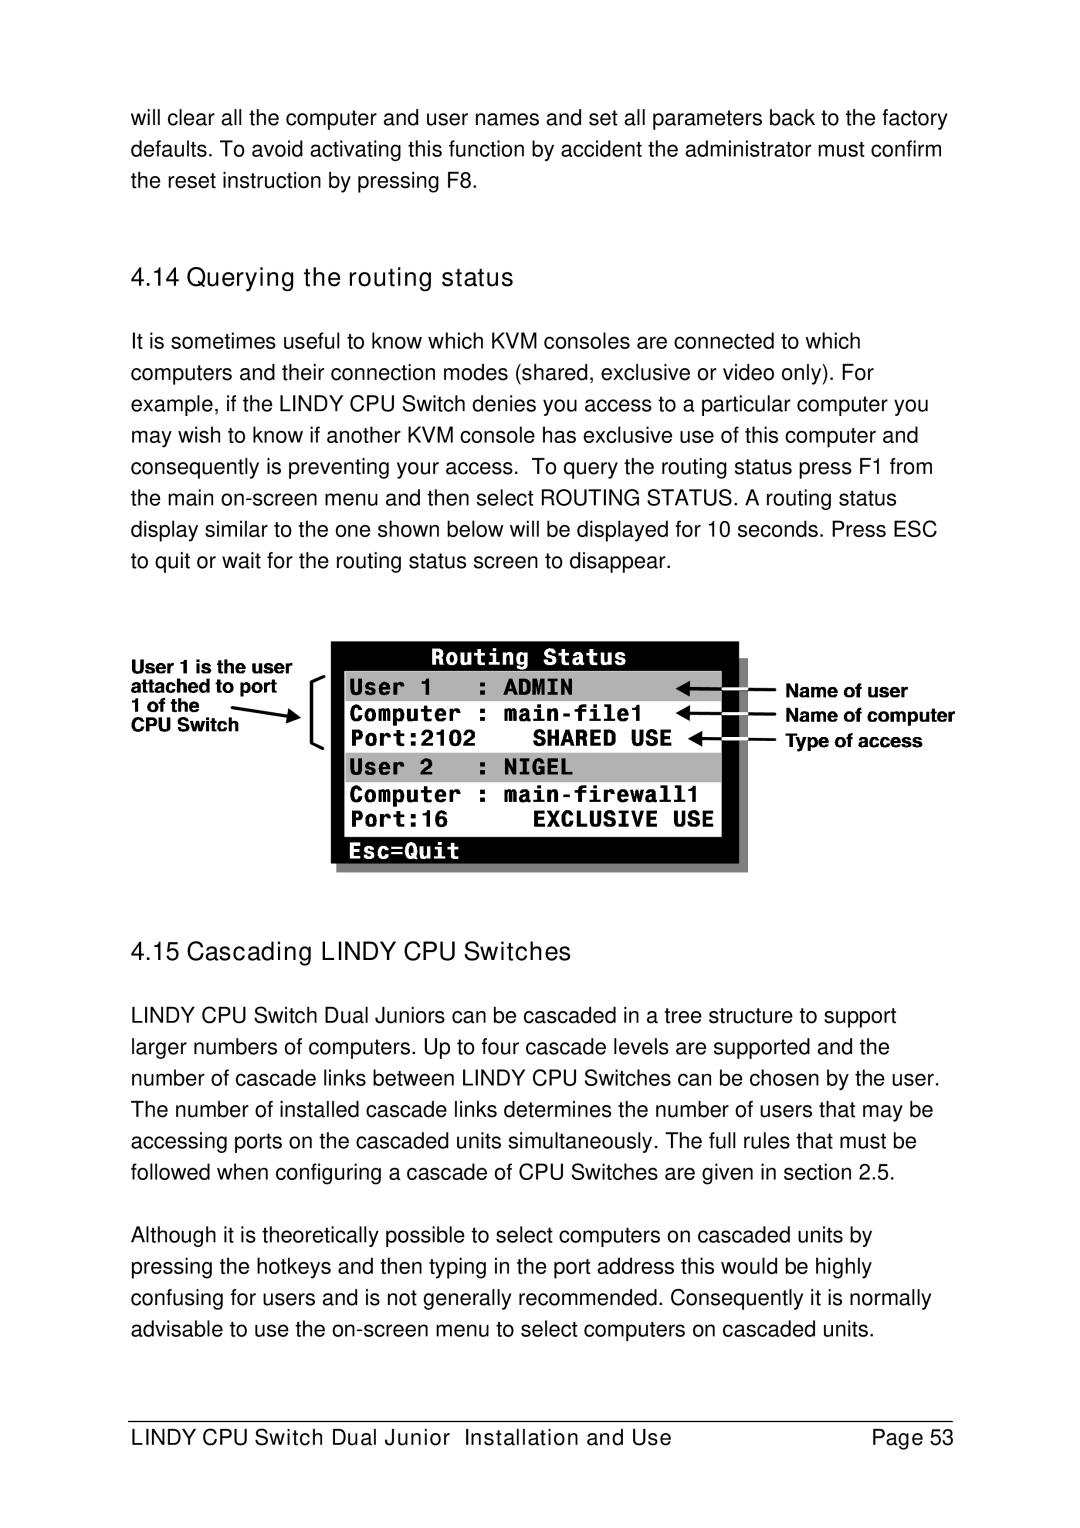
It is sometimes useful to know which KVM consoles are connected to which computers and their connection modes (shared, exclusive or video only). For example, if the LINDY CPU Switch denies you access to a particular computer you may wish to know if another KVM console has exclusive use of this computer and consequently is preventing your access. To query the routing status press F1 from the main
4.15 Cascading LINDY CPU Switches
LINDY CPU Switch Dual Juniors can be cascaded in a tree structure to support larger numbers of computers. Up to four cascade levels are supported and the number of cascade links between LINDY CPU Switches can be chosen by the user. The number of installed cascade links determines the number of users that may be accessing ports on the cascaded units simultaneously. The full rules that must be followed when configuring a cascade of CPU Switches are given in section 2.5.
Although it is theoretically possible to select computers on cascaded units by pressing the hotkeys and then typing in the port address this would be highly confusing for users and is not generally recommended. Consequently it is normally advisable to use the
LINDY CPU Switch Dual Junior Installation and Use | Page 53 |