
WPC54G specifications
The Linksys WPC54G is a wireless network adapter specifically designed for laptops and portable devices, enabling users to connect to wireless networks seamlessly. As a member of the Linksys family, the WPC54G provides robust functionality paired with ease of use, making it a popular choice for home and office environments.One of the standout features of the WPC54G is its support for the IEEE 802.11g standard, which allows for wireless data transfer rates of up to 54 Mbps. This technology provides a significant upgrade over older standards, enabling users to enjoy faster internet speeds and smoother streaming experiences. The WPC54G is also backward compatible with the 802.11b standard, ensuring it can connect to a wide range of wireless networks.
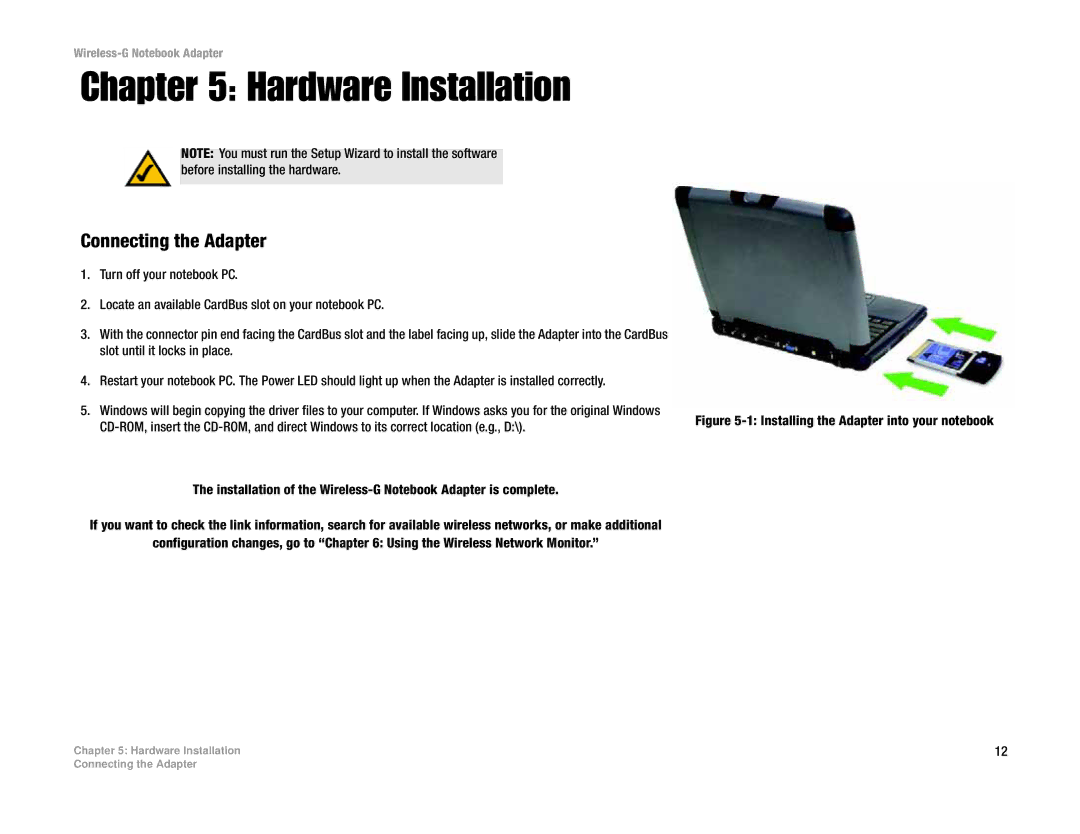
The device employs a PCI card form factor, which makes it easy to install in most laptops. Compatibility with a range of operating systems, including Windows and Linux, enhances its versatility. The card offers a reliable connection through its use of advanced wireless technologies such as the use of Multiple Input Multiple Output (MIMO) technology, improving signal strength and stability. This allows the WPC54G to deliver high-speed connections even at greater distances from the access point.
Equipped with WEP, WPA, and WPA2 encryption protocols, the Linksys WPC54G prioritizes security, giving users peace of mind when accessing unsecured networks. This feature is especially important in today’s digital landscape, where data privacy and security are paramount.
Another significant characteristic of the WPC54G is its ease of setup. The included utility allows users to manage their connections and configure settings effortlessly, making it accessible even to those who are not technically savvy. The card also features a Linksys Easy Setup Assistant, guiding users through the installation process step by step.
In terms of physical attributes, the WPC54G is compact and designed to fit snugly into PC Card slots, ensuring portability without compromising performance. Overall, the Linksys WPC54G wireless network adapter remains a reliable choice for users seeking speed, security, and ease of use in their wireless connectivity solutions, solidifying its place in the market as a dependable networking device.