Wireless Receiver
Installing the Camera
To install the camera:
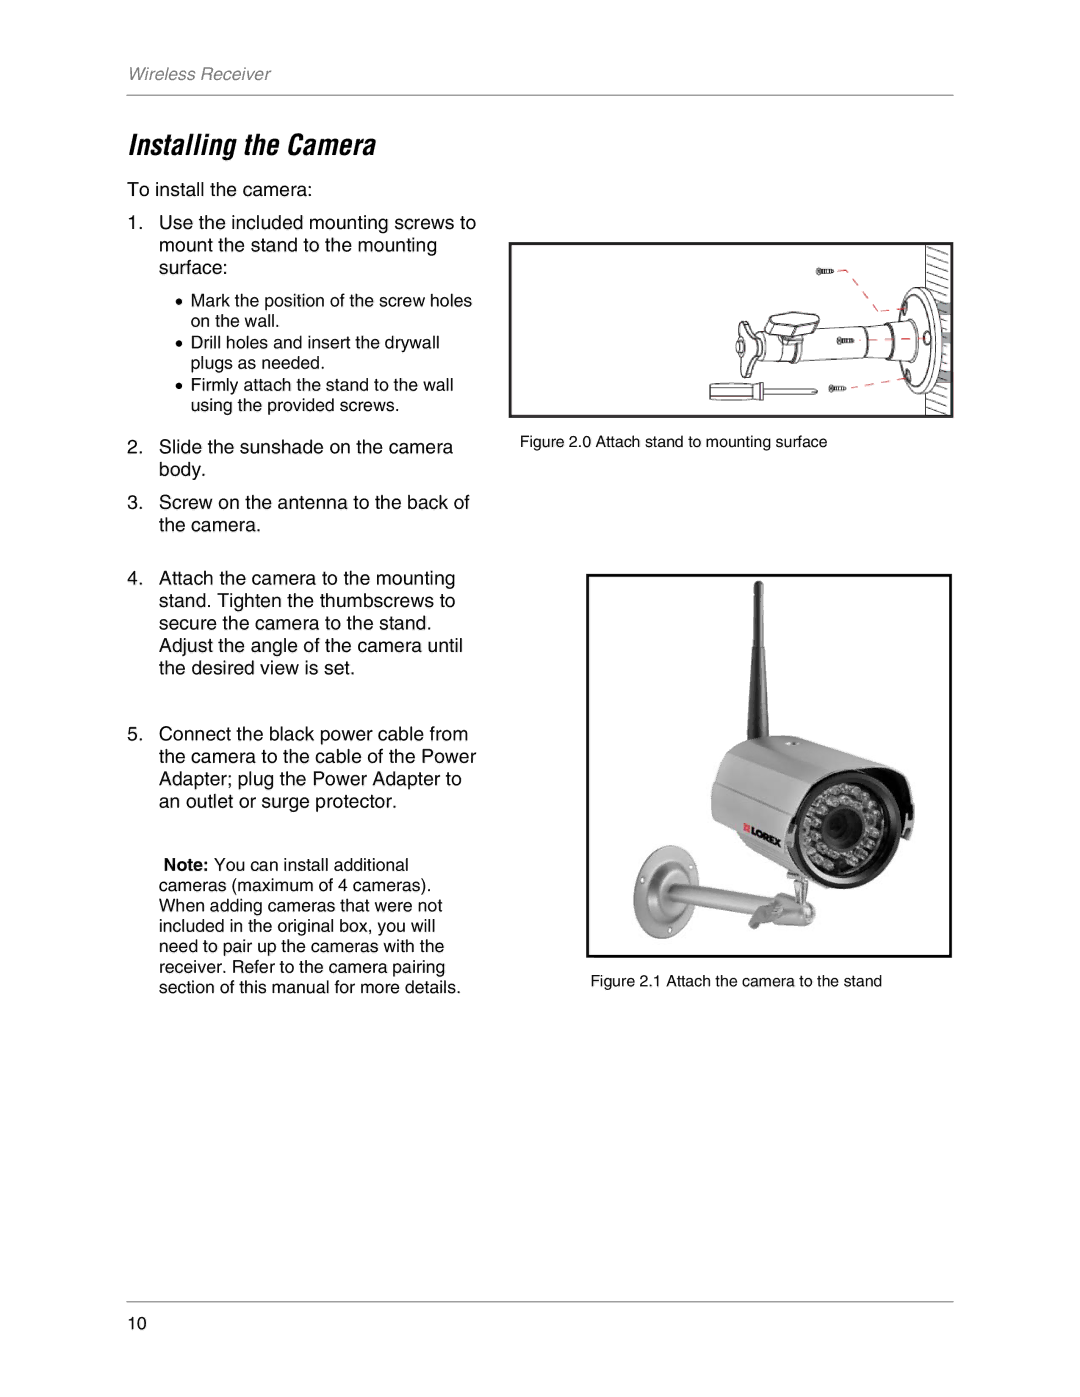
1.Use the included mounting screws to mount the stand to the mounting surface:
•Mark the position of the screw holes on the wall.
•Drill holes and insert the drywall plugs as needed.
•Firmly attach the stand to the wall using the provided screws.
2.Slide the sunshade on the camera body.
3.Screw on the antenna to the back of the camera.
4.Attach the camera to the mounting stand. Tighten the thumbscrews to secure the camera to the stand.
Adjust the angle of the camera until the desired view is set.
5.Connect the black power cable from the camera to the cable of the Power Adapter; plug the Power Adapter to an outlet or surge protector.
Note: You can install additional cameras (maximum of 4 cameras). When adding cameras that were not included in the original box, you will need to pair up the cameras with the receiver. Refer to the camera pairing section of this manual for more details.
Figure 2.0 Attach stand to mounting surface
Figure 2.1 Attach the camera to the stand
10
