ProKeys Sono 61 User Guide | 8 |
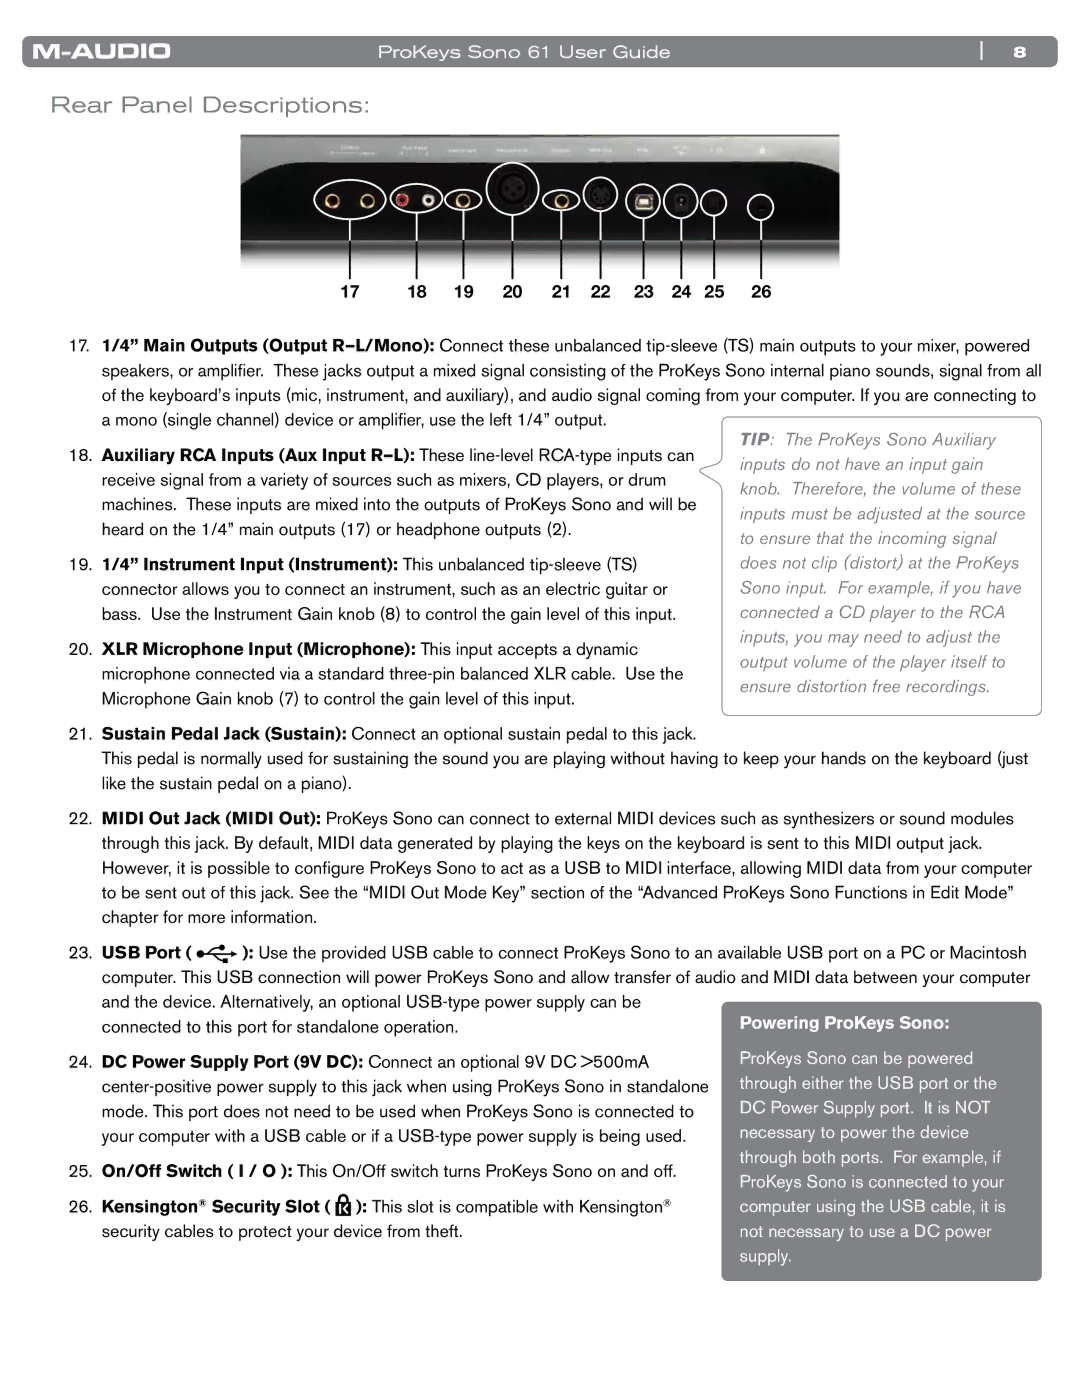
Rear Panel Descriptions:
£Ç £n £ Óä Ó£ ÓÓ ÓÎ Ó{ Óx ÓÈ
17.1/4” Main Outputs (Output
18..Auxiliary RCA Inputs (Aux Input
19..1/4” Instrument Input (Instrument): This unbalanced
20..XLR Microphone Input (Microphone): This input accepts a dynamic microphone connected via a standard
TIP: The ProKeys Sono Auxiliary inputs do not have an input gain knob. Therefore, the volume of these inputs must be adjusted at the source to ensure that the incoming signal does not clip (distort) at the ProKeys Sono input. For example, if you have connected a CD player to the RCA inputs, you may need to adjust the output volume of the player itself to ensure distortion free recordings.
21..Sustain Pedal Jack (Sustain): Connect an optional sustain pedal to this jack..
This pedal is normally used for sustaining the sound you are playing without having to keep your hands on the keyboard (just like the sustain pedal on a piano)..
22..MIDI Out Jack (MIDI Out): ProKeys Sono can connect to external MIDI devices such as synthesizers or sound modules through this jack.. By default, MIDI data generated by playing the keys on the keyboard is sent to this MIDI output jack.. However, it is possible to configure ProKeys Sono to act as a USB to MIDI interface, allowing MIDI data from your computer to be sent out of this jack.. See the “MIDI Out Mode Key” section of the “Advanced ProKeys Sono Functions in Edit Mode” chapter for more information..
23..USB Port ( ![]()
![]()
![]() ): Use the provided USB cable to connect ProKeys Sono to an available USB port on a PC or Macintosh computer.. This USB connection will power ProKeys Sono and allow transfer of audio and MIDI data between your computer and the device.. Alternatively, an optional
): Use the provided USB cable to connect ProKeys Sono to an available USB port on a PC or Macintosh computer.. This USB connection will power ProKeys Sono and allow transfer of audio and MIDI data between your computer and the device.. Alternatively, an optional
connected to this port for standalone operation..
24.. DC Power Supply Port (9V DC): Connect an optional 9V DC >500mA
25.. On/Off Switch ( I / O ): This On/Off switch turns ProKeys Sono on and off..
26.. Kensington® Security Slot ( ![]() ): This slot is compatible with Kensington® security cables to protect your device from theft..
): This slot is compatible with Kensington® security cables to protect your device from theft..