ProKeys Sono 61 User Guide | 6 |
Controls and Connectors
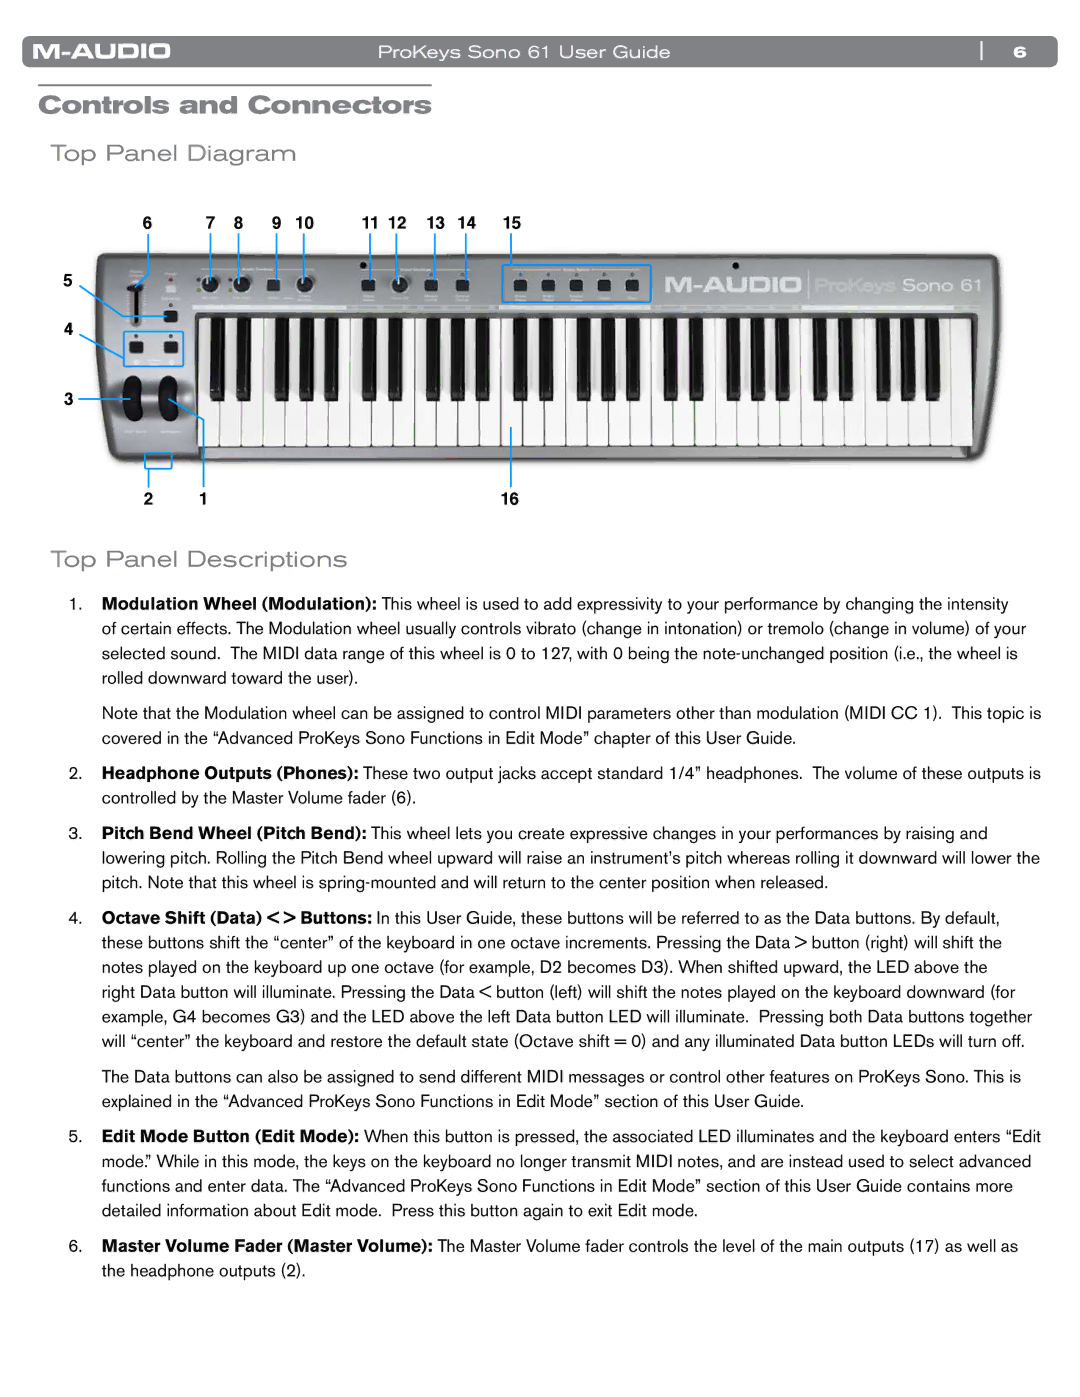
Top Panel Diagram
6 | 7 | 8 | 9 | 10 | 11 12 | 13 | 14 | 15 |
5
4
3
2 | 1 | 16 |
Top Panel Descriptions
1..Modulation Wheel (Modulation): This wheel is used to add expressivity to your performance by changing the intensity of certain effects.. The Modulation wheel usually controls vibrato (change in intonation) or tremolo (change in volume) of your selected sound.. The MIDI data range of this wheel is 0 to 127, with 0 being the
Note that the Modulation wheel can be assigned to control MIDI parameters other than modulation (MIDI CC 1).. This topic is covered in the “Advanced ProKeys Sono Functions in Edit Mode” chapter of this User Guide..
2..Headphone Outputs (Phones): These two output jacks accept standard 1/4” headphones.. The volume of these outputs is controlled by the Master Volume fader (6)..
3..Pitch Bend Wheel (Pitch Bend): This wheel lets you create expressive changes in your performances by raising and lowering pitch.. Rolling the Pitch Bend wheel upward will raise an instrument’s pitch whereas rolling it downward will lower the pitch.. Note that this wheel is
4..Octave Shift (Data) < > Buttons: In this User Guide, these buttons will be referred to as the Data buttons.. By default, these buttons shift the “center” of the keyboard in one octave increments.. Pressing the Data > button (right) will shift the notes played on the keyboard up one octave (for example, D2 becomes D3).. When shifted upward, the LED above the right Data button will illuminate.. Pressing the Data < button (left) will shift the notes played on the keyboard downward (for example, G4 becomes G3) and the LED above the left Data button LED will illuminate.. Pressing both Data buttons together will “center” the keyboard and restore the default state (Octave shift = 0) and any illuminated Data button LEDs will turn off..
The Data buttons can also be assigned to send different MIDI messages or control other features on ProKeys Sono.. This is explained in the “Advanced ProKeys Sono Functions in Edit Mode” section of this User Guide..
5..Edit Mode Button (Edit Mode): When this button is pressed, the associated LED illuminates and the keyboard enters “Edit mode..” While in this mode, the keys on the keyboard no longer transmit MIDI notes, and are instead used to select advanced functions and enter data.. The “Advanced ProKeys Sono Functions in Edit Mode” section of this User Guide contains more detailed information about Edit mode.. Press this button again to exit Edit mode..
6..Master Volume Fader (Master Volume): The Master Volume fader controls the level of the main outputs (17) as well as the headphone outputs (2)..