General Operation
Camera View Selection and A/V Input:
Left Side Camera:
The left side view camera (CAM1) is designed to automatically turn on whenever the vehicle’s left turn signal is activated.
Right Side Camera:
The right side view camera (CAM2) is designed to automatically turn on whenever the vehicle’s right turn signal is activated.
Rearview Camera:
The rearview camera (CAM3) is designed to auto- matically turn on whenever the vehicle is placed into reverse gear.
Video Input:
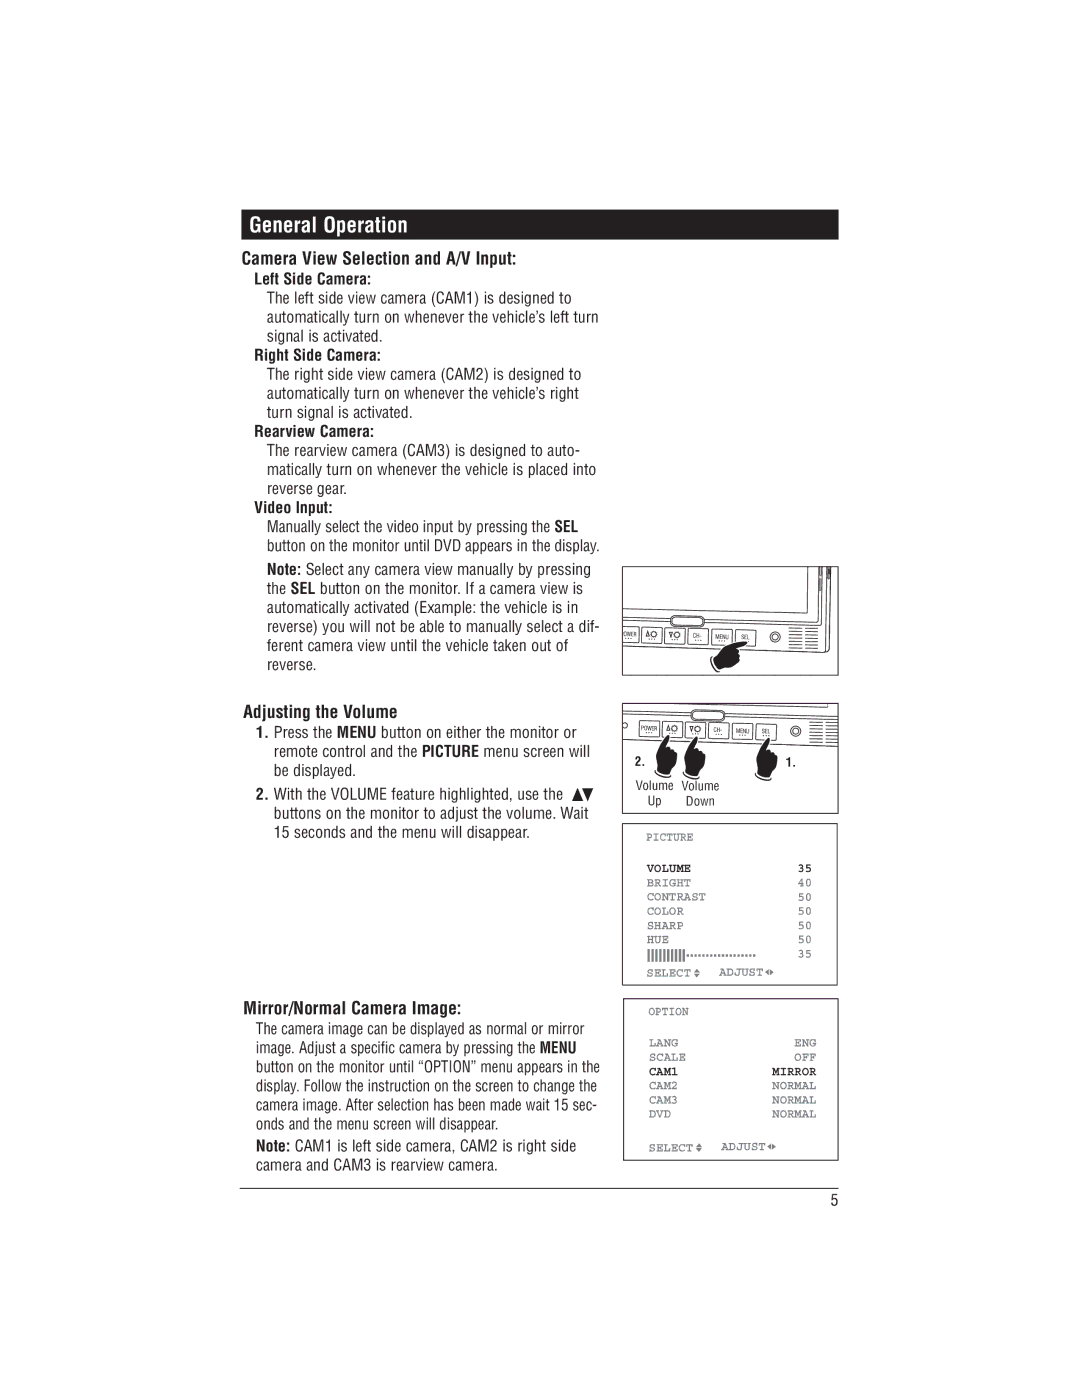
Manually select the video input by pressing the SEL button on the monitor until DVD appears in the display.
Note: Select any camera view manually by pressing the SEL button on the monitor. If a camera view is automatically activated (Example: the vehicle is in reverse) you will not be able to manually select a dif- ferent camera view until the vehicle taken out of reverse.
Adjusting the Volume
1.Press the MENU button on either the monitor or remote control and the PICTURE menu screen will be displayed.
2.With the VOLUME feature highlighted, use the ![]() buttons on the monitor to adjust the volume. Wait 15 seconds and the menu will disappear.
buttons on the monitor to adjust the volume. Wait 15 seconds and the menu will disappear.
2. |
| 1. |
Volume | Volume |
|
Up | Down |
|
PICTURE |
| |
VOLUME | 35 | |
BRIGHT | 40 | |
CONTRAST | 50 | |
COLOR | 50 | |
SHARP | 50 | |
HUE |
| 50 |
|
| 35 |
SELECT ![]() ADJUST
ADJUST ![]()
![]()
Mirror/Normal Camera Image:
The camera image can be displayed as normal or mirror image. Adjust a specific camera by pressing the MENU button on the monitor until “OPTION” menu appears in the display. Follow the instruction on the screen to change the camera image. After selection has been made wait 15 sec- onds and the menu screen will disappear.
Note: CAM1 is left side camera, CAM2 is right side camera and CAM3 is rearview camera.
OPTION |
|
LANG | ENG |
SCALE | OFF |
CAM1 | MIRROR |
CAM2 | NORMAL |
CAM3 | NORMAL |
DVD | NORMAL |
SELECT | ADJUST |
|
|
5
