P 4/ 8
 Repair
[3] -2. Spiral Bevel Gear 37 and Ball Bearing 6201DDW (cont.)
ASSEMBLING
Do the reverse of the disassembling steps.
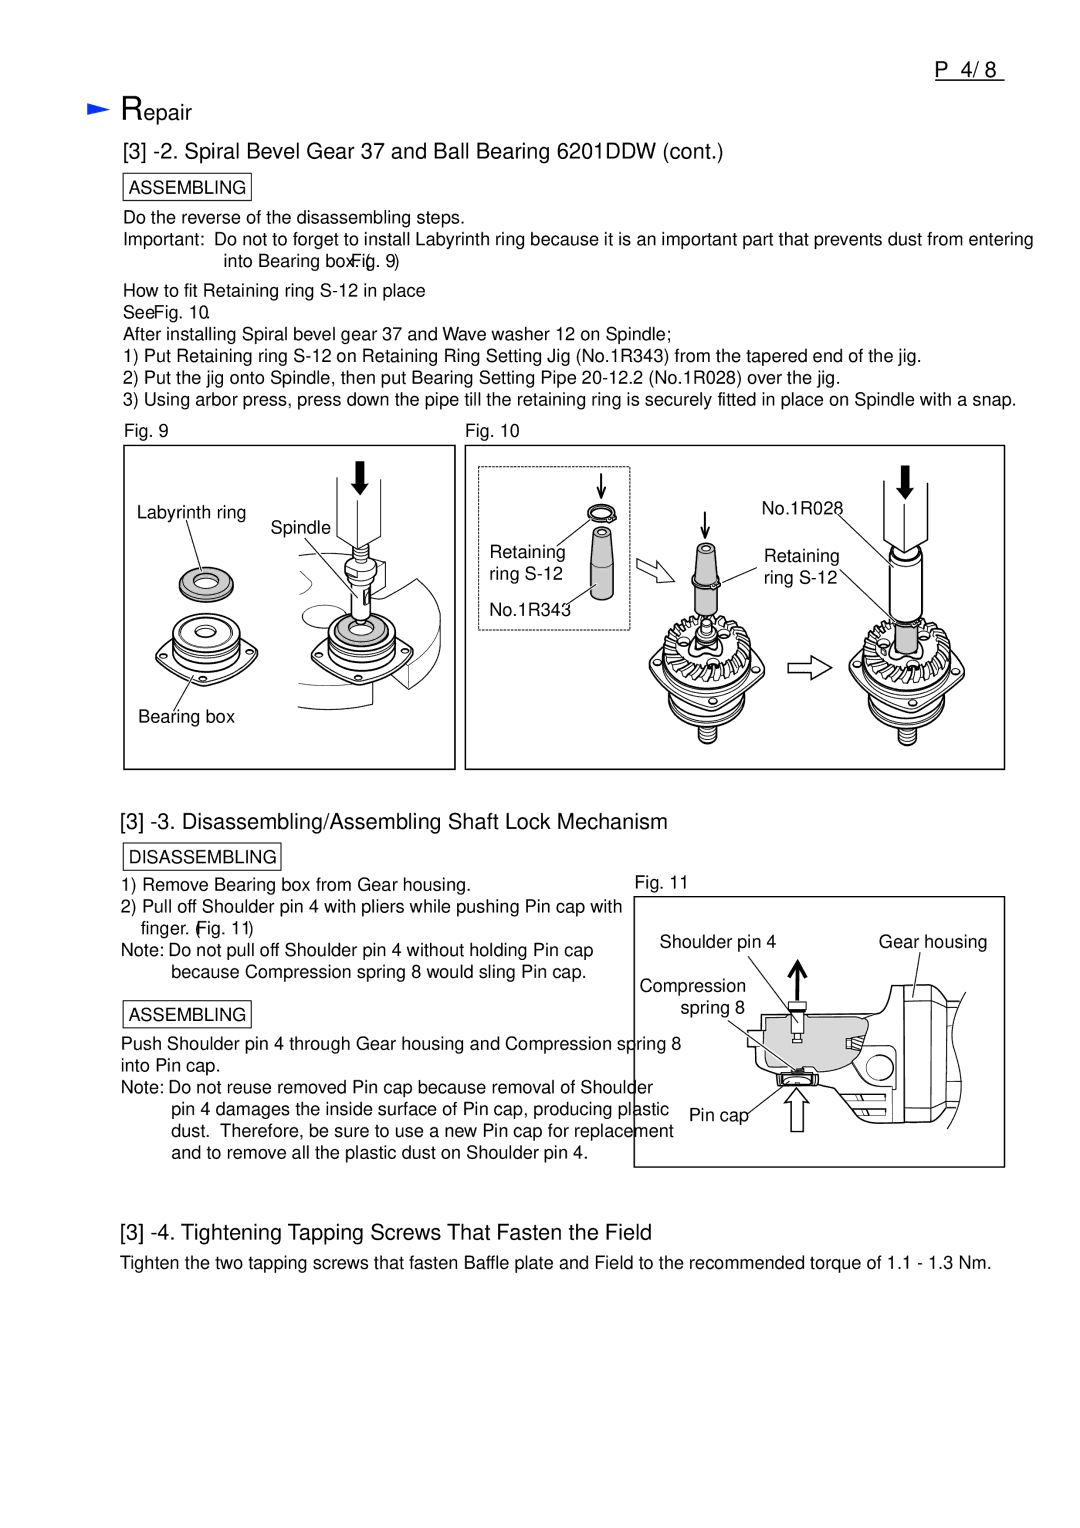
Important: Do not to forget to install Labyrinth ring because it is an important part that prevents dust from entering into Bearing box. (Fig. 9)
How to fit Retaining ring S-12 in place
See Fig. 10.
After installing Spiral bevel gear 37 and Wave washer 12 on Spindle;
1)Put Retaining ring
2)Put the jig onto Spindle, then put Bearing Setting Pipe
3)Using arbor press, press down the pipe till the retaining ring is securely fitted in place on Spindle with a snap.
Fig. 9
Labyrinth ring
Bearing box
Spindle
Fig. 10
| No.1R028 |
Retaining | Retaining |
ring | ring |
No.1R343 |
|
[3] -3. Disassembling/Assembling Shaft Lock Mechanism
DISASSEMBLING
1)Remove Bearing box from Gear housing.
2)Pull off Shoulder pin 4 with pliers while pushing Pin cap with finger. (Fig. 11)
Note: Do not pull off Shoulder pin 4 without holding Pin cap because Compression spring 8 would sling Pin cap.
ASSEMBLING
Push Shoulder pin 4 through Gear housing and Compression spring 8 into Pin cap.
Note: Do not reuse removed Pin cap because removal of Shoulder pin 4 damages the inside surface of Pin cap, producing plastic dust. Therefore, be sure to use a new Pin cap for replacement and to remove all the plastic dust on Shoulder pin 4.
Fig. 11
Shoulder pin 4 | Gear housing |
Compression spring 8
Pin cap ![]()
[3] -4. Tightening Tapping Screws That Fasten the Field
Tighten the two tapping screws that fasten Baffle plate and Field to the recommended torque of 1.1 - 1.3 Nm.
