Controlling
7 CONTROLLING
The projector can be controlled with a. The RCU
b. The hardwired RCU (cable is not included) c. The local keypad.
Controlling the projector with the RCU and the hardwired RCU is equal.
How to use the RCU?
a) Point the front of the RCU to the reflective screen surface.
Ceiling
IR sensor
Screen
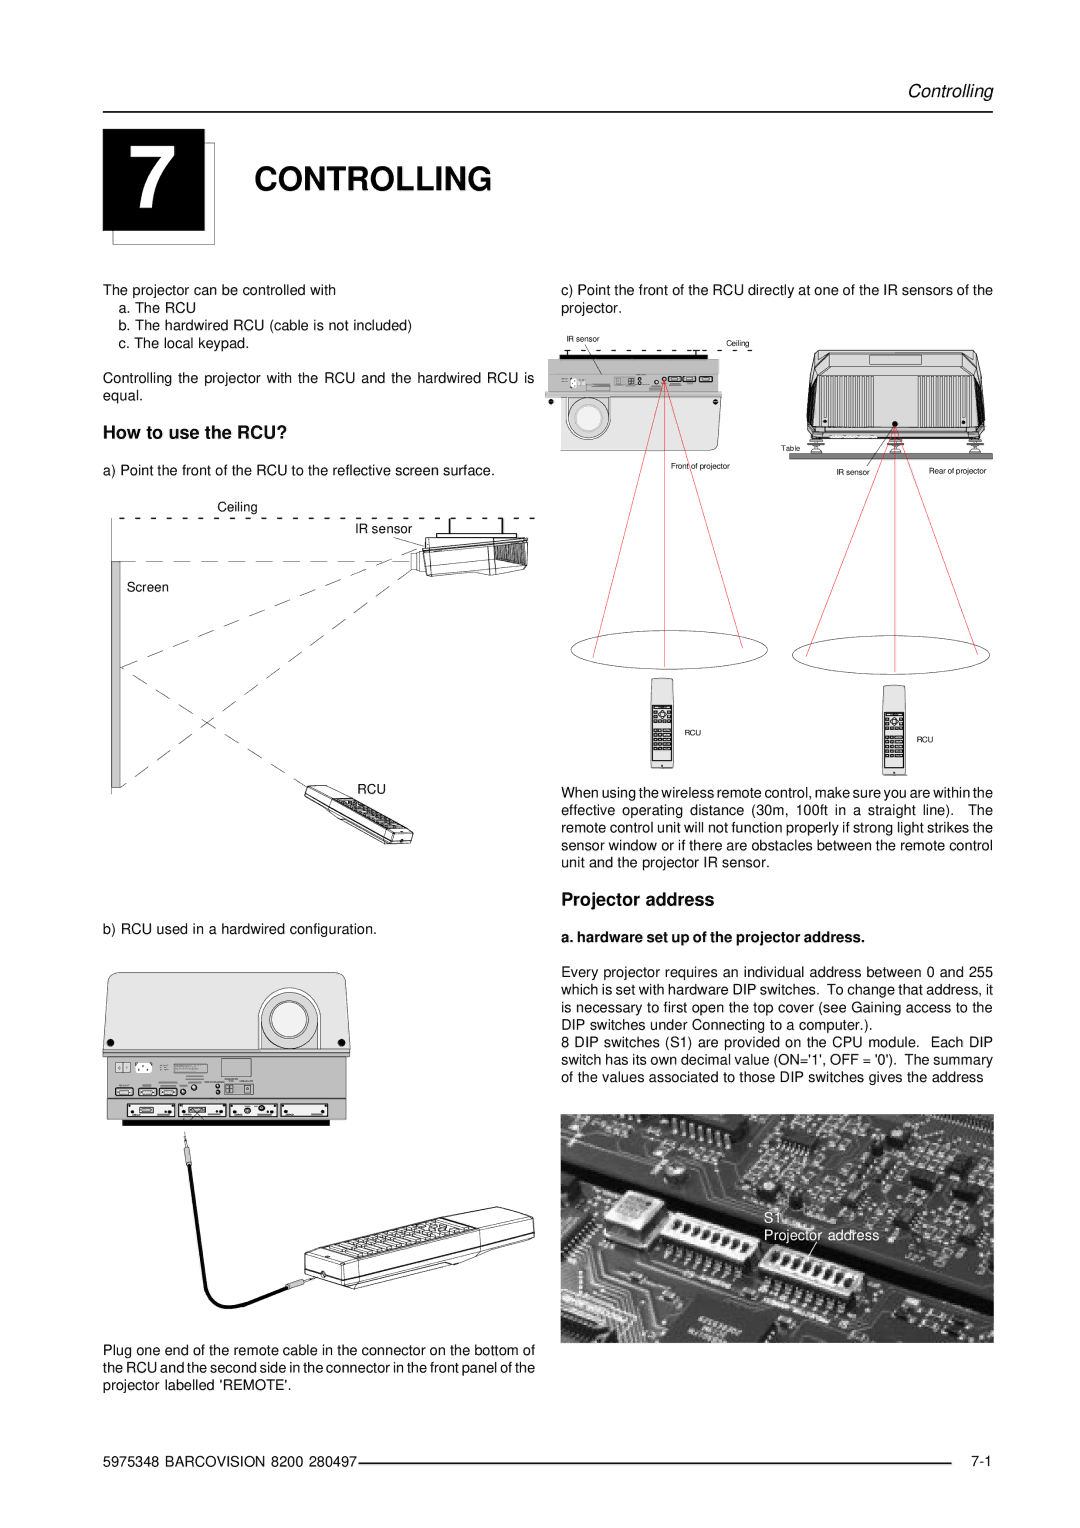
c)Point the front of the RCU directly at one of the IR sensors of the projector.
IR sensor
Ceiling
I | 0 |
Table
Front of projector | Rear of projector |
IR sensor |
9 ![]()
![]()
![]()
![]() 8
8 ![]()
RCU
9 | 8 |
| |
3 | 4 |
RCU
RCU | When using the wireless remote control, make sure you are within the |
| effective operating distance (30m, 100ft in a straight line). The |
| remote control unit will not function properly if strong light strikes the |
| sensor window or if there are obstacles between the remote control |
| unit and the projector IR sensor. |
b) RCU used in a hardwired configuration.
0 I
DIAGNOSTICS
RS2 32 O UT
Projector address
a. hardware set up of the projector address.
Every projector requires an individual address between 0 and 255 which is set with hardware DIP switches. To change that address, it is necessary to first open the top cover (see Gaining access to the DIP switches under Connecting to a computer.).
8 DIP switches (S1) are provided on the CPU module. Each DIP switch has its own decimal value (ON='1', OFF = '0'). The summary of the values associated to those DIP switches gives the address
S1
Projector address
Plug one end of the remote cable in the connector on the bottom of the RCU and the second side in the connector in the front panel of the projector labelled 'REMOTE'.
5975348 BARCOVISION 8200 280497 |
| |
|