Repair | P 5 / 22 |
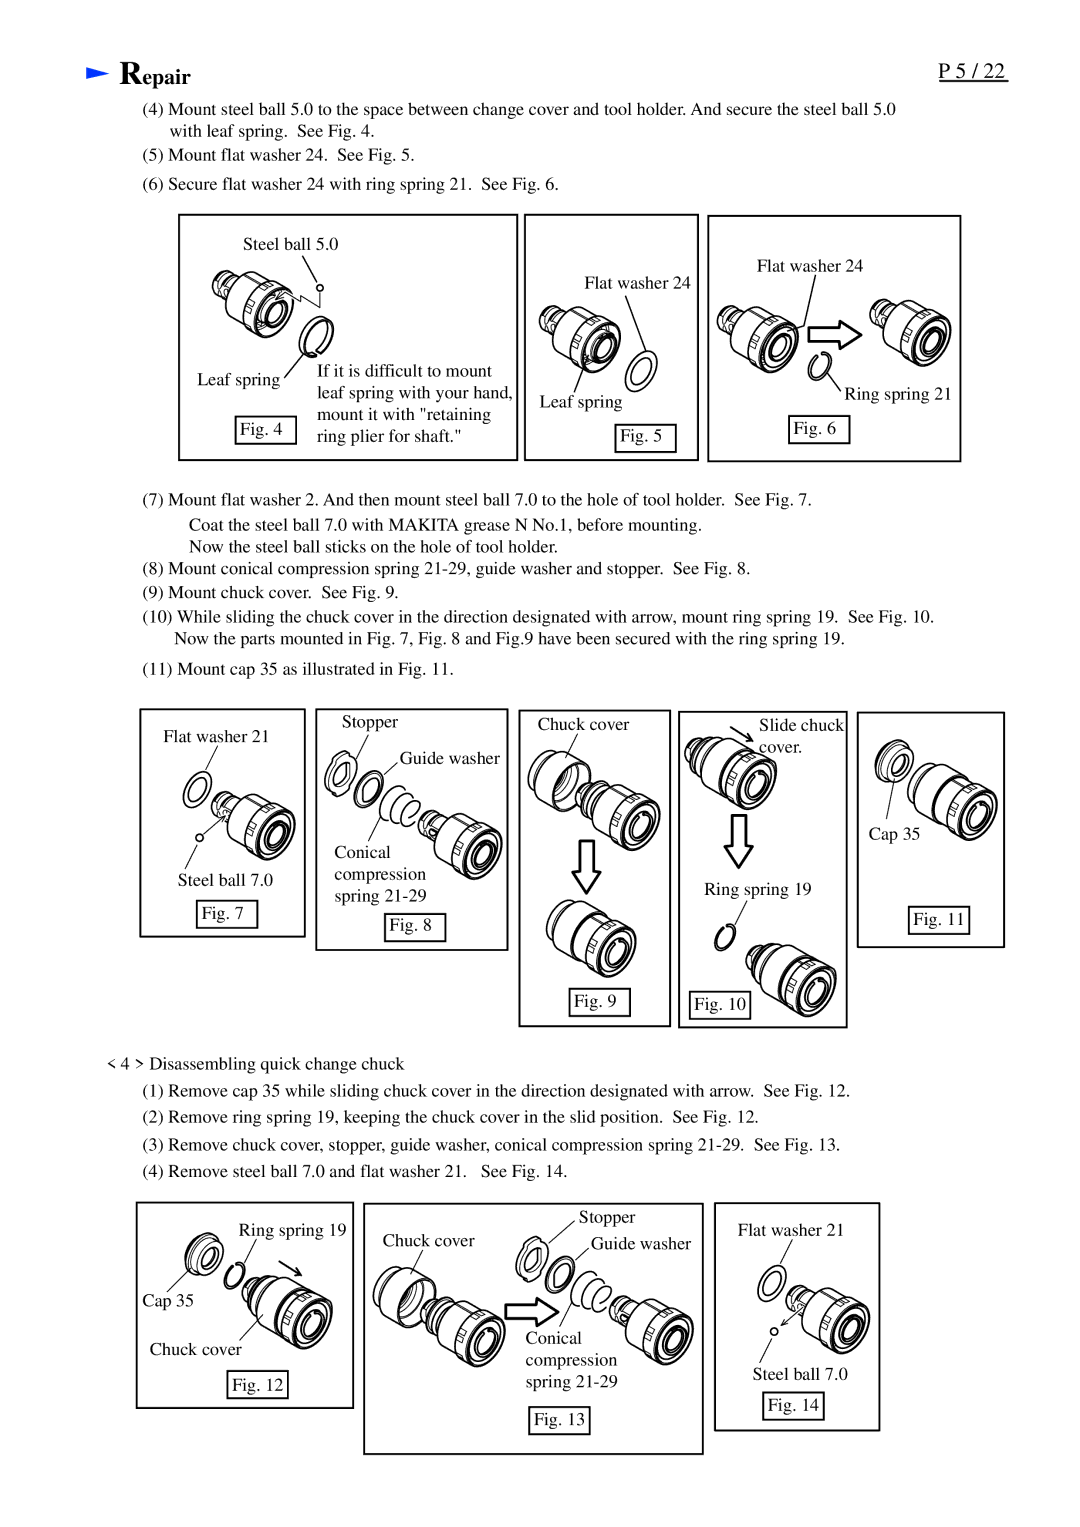
(4)Mount steel ball 5.0 to the space between change cover and tool holder. And secure the steel ball 5.0 with leaf spring. See Fig. 4.
(5)Mount flat washer 24. See Fig. 5.
(6)Secure flat washer 24 with ring spring 21. See Fig. 6.
Steel ball 5.0
Leaf spring | If it is difficult to mount | |
leaf spring with your hand, | ||
|
| mount it with "retaining | |
Fig. 4 | ||
ring plier for shaft." | ||
|
Flat washer 24 |
Leaf spring |
Fig. 5 |
Flat washer 24 |
Ring spring 21 |
Fig. 6 |
(7) Mount flat washer 2. And then mount steel ball 7.0 to the hole of tool holder. See Fig. 7. Coat the steel ball 7.0 with MAKITA grease N No.1, before mounting.
Now the steel ball sticks on the hole of tool holder.
(8)Mount conical compression spring
(9)Mount chuck cover. See Fig. 9.
(10)While sliding the chuck cover in the direction designated with arrow, mount ring spring 19. See Fig. 10. Now the parts mounted in Fig. 7, Fig. 8 and Fig.9 have been secured with the ring spring 19.
(11)Mount cap 35 as illustrated in Fig. 11.
Flat washer 21
Steel ball 7.0 Fig. 7
Stopper |
Guide washer |
Conical |
compression |
spring |
Fig. 8 |
Chuck cover |
Fig. 9 |
Slide chuck |
cover. |
Ring spring 19 |
Fig. 10 |
Cap 35
Fig. 11
<4 > Disassembling quick change chuck
(1)Remove cap 35 while sliding chuck cover in the direction designated with arrow. See Fig. 12.
(2)Remove ring spring 19, keeping the chuck cover in the slid position. See Fig. 12.
(3)Remove chuck cover, stopper, guide washer, conical compression spring
(4)Remove steel ball 7.0 and flat washer 21. See Fig. 14.
Ring spring 19
Cap 35
Chuck cover
Fig. 12
| Stopper |
Chuck cover | Guide washer |
| Conical |
| compression |
| spring |
| Fig. 13 |
Flat washer 21
Steel ball 7.0
Fig. 14